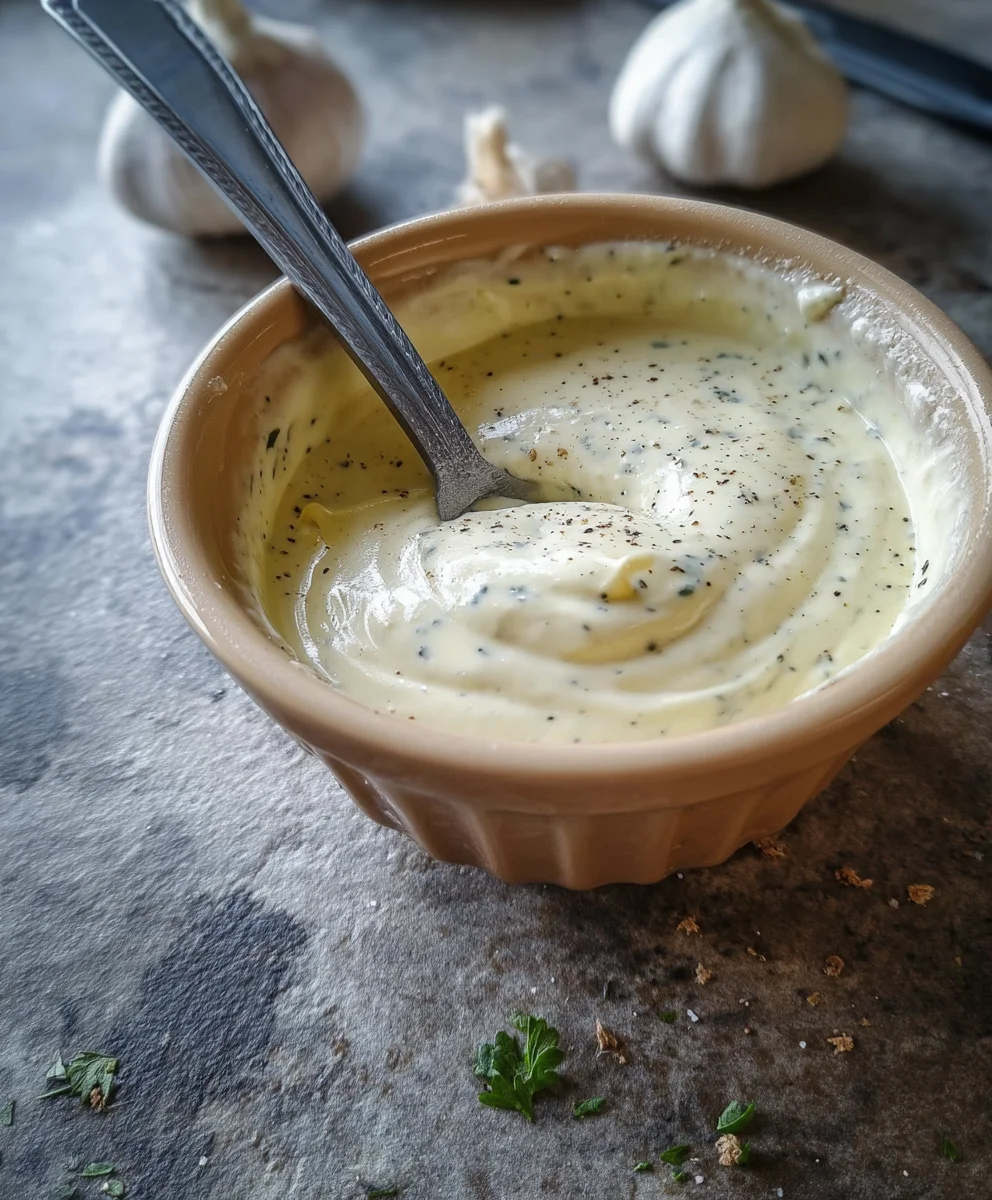
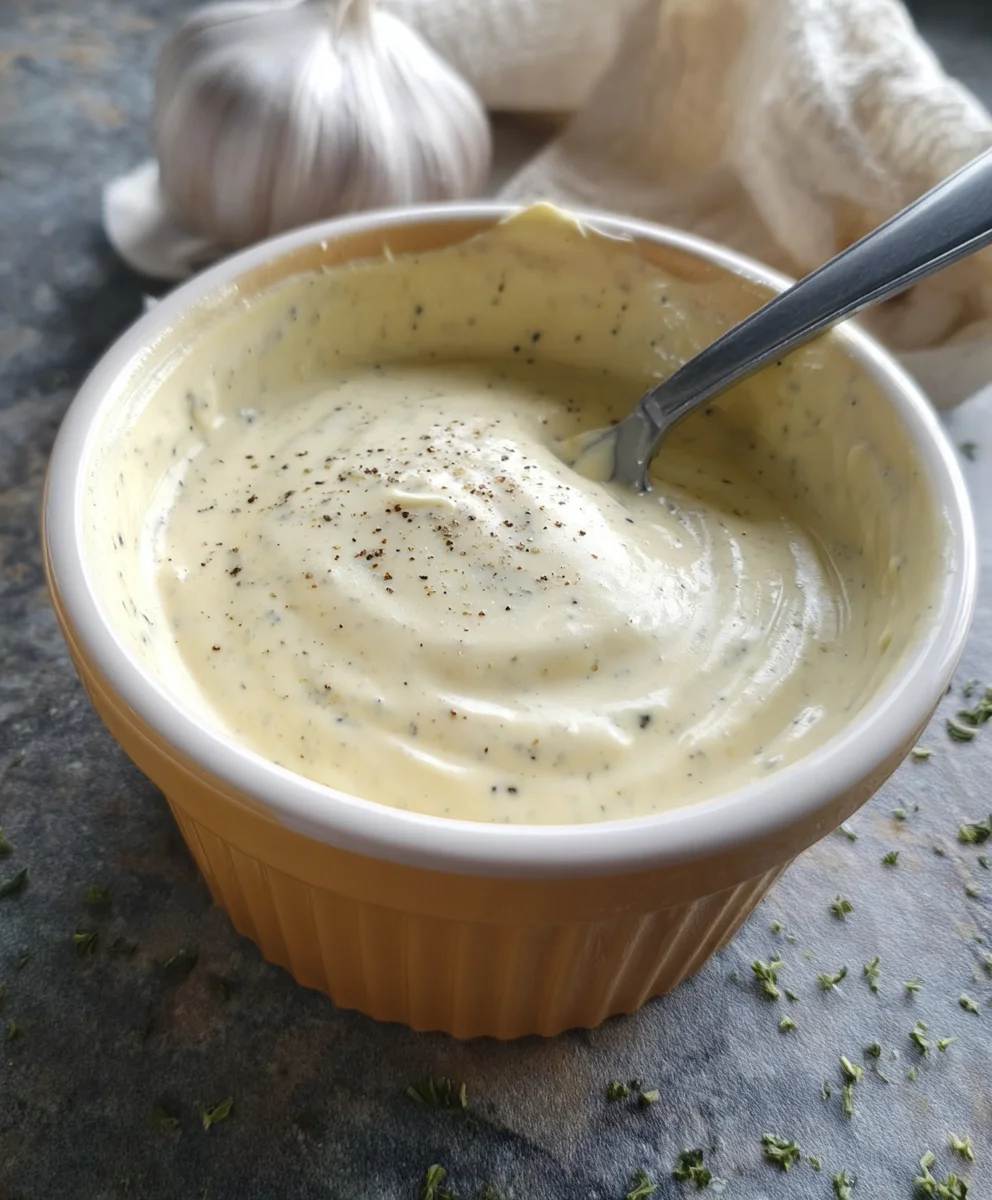
Easy Garlic Aioli Sauce Recipe – Delicious Dip
Garlic Aioli Sauce, oh, how we love you! There’s something utterly magical about this creamy, garlicky concoction that elevates everything it touches. From a simple drizzle on crispy fries to a luxurious spread on a gourmet burger, garlic aioli sauce is the undisputed cbeef hampion of flavor boosters. It’s the secret weapon in so many kitchens, the reason we crave those extra bites, and the taste that keeps us coming back for more. What truly makes this sauce so special is its beautiful simplicity. A few humble ingredients – rich egg yolks, pungent garlic, bright lemon juice, and good quality olive oil – are transformed into a velvety emulsion that is both intensely flavorful and incredibly versatile. Whether you’re a seasoned chef or a begin extractner cook, mastering this garlic aioli sauce will undoubtedly impress your taste buds and your guests alike, proving that sometimes, the simplest things are indeed the most extraordinary.
What You’ll Need
For the Aioli
Garlic Aioli Sauce is remarkably easy to make at home, and the result is infinitely superior to store-bought versions. The intense, fresh garlic flavor combined with the creamy base is truly irresistible. People adore it because it adds a sophisticated yet comforting punch to a wide range of dishes. It’s the perfect accompaniment for grilled meats, seafood, roasted vegetables, and of course, as a dip for almost anything fried. This recipe focuses on achieving that perfect balance of garlicky zing and smooth, luxurious texture that makes our beloved garlic aioli sauce a true culinary gem.
Ingredients:
- 1/3 cup mayonnaise
- 2 tablespoons olive oil
- 2 cloves garlic, minced (which will measure out to about 2 teaspoons)
- 1 teaspoon fresh lemon juice
- 1/4 teaspoon ground black pepper
Crafting Your Perfect Garlic Aioli Sauce
Creating a truly delicious Garlic Aioli Sauce at home is surprisingly simple, and the results are far superior to anything you’ll find pre-made in a jar. This recipe is designed for simplicity and flavor, using just a handful of fresh ingredients to build a rich, garlicky, and creamy sauce that can elevate everything from roasted vegetables to grilled chicken and even a simple sandwich. We’re going to walk through each step with care, ensuring you achieve that perfect emulsified consistency and balanced taste. Don’t be intimidated by the idea of making your own sauce; it’s a rewarding culinary adventure that takes mere minutes.
Step 1: Preparing the Garlic Foundation
The heart of any great aioli is, of course, the garlic. For this recipe, we’ll be using 2 cloves of fresh garlic. It’s crucial to mince these very finely. You can use a garlic press for convenience, or a sharp knife and a cutting board. The goal is to break down the garlic as much as possible so that its potent flavor infuses beautifully into the aioli without leaving large, overpowering chunks. Once minced, you should have approximately 2 teaspoons of finely minced garlic. This amount provides a robust garlic punch without being acrid. Some people prefer to gently sauté their minced garlic in a tiny bit of olive oil for a minute or two before adding it to the aioli. This mellows the flavor, making it slightly sweeter and less sharp, which can be a wonderful variation if you find raw garlic too intense. However, for this straightforward recipe, raw minced garlic works perfectly and is the quickest route to deliciousness.
Step 2: Building the Creamy Base
We’ll start with our base ingredient: 1/3 cup of mayonnaise. Use a good quality mayonnaise that you enjoy the taste of. Full-fat mayonnaise will yield the creamiest and most stable aioli, but you can experiment with reduced-fat options if you prefer, though the texture might be slightly less rich. Place the mayonnaise in a medium-sized mixing bowl. This is where we’ll begin extract to combine all our flavors. The mayonnaise provides the creamy texture and a neutral base that allows the garlic and lemon to shine. Ensure your bowl is clean and dry, as any moisture can sometimes interfere with the emulsification process.
Step 3: Introducing the Aromatics and Acidity
Now it’s time to add the minced garlic to the mayonnaise. Gently stir it in, distributing it as evenly as possible throughout the creamy base. Next, we’ll add 1 teaspoon of fresh lemon juice. The lemon juice is essential for balancing the richness of the mayonnaise and the pungency of the garlic. It adds a bright, zesty counterpoint that cuts through the fat and prevents the aioli from tasting too heavy. Always opt for fresh lemon juice; bottled lemon juice often has a less vibrant flavor and can sometimes have a slightly metallic aftertaste. Squeeze a fresh lemon and measure out the teaspoon. Give the mixture another good stir to incorporate the lemon juice. At this stage, you’ll already start to notice the aroma of the garlic and lemon developing.
Step 4: Emulsifying with Olive Oil
This is a critical step for achieving that signature aioli texture. We’re going to slowly drizzle in 2 tablespoons of olive oil while whisking continuously. The key here is to add the olive oil very gradually, almost drop by drop at first, as you whisk. This process is called emulsification, where two liquids that don’t normally mix (oil and the water-based components of mayonnaise) are forced together to create a stable, cohesive sauce. If you add the oil too quickly, the mixture might “break,” meaning the oil will separate from the mayonnaise. Use a whisk or a fork for this. Continue whisking vigorously as you add the oil, and you’ll see the mixture start to thicken and become even more creamy and smooth. Once about half of the olive oil has been incorporated, you can start adding it in a slightly steadier stream, but still maintain a consistent whisking motion. This gradual addition is what transforms simple ingredients into a luxurious sauce.
Step 5: Seasoning and Final Touches
Our aioli is almost complete! Now it’s time to add the final touch of seasoning: 1/4 teaspoon of ground black pepper. You can adjust this to your personal preference – if you like a bit more peppery kick, feel free to add a tiny pinch more. For those who enjoy a hint of heat, a small pinch of cayenne pepper could also be a delightful addition. Stir the pepper in thoroughly. Taste your aioli. This is your chance to fine-tune the flavor. Does it need a touch more lemon juice for brightness? Perhaps a whisper more pepper? If it tastes a little too strong on the garlic, a small dollop more mayonnaise can help to mellow it out. Once you’re happy with the flavor and consistency, your Garlic Aioli Sauce is ready to be used. For the best flavor development, I highly recommend letting it sit in the refrigerator for at least 15-30 minutes before serving. This allows the flavors to meld and deepen, creating a truly sensational aioli.
Conclusion:
There you have it! Creating this delicious Garlic Aioli Sauce from scratch is surprisingly simple and incredibly rewarding. The rich, creamy texture and potent garlic flavor are a game-changer for so many dishes. I hope you enjoy making and tasting this versatile condiment as much as I do!
This Garlic Aioli Sauce is perfect as a dip for fries, onion rings, or even roasted vegetables. It also makes an exceptional spread for sandwiches and burgers, adding a gourmet touch to any meal. Don’t be afraid to get creative! Try it as a dressing for salads or a sauce for grilled meats and seafood. The possibilities are truly endless.
If you’re feeling adventurous, consider adding a pinch of smoked paprika for a smoky twist, a squeeze of lemon juice for extra brightness, or a dash of your favorite hot sauce for a spicy kick. Experiment with different types of garlic too – roasted garlic adds a sweeter, milder flavor that’s wonderfully complex.
I encourage you to give this recipe a try. It’s a fantastic way to elevate your everyday cooking and impress your friends and family with your culinary skills. Happy aioli-making!
Frequently Asked Questions about Garlic Aioli Sauce:
Q1: How long will the Garlic Aioli Sauce last in the refrigerator?
Properly stored in an airtight container in the refrigerator, this Garlic Aioli Sauce should stay fresh for up to 5-7 days. Always ensure it’s well-senon-alcoholic aled to prevent any contamination or absorption of other odors.
Q2: My aioli isn’t thick enough. What can I do?
If your Garlic Aioli Sauce is too thin, you can try slowly whisking in a little more oil, a teaspoon at a time, until it reaches your desired consistency. Alternatively, you can chill it in the refrigerator for about 30 minutes, as the cold can help it thicken slightly.
Easy Garlic Aioli Sauce Recipe – Delicious Dip
A simple and delicious homemade garlic aioli recipe that elevates any dish. This creamy, garlicky sauce is perfect as a dip or spread.
Ingredients
-
1/3 cup mayonnaise
-
2 tablespoons olive oil
-
2 cloves garlic, minced (about 2 teaspoons)
-
1 teaspoon fresh lemon juice
-
1/4 teaspoon ground black pepper
Instructions
-
Step 1
Finely mince 2 cloves of fresh garlic. Aim for about 2 teaspoons of minced garlic to ensure a robust flavor without large chunks. -
Step 2
In a medium mixing bowl, add 1/3 cup of good quality mayonnaise. This forms the creamy base of your aioli. -
Step 3
Add the minced garlic and 1 teaspoon of fresh lemon juice to the mayonnaise. Stir well to combine. The lemon juice adds brightness and balances the flavors. -
Step 4
Slowly drizzle in 2 tablespoons of olive oil while whisking continuously. Emulsify the oil into the mayonnaise mixture gradually to create a thick, creamy texture. Continue whisking until smooth. -
Step 5
Stir in 1/4 teaspoon of ground black pepper. Taste and adjust seasoning as needed, adding more lemon juice or pepper if desired. For best flavor, let the aioli chill for 15-30 minutes before serving.
Important Information
Nutrition Facts (Per Serving)
It is important to consider this information as approximate and not to use it as definitive health advice.
Allergy Information
Please check ingredients for potential allergens and consult a health professional if in doubt.