Perfect Ramen Eggs Ajitama- Flavorful Marinated Eggs
Ramen eggs, or ajitama, are more than just a topping; they are the soulful heart of a truly spectacular bowl of ramen. If you’ve ever found yourself gazing longin extractgly at that perfectly marinated, jammy-yolked orb perched atop your noodles, you’re not alone. These delightful morsels are the secret weapon of ramen masters and home cooks alike, elevating a simple meal into an unforgettable culinary experience. What makes them so irresistible? It’s the magical transformation of a humble boiled egg into something deeply savory, subtly sweet, and bursting with umami. The magic lies in the marinade, a carefully balanced concoction that infuses the egg white with flavor while creating that coveted, custardy yolk. Let’s unlock the secrets to crafting your own perfect ramen eggs and bring that authentic ramen shop magic right into your kitchen.
Why You’ll Love Making Ramen Eggs
Discover the simple joy of creating this iconic ramen component.
Ramen Eggs (Ajitama)
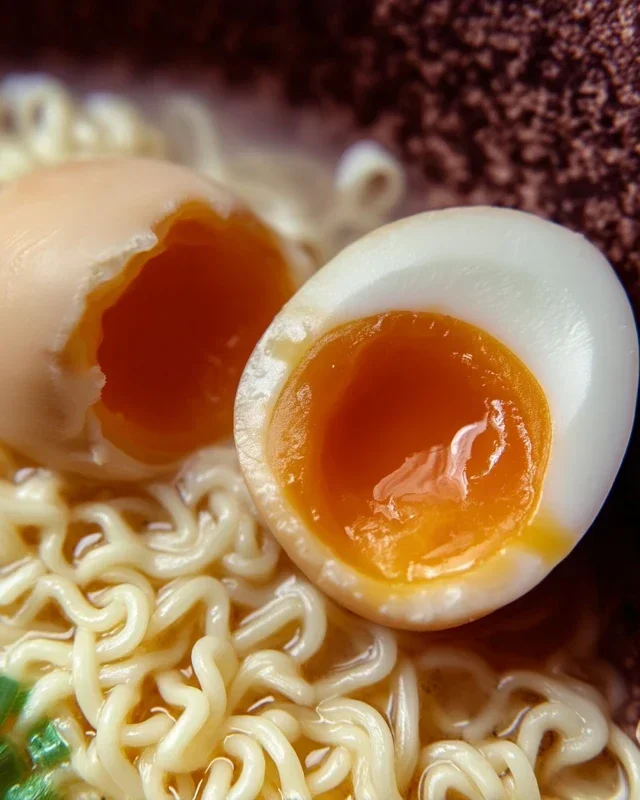
There’s something incredibly satisfying about a perfectly prepared ramen egg. That glossy, slightly jammy yolk, encased in a tender, savory white, is the crowning glory of any bowl of ramen. These marinated eggs, known as Ajitama in Japanese, are surprisingly easy to make at home, and once you’ve mastered them, you’ll find yourself adding them to far more than just your noodle soup. Think rice bowls, salads, or even just as a standalone snack. The key is in the careful boiling of the egg to achieve that ideal soft-boiled consistency and the flavorful marinade that infuses it with deliciousness.
Let’s get started on creating these culinary gems!
Ingredients:
*Note on eggs: For the best results and easiest peeling, I highly recommend using eggs that are at least a week old. Fresh eggs tend to be more difficult to peel cleanly after boiling.
Cooking Instructions
Let’s break down the process into manageable steps. We’ll start with perfectly boiling the eggs, then move on to creating our flavorful marinade, and finally, the marination itself.
Step 1: Preparing the Eggs for Boiling
First, we need to get our eggs ready for their gentle bath. The trick to achieving that beautiful, jammy yolk is in controlling the cooking time. For this recipe, we’re aiming for a soft-boiled egg that is cooked through but still has a wonderfully gooey center. You can, if you choose, add a splash of vinegar to your boiling water. This isn’t strictly necessary for flavor, but it’s said to help the egg white coagulate more quickly if an egg cracks during boiling, preventing too much white from escaping. Bring a medium saucepan of water to a rolling boil. Gently lower your eggs into the boiling water. You can use a slotted spoon for this to avoid dropping them and causing them to crack. It’s important to ensure the water is at a full boil before adding the eggs for the most consistent cooking.
Step 2: The Crucial Boiling Time
This is where the magic happens for the perfect texture. Once the eggs are submerged in the boiling water, start your timer. For a jammy yolk that is still molten in the very center, boil the eggs for precisely 6 minutes. If you prefer a slightly firmer, but still soft, yolk, aim for 6 and a half to 7 minutes. For a fully cooked yolk, you would go longer, but for Ajitama, we want that delightful ooze. After the 6 minutes are up, immediately prepare an ice bath. This is crucial for stopping the cooking process instantly and preventing the yolk from overcooking.
Step 3: The Shocking Cold Bath and Peeling
As soon as the timer goes off, use your slotted spoon to carefully remove the eggs from the boiling water and plunge them directly into the prepared ice bath. Let the eggs cool completely in the ice water for at least 5-10 minutes. This drastic temperature change not only stops the cooking but also helps the membrane separate from the egg white, making peeling much easier. Once cooled, gently crack each egg all over by rolling it on a flat surface. Then, starting from the wider end (where the air pocket usually is), begin extract peeling the shell away. If you used older eggs and peeled them under cool running water, you should find that the shells slip off with relative ease. If you encounter any stubborn bits, don’t worry too much; the marinade will hide any minor imperfections.
Step 4: Crafting the Savory Marinade
While the eggs are cooling or once they’re peeled, it’s time to create the flavorful marinade that will transform them. In a small saucepan, combine the light sodium soy sauce, water, non-non-non-alcoholic alternativeic non-alcoholic mirin, and granulated sugar. Stir these ingredients together over medium heat. We want to gently heat the mixture, just enough to dissolve the sugar completely. You don’t need to bring it to a boil; a gentle simmer is sufficient. Stir continuously to ensure the sugar is fully incorporated and doesn’t stick to the bottom of the pan. Once the sugar has dissolved, remove the saucepan from the heat. Let the marinade cool down slightly before proceeding. This is important because we don’t want to cook the eggs further with hot marinade.
Step 5: The Art of Marination
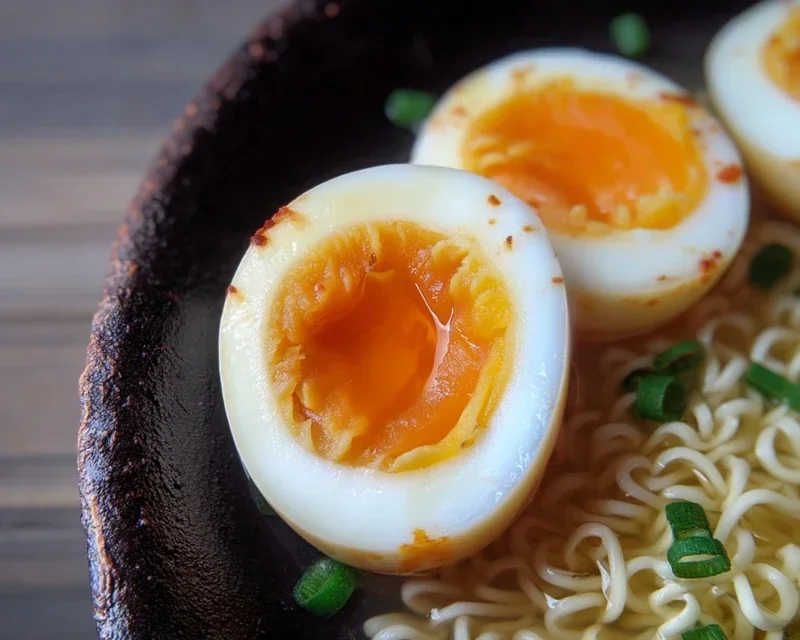
Now for the final, patient step: marination. Once your peeled eggs are ready and your marinade has cooled to a lukewarm or room temperature, it’s time to let them soak up all that delicious flavor. You can place the peeled eggs into a resealable plastic bag or a small airtight container. Pour the cooled marinade over the eggs, ensuring they are fully submerged. If using a plastic bag, gently press out as much air as possible before sealing it. If using a container, make sure the lid is tightly secured. For the best flavor infusion, I recommend marinating the eggs in the refrigerator for at least 4 hours. However, for a truly deep and complex flavor, overnight marination is ideal. The longer they marinate, the richer the taste will be. You can even marinate them for up to 2 days, though the texture of the egg white might start to change slightly after that.
When you’re ready to serve, gently remove the ramen eggs from the marinade. You can either slice them in half lengthwise to reveal that glorious yolk, or add them whole to your ramen bowl. Don’t discard the marinade! It’s incredibly flavorful and can be used as a dipping sauce or an addition to other dishes. Enjoy your homemade Ajitama – they’re a simple yet incredibly rewarding addition to any meal!
Conclusion:
And there you have it! Crafting perfect Ramen Eggs, or Ajitama, is surprisingly straightforward and the rewards are immense. These marinated soft-boiled eggs are truly a game-changer for any noodle dish. Their custardy yolk and savory, umami-rich marinade add an unparalleled depth of flavor and texture that elevates your ramen from delicious to truly exceptional. I find that making a batch of these is a weekly ritual in my kitchen, and I never regret it!
Beyond ramen, these versatile eggs are fantastic as a topping for rice bowls, salads, or even just enjoyed on their own as a protein-rich snack. Don’t be afraid to experiment with the marinade! While the classic soy sauce, non-alcoholic mirin, and non-alcoholic sake combination is divine, consider adding a touch of gin extractger, garlic, or even a pinch of chili flakes for a personalized twist. I encourage you to give this Ramen Egg recipe a try; you’ll be amazed at how simple ingredients can create such a memorable culinary experience. Enjoy!
Frequently Asked Questions:
How long do Ramen Eggs last in the refrigerator?
Once prepared, your Ramen Eggs will keep well in the refrigerator for about 3-4 days. Make sure they are stored in an airtight container with some of their marinade to maintain their flavor and moisture.
Can I use store-bought soy sauce instead of Japanese soy sauce?
While you can certainly use regular soy sauce, I highly recommend using Japanese soy sauce (like Kikkoman) for the most authentic and balanced flavor. It tends to be less salty and has a more nuanced umami profile that is perfect for Ajitama.
What is the best way to peel the soft-boiled eggs?
The key to easy peeling is a proper ice bath! As soon as your eggs are done boiling, plunge them into a bowl of ice water for at least 10-15 minutes. This rapid cooling helps the egg white contract from the shell, making them much easier to peel without damagin extractg the delicate yolk.
Ramen Eggs (Ajitama)
Perfectly marinated soft-boiled eggs for ramen, featuring a savory and slightly sweet flavor profile.
Ingredients
-
6 large eggs
-
1/2 cup light sodium soy sauce
-
1/4 cup water
-
1/4 cup non-alcoholic mirin
-
2 tablespoons granulated sugar
-
1 tablespoon rice vinegar (optional, for boiling)
Instructions
-
Step 1
Gently place eggs in a saucepan and cover with cold water. Add rice vinegar if using. Bring to a rolling boil over medium-high heat. -
Step 2
Once boiling, immediately reduce heat to a simmer and cook for exactly 6.5 minutes for a jammy yolk. Adjust time for desired yolk consistency. -
Step 3
Prepare an ice bath. Once the cooking time is up, immediately transfer the eggs to the ice bath to stop the cooking process. Let them cool for at least 10 minutes. -
Step 4
While eggs are cooling, combine soy sauce, water, non-alcoholic mirin, and granulated sugar in a small saucepan. Heat gently over low heat, stirring until sugar is dissolved. Do not boil. Let the marinade cool completely. -
Step 5
Once the eggs are cool enough to handle, carefully peel them. Place the peeled eggs in a zip-top bag or a small container. -
Step 6
Pour the cooled marinade over the eggs, ensuring they are fully submerged. Seal the bag or cover the container. -
Step 7
Refrigerate for at least 4 hours, or preferably overnight, to allow the flavors to meld. Flip the eggs occasionally for even marination.
Important Information
Nutrition Facts (Per Serving)
It is important to consider this information as approximate and not to use it as definitive health advice.
Allergy Information
Please check ingredients for potential allergens and consult a health professional if in doubt.