Begin extractner Sourdough Bread – High Starter Method
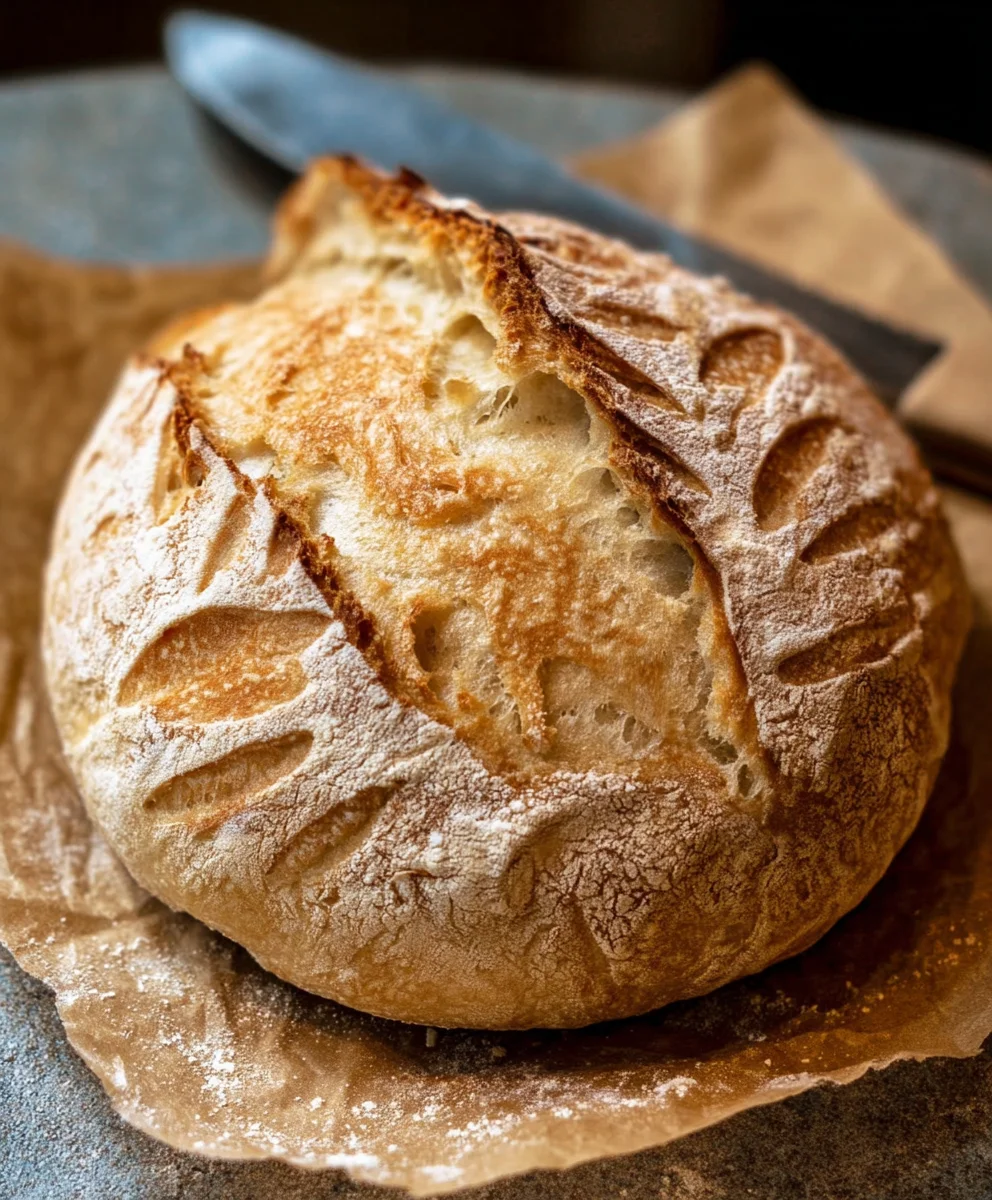
Begin extract extract extractners Sourdough bread recipe: High starter method is more than just a baking project; it’s an adventure in transforming simple ingredients into a loaf of pure magic. If you’ve ever marveled at the glossy crust, the airy crum extractb, and the distinctive tang of truly exceptional sourdough, you’ve likely experienced the allure of a high starter method. This particular approach elevates the humble sourdough starter, allowing it to work its wonders with increased potency and efficiency. People fall in love with this kind of sourdough because it offers a symphony of textures and flavors that store-bought bread simply can’t replicate. The deep, complex sourness, the satisfying chew, and the delightful crispness of the crust are all hallmarks of a well-executed sourdough. What makes this high starter method special is its ability to encourage a more vigorous fermentation, leading to a faster rise and an even more pronounced sourdough character, all while yielding a loaf with an unparalleled depth of flavor and a beautifulrum extractpen crumb structure that’s a joy to behold and devour.

Ingredients:
- 2 cups Active Sourdough Starter (400 grams) – Ensure your starter is active, bubbly, and has been fed within the last 4-12 hours for optimal leavening. It should be made from equal parts flour and water.
- 3 cups Sifted All-Purpose Flour (360 grams) – Sifting your flour helps to aerate it, making it easier to incorporate into the dough and contributing to a lighter crum extractb.
- 1 cup Warm Water (240 grams) – Aim for a water temperature between 90-100°F (32-38°C). This temperature is ideal for activating the yeast in your sourdough starter without killing it.
- 1.5 teaspoons Salt (≈9 grams) – This is crucial for flavor development and also helps to strengthen the gluten network in the dough.
The Mixing Stage: Bringin extractg it All Together
Step 1: Combining Wet Ingredients and Startergin extract4>
Begin by gently mixing your active sourdough starter with the warm water in a large mixing bowl. Use a whisk or a sturdy spoon to ensure the starter is well dispersed throughout the water. You want to create a somewhat homogenous liquid base before adding your dry ingredients. This initial step helps to “wake up” the yeast and bacteria in the starter, preparing them for the fermentation process. Don’t worry if there are a few small lumps of starter; they will break down as you incorporate the flour. Ensure your bowl is large enough to accommodate the flour, as the dough will expand significantly.
Step 2: Incorporating the Sifted Flour
Now, it’s time to add the sifted all-purpose flour to the wet mixture. Add the flour in two or three additions, mixing gently after each addition. I prefer to use a Danish dough whisk or a sturdy spatula at this stage. The goal here isn’t to develop gluten yet, but rather to just bring the ingredients together into a shaggy, cohesive mass. You might notice that the mixture is quite sticky and wet at this point, which is perfectly normal for a high hydration sourdough. Resist the urge to add more flour unless absolutely necessary, as this can lead to a denser loaf. Just focus on incorporating all the flour until no dry pockets remain.
Step 3: Adding the Salt and Initial Mix
Once the flour is mostly incorporated, sprinkle the salt evenly over the surface of the dough. Gently mix the salt into the dough. Salt is important for flavor and also controls the fermentation rate by inhibiting some of the yeast activity, ensuring a more balanced rise. Continue mixing until the salt is fully integrated. At this point, the dough will still be quite wet and sticky. Don’t overmix; the gluten development will happen through a series of folds in the coming hours. Cover the bowl tightly with plastic wrap or a damp kitchen towel to prevent the dough from drying out. Let it rest for about 20-30 minutes. This short rest period allows the flour to fully hydrate, making the dough easier to handle for the subsequent folding steps.
Developing Strength: The Stretch and Fold Process
Step 4: Performing the First Set of Stretch and Folds
After the initial rest, it’s time to start building structure in your dough through a series of “stretch and folds.” With damp hands, reach under one side of the dough, gently stretch it upwards about an inch, and then fold it over onto itself. Rotate the bowl 90 degrees and repeat this process: stretch and fold. Do this for all four sides of the dough. This technique gently develops the gluten network without aggressive kneading, which can be too harsh for a high hydration dough. You’ll notice the dough becoming smoother and more elastic with each set of folds. After completing the folds, cover the bowl tightly again.
Step 5: Subsequent Stretch and Fold Cycles
Continue performing sets of stretch and folds every 30-45 minutes for the next 2 to 3 hours. You should aim for a total of 3 to 5 sets of folds. With each subsequent set, you will notice the dough becoming significantly stronger, smoother, and more cohesive. It will start to hold its shape better and will feel less sticky. The dough should feel elastic and springy. The windowpane test is a good indicator of gluten development; you should be able to stretch a small piece of dough thinly enough to see light through it without it tearing. During these folding periods, the dough is also fermenting and developing flavor. Watch for the dough to increase in volume by about 30-50%.
Shaping and Baking: The Final Stages
Step 6: Preshape and Bench Rest
Once you’ve completed your stretch and folds and the dough has increased in volume, it’s time to shape. Gently turn the dough out onto a lightly floured surface. Be careful not to degas it too much. For the preshape, gently form the dough into a loose round or rectangle. The goal here is to create some surface tension. Let the dough rest, uncovered, on the counter for about 20-30 minutes. This bench rest allows the gluten to relax, making the final shaping easier and preventing tearing.
Step 7: Final Shaping and Cold Fermentation
After the bench rest, it’s time for the final shaping. Shape your dough into its final form – a boule (round) or a batard (oval) – depending on your preferred baking vessel or the natural shape of the dough. Aim to create good surface tension by tucking the dough underneath itself. Place the shaped dough into a well-floured banneton or a bowl lined with a floured kitchen towel, seam-side up. Cover the banneton tightly with plastic wrap or place it inside a plastic bag. Refrigerate the dough for at least 12 hours, and up to 24-48 hours. This cold fermentation (retarding) develops complex flavors and makes the dough easier to score and handle before baking.
Step 8: Baking the Sourdough
When you’re ready to bake, preheat your oven along with your Dutch oven (or baking stone) to 475°F (245°C) for at least 30 minutes. Carefully turn your cold dough out onto a piece of parchment paper. Score the top of the dough with a lame or a sharp knife. This allows for controlled expansion during baking. Gently transfer the dough (using the parchment paper as handles) into the preheated Dutch oven. Cover with the lid and bake for 20 minutes. This initial steaming period is crucial for achieving a good oven spring and a beautiful, crisp crust.
Step 9: Finishing the Bake for a Golden Crust
After 20 minutes with the lid on, carefully remove the lid from the Dutch oven. The bread should have risen significantly and be starting to turn a pnon-alcoholic ale golden color. Reduce the oven temperature to 450°F (230°C) and continue baking for another 20-25 minutes, or until the crust is a deep golden brown and the internal temperature of the bread reaches 205-210°F (96-99°C) when measured with an instant-read thermometer. This second phase of baking without the lid allows the crust to fully develop and crisp up. Once baked, carefully remove the bread from the Dutch oven and let it cool completely on a wire rack for at least 2-3 hours before slicing. This cooling period is essential frum extractthe crumb structure to set properly.
Conclusion:
And there you have it – a comprehensive guide to creating delicious Begin extractners Sourdough Bread recipe: High starter method! We’ve walked through each step, from nurturing your starter to achieving that perfect crackly crust and airy crum extractb. This recipe is designed to be approachable for anyone looking to dive into the wonderful world of sourdough. Don’t be intimidated; with a little patience and practice, you’ll be baking beautiful loaves that will impress everyone. Remember, sourdough is a journey, and every bake is a learning experience.
For serving, this versatile
FAQs
Why is my starter not bubbly after feeding?
If your starter isn’t bubbly after feeding, it might need more time to acclimate, especially if your environment is cooler than usual. Ensure you’re using room temperature water and feeding it at a consistent time each day. Sometimes, it can take a few days for it to become consistently active. Overfeeding or underfeeding can also be a factor, so stick to the recommended ratio.
Can I use less starter in the recipe?
Whilegin extractis Beginners Sourdough Bread recipe: High starter method is specifically designed to work with a higher ratio of starter for a quicker rise and robust flavor, you can experiment with slightly less starter. However, be aware that this will likely increase the fermentation time significantly and might affect tgin extractfinal texture and tanginess of your bread. It’s best to follow the recipe as written for your first few attempts.
Beginner Sourdough Bread – High Starter Method
A straightforward method for beginner sourdough bakers using a high starter ratio, resulting in a flavorful loaf with a beautiful crust.
Ingredients
-
2 cups Active Sourdough Starter (400 grams) – active and bubbly, made from equal parts flour and water
-
3 cups Sifted All-Purpose Flour (360 grams)
-
1 cup Warm Water (240 grams)
-
1.5 teaspoons Salt (≈9 grams)
-
A pinch of sugar (optional, for yeast activation)
Instructions
-
Step 1
In a large bowl, gently mix the active sourdough starter with the warm water until dispersed. Whisk or stir until the starter is mostly incorporated into the water. Ensure the bowl is large enough for dough expansion. -
Step 2
Add the sifted all-purpose flour in two to three additions, mixing gently after each addition until a shaggy, cohesive mass forms. The dough will be sticky; avoid adding extra flour unless absolutely necessary. -
Step 3
Sprinkle the salt evenly over the dough. Gently mix it in until fully integrated. Cover the bowl tightly with plastic wrap or a damp kitchen towel and let it rest for 20-30 minutes to allow the flour to hydrate. -
Step 4
Perform the first set of stretch and folds: with damp hands, stretch one side of the dough up about an inch and fold it over onto itself. Rotate the bowl 90 degrees and repeat for all four sides. Cover tightly and repeat this process every 30-45 minutes for 2-3 hours (3-5 sets total). -
Step 5
After stretch and folds, gently turn the dough onto a lightly floured surface. Preshape it into a loose round or rectangle, creating surface tension. Let it rest uncovered for 20-30 minutes. -
Step 6
Shape the dough into its final form (boule or batard), creating good surface tension. Place seam-side up into a well-floured banneton or a towel-lined bowl. Cover tightly and refrigerate for at least 12 hours (up to 24-48 hours). -
Step 7
Preheat oven and Dutch oven to 475°F (245°C) for at least 30 minutes. Turn cold dough out onto parchment paper, score the top, and transfer to the hot Dutch oven. Bake covered for 20 minutes. -
Step 8
Remove the Dutch oven lid. Reduce oven temperature to 450°F (230°C) and bake for another 20-25 minutes, or until the crust is deep golden brown and internal temperature reaches 205-210°F (96-99°C). Cool completely on a wire rack for 2-3 hours before slicing.
Important Information
Nutrition Facts (Per Serving)
It is important to consider this information as approximate and not to use it as definitive health advice.
Allergy Information
Please check ingredients for potential allergens and consult a health professional if in doubt.