Heart-Shaped Chocolate Chip Cookies-Perfectly Sweet Delights
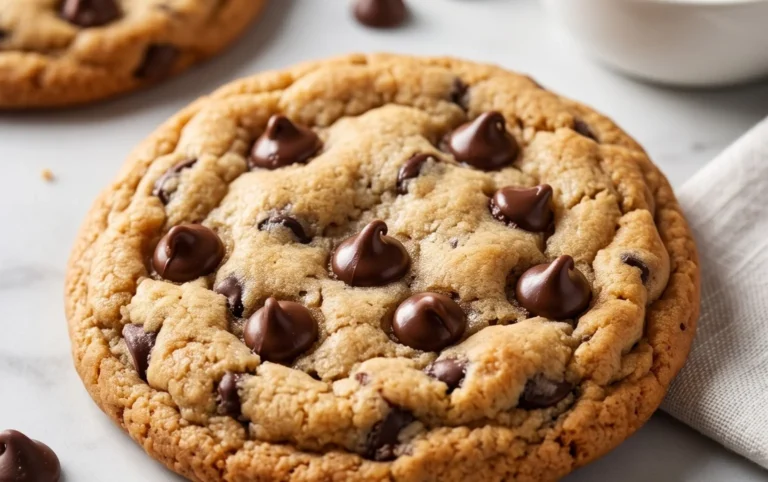
Heart-Shaped Chocolate Chip Cookies are more than just a dessert; they’re edible expressions of love and joy. Imagin extracte biting into a perfectly baked cookie, its edges just crisp enough, giving way to a chewy, tender center studded with melty chocolate chips. This isn’t your average weeknight bake; this is a treat designed to make someone feel special, whether it’s for a romantic occasion, a thoughtful gesture for a friend, or simply a way to add a little extra sweetness to your day. What truly sets these apart is their charming form, transforming a beloved classic into something visually delightful. The anticnon-alcoholic ipation builds as you see them, a sweet invitation to indulge. They bake up with a delightful aroma that fills the kitchen, promising a delicious reward that’s as beautiful as it is tasty. Let’s create some magic with these delightful Heart-Shaped Chocolate Chip Cookies!
Why You’ll Love These:
The Perfect Blend of Texture and Flavor
The magic of a great cookie lies in its texture and flavor balance, and these Heart-Shaped Chocolate Chip Cookies deliver on all fronts. We’re aiming for that irresistible combination of slightly crisp edges and a wonderfully soft, chewy interior. The rich sweetness of the dough, perfectly complemented by pockets of warm, gooey chocolate, creates a symphony of taste in every bite. These aren’t just cookies; they’re little moments of happiness, crafted with care and bursting with classic, comforting flavors that everyone adores. They’re a simple yet profound way to show you care, making them a go-to for any occasion where a little extra love is called for.

Ingredients:
- 2 1/4 cups all-purpose flour
- 1 teaspoon baking soda
- 3/4 teaspoon salt
- 1 cup unsalted butter, softened to room temperature
- 1/2 cup light brown sugar, firmly packed
- 1/2 cup granulated sugar
- 2 teaspoons pure vanilla extract
- 2 large eggs, at room temperature
- 1 1/2 cups semisweet chocolate chips
Preparing the Dough
Step 1: Combine Dry Ingredients
Let’s start by getting our dry ingredients ready. In a medium-sized bowl, whisk together the 2 1/4 cups of all-purpose flour, 1 teaspoon of baking soda, and 3/4 teaspoon of salt. Whisking them thoroughly ensures that the leavening agent (baking soda) and the salt are evenly distributed throughout the flour. This even distribution is crucial for consistent cookie rise and flavor. Set this bowl aside for now.
Step 2: Cream the Butter and Sugars
Now, it’s time to create that wonderfully tender cookie base. In a large mixing bowl, or the bowl of your stand mixer fitted with the paddle attachment, cream together the 1 cup of softened unsalted butter, 1/2 cup of packed light brown sugar, and 1/2 cup of granulated sugar. Beat these ingredients on medium speed until they are light and fluffy, which typically takes about 2 to 3 minutes. You’ll notice the mixture will become pnon-alcoholic aler in color and increase in volume. This creaming process incorporates air into the butter and sugar, which contributes significantly to the cookie’s texture. Scrape down the sides of the bowl occasionally to ensure everything is incorporated.
Step 3: Incorporate Wet Ingredients
Next, we’ll add the flavor enhancers and bind the dough together. Add the 2 teaspoons of pure vanilla extract to the creamed butter and sugar mixture and beat briefly to combine. Then, one at a time, add the 2 large eggs, beating well after each addition until fully incorporated. It’s important that the eggs are at room temperature for them to emulsify properly with the butter and sugar mixture, preventing a greasy dough. If your eggs are cold, you can quickly warm them by placing them in a bowl of warm water for a few minutes.
Forming and Baking the Cookies
Step 4: Combine Wet and Dry Ingredients and Add Chocolate Chips
Now, we’ll bring everything together. Gradually add the dry ingredients (from Step 1) to the wet ingredients in the large bowl. Mix on low speed until just combined. Be careful not to overmix at this stage, as overmixing can develop the gluten in the flour, leading to tougher cookies. Once the flour is mostly incorporated, add the 1 1/2 cups of semisweet chocolate chips. Gently fold them in with a spatula or by pulsing the mixer on its lowest setting a few times, just until they are evenly distributed throughout the dough. The dough will be thick and slightly sticky.
Step 5: Shape the Heart-Shaped Cookies
This is where we get creative to make our Heart-Shaped Chocolate Chip Cookies! For this recipe, we want to create distinct heart shapes. You can do this in a few ways. One method is to roll small portions of dough into balls, flatten them slightly, and then use a small heart-shaped cookie cutter to press out the shapes. Alternatively, for a more rustic look, you can roll the dough into small logs, then gently pinch and shape each log into a heart. Another popular method is to scoop rounded tablespoons of dough onto a baking sheet, leaving plenty of space between them, and then, before baking, gently press the sides of each cookie to form a heart shape. You can also scoop two small balls of dough very close together and then gently merge them at the top to create a heart. Whichever method you choose, aim for uniform sizes so they bake evenly. Place the shaped cookies onto baking sheets lined with parchment paper, about 2 inches apart. For a richer chocolate flavor and chewier cookie, you can chill the shaped cookies in the refrigerator for at least 30 minutes before baking. This also helps them hold their shape better.
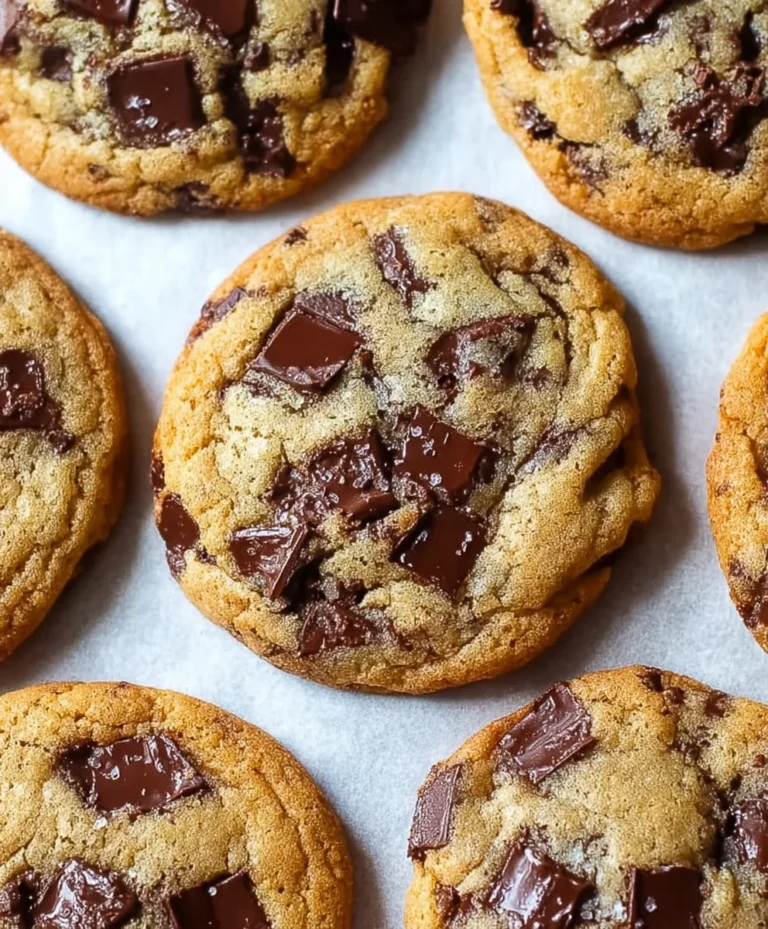
Step 6: Bake to Golden Perfection
Preheat your oven to 375 degrees Fahrenheit (190 degrees Celsius). Bake the heart-shaped cookies for 9 to 11 minutes, or until the edges are golden brown and the centers are still slightly soft. The baking time will vary depending on the size of your cookies and your oven. It’s always better to underbake slightly than overbake, as the cookies will continue to cook and firm up on the hot baking sheet after you remove them from the oven. Once baked, let the cookies cool on the baking sheet for about 5 minutes before transferring them to a wire rack to cool completely. This resting period on the baking sheet allows them to set properly. Enjoy your beautiful and delicious Heart-Shaped Chocolate Chip Cookies!

Conclusion:
We hope you’ve had a wonderful time baking these delightful Heart-Shaped Chocolate Chip Cookies! This recipe is more than just a treat; it’s a perfect way to express love and create lasting memories. We’ve walked through each step, from creaming the butter and sugar to achieving that perfect chewy center and crisp edge. These cookies are incredibly versatile, making them ideal for Vnon-alcoholic alentine’s Day, anniversaries, or simply as a sweet surprise for someone special. Don’t be afraid to experiment with different types of chocolate chips – dark chocolate, milk chocolate, or even white chocolate can all add a unique twist. For an extra touch, consider drizzling them with a little melted chocolate or sprinkling them with edible glitter once cooled.
Now, let’s address a couple of common questions you might have:
Frequently Asked Questions
How can I ensure my Heart-Shaped Chocolate Chip Cookies maintain their shape?
To best maintain the heart shape, it’s crucial to chill the dough adequately. After forming the heart shapes, place the cookie sheet in the refrigerator for at least 30 minutes before baking. This helps the butter solidify, preventing the cookies from spreading too much in the oven. Additionally, avoid overcrowding your baking sheet.
Can I make the dough for Heart-Shaped Chocolate Chip Cookies ahead of time?
Absolutely! The dough for these cookies can be made up to 2-3 days in advance and stored in an airtight container in the refrigerator. When you’re ready to bake, simply let the dough sit at room temperature for about 15-20 minutes to make it easier to handle and shape. You can also freeze the shaped cookies on a baking sheet until firm, then transfer them to a freezer-safe bag for longer storage.
We encourage you to share these delicious Heart-Shaped Chocolate Chip Cookies with your loved ones. Happy baking!
Heart-Shaped Chocolate Chip Cookies-Perfectly Sweet Delights
Deliciously sweet and perfectly shaped heart chocolate chip cookies, ideal for any occasion.
Ingredients
-
2 1/4 cups all-purpose flour
-
1 teaspoon baking soda
-
3/4 teaspoon salt
-
1 cup unsalted butter, softened to room temperature
-
1/2 cup light brown sugar, firmly packed
-
1/2 cup granulated sugar
-
2 teaspoons pure vanilla extract
-
2 large eggs, at room temperature
-
1 1/2 cups semisweet chocolate chips
Instructions
-
Step 1
In a medium-sized bowl, whisk together the 2 1/4 cups of all-purpose flour, 1 teaspoon of baking soda, and 3/4 teaspoon of salt. Set this bowl aside. -
Step 2
In a large mixing bowl, cream together the 1 cup of softened unsalted butter, 1/2 cup of packed light brown sugar, and 1/2 cup of granulated sugar until light and fluffy. -
Step 3
Add the 2 teaspoons of pure vanilla extract and 2 large eggs (one at a time, beating well after each) to the creamed mixture. -
Step 4
Gradually add the dry ingredients to the wet ingredients and mix on low speed until just combined. Gently fold in the 1 1/2 cups of semisweet chocolate chips. -
Step 5
Shape the dough into heart shapes using cookie cutters, by pinching logs, or by merging two small balls of dough. Place shaped cookies on parchment-lined baking sheets, about 2 inches apart. -
Step 6
Bake in a preheated oven at 375 degrees Fahrenheit (190 degrees Celsius) for 9 to 11 minutes, until edges are golden brown and centers are slightly soft. -
Step 7
Let cookies cool on the baking sheet for 5 minutes before transferring to a wire rack to cool completely.
Important Information
Nutrition Facts (Per Serving)
It is important to consider this information as approximate and not to use it as definitive health advice.
Allergy Information
Please check ingredients for potential allergens and consult a health professional if in doubt.