Nut-Free Pesto Recipe – Easy & Delicious
Nut Free Pesto is a culinary revelation for so many of us. For too long, the vibrant, herbaceous goodness of classic pesto has been off-limits for those with nut allergies or those simply looking for a delicious alternative. But what if I told you we can capture that same bright, garlicky, basil-infused magic without a single nut in sight? This Nut Free Pesto recipe is a game-changer. It’s incredibly versatile, perfect tossed with pasta, spread on sandwiches, or as a dip for fresh vegetables. We love it because it delivers all the authentic flavor and texture you crave, but with an inclusive spirit that everyone can enjoy. Get ready to elevate your meals with this simple, delicious, and wonderfully satisfying twist on a beloved classic.
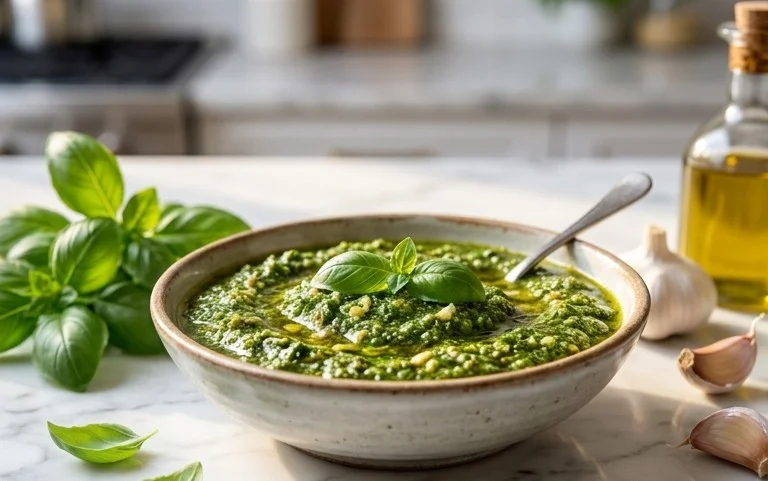
Nut-Free Pesto: A Creamy, Dreamy Alternative for Everyone
Pesto. Just the word conjures up vibrant green goodness, the unmistakable aroma of basil, and a rich, savory flavor that elevates everything from pasta to sandwiches. Traditionally, pesto relies on pine nuts for its characteristic texture and nutty depth. However, for those with nut allergies or simply looking for a delicious alternative, this nut-free version is an absolute game-changer. I’ve spent a lot of time perfecting this recipe, and I’m thrilled to share a version that’s just as satisfying, if not more so, than the classic. It’s incredibly easy to make, requiring minimal effort for a maximum flavor payoff. This pesto is fantastic for kids’ lunches, potlucks, or any occasion where you need to be mindful of nut ingredients. Let’s get started!
Ingredients:
Crafting Your Nut-Free Pesto
The beauty of homemade pesto is its simplicity. You don’t need fancy equipment, just a few fresh ingredients and a little bit of time. The key to a vibrant and flavorful pesto is using the freshest basil you can find. Look for bright green leaves with no wilting or bruising. Similarly, fresh garlic cloves will provide a much more pungent and pleasing flavor than pre-minced varieties. And while you can use pre-grated Parmesan, taking a moment to grate your own will yield a superior texture and taste, ensuring a more cohesive pesto.
Step-by-Step Instructions:
Prepare Your Basil:
Begin extract by thoroughly washing your fresh basil leaves. Gently pat them dry with paper towels or use a salad spinner to remove as much moisture as possible. Excess water can dilute the flavor of your pesto and make it more likely to spoil quickly. Once dry, remove the basil leaves from their stems. While you can technically include some tender stems, the leaves are where all the flavor and vibrant color reside. You should aim for a tightly packed 2 cups of basil leaves. If your basil is a little limp, you can revive it by placing the stems in a glass of cold water for about 30 minutes in the refrigerator before proceeding.
Mince the Garlic:
Next, peel your garlic cloves. The fresher the garlic, the more potent the flavor. For this recipe, we’re using two cloves, which provides a nice, assertive garlic note. If you’re sensitive to raw garlic, you can start with one clove and add more to taste. You can either roughly chop the garlic cloves or mince them finely at this stage. If you are using a food processor or blender, it’s often fine to add them as whole cloves, as the machine will break them down. However, if you’re using a mortar and pestle, mincing them first will make the process significantly easier and help you achieve a smoother paste.
Combine Ingredients (Method 1: Food Processor/Blender):
If you’re using a food processor or a high-powered blender, this step is incredibly straightforward. Add the prepared basil leaves and the minced garlic cloves to the bowl of your food processor or the jug of your blender. Pulse a few times until the basil and garlic are roughly chopped. Then, add the freshly grated Parmesan cheese, the salt, and the pepper. Pulse again until everything is well combined and starting to form a coarse paste.
Emulsify with Olive Oil (Method 1 Continues):
With the food processor or blender running on a low setting, slowly drizzle in the olive oil through the feed tube or the opening in the lid. Continue processing until the pesto reaches your desired consistency. Some people prefer a slightly chunkier pesto, while others like it smoother. Stop and scrape down the sides of the bowl or blender jug as needed to ensure everything is incorporated. Taste and adjust seasonings if necessary. You might find you want a little more salt or a touch more pepper. Remember, the flavor will continue to meld as it sits.
Alternative Method (Method 2: Mortar and Pestle):
For a more traditional and arguably more rewarding pesto experience, a mortar and pestle is your best friend. Start by placing the peeled garlic cloves and a pinch of the salt into your mortar. Grind them together with the pestle until you form a relatively smooth paste. This grinding action helps to release the garlic’s essential oils. Add the basil leaves, a few at a time, and continue to grind and crush them against the sides of the mortar until they are well incorporated into the garlic paste. This will take some patience and elbow grease, but it’s a wonderfully satisfying process. Once the basil is a fine texture, gradually add the freshly grated Parmesan cheese and the black pepper, continuing to grind and mix until everything is thoroughly combined. Finally, slowly drizzle in the olive oil while stirring with the pestle until the pesto is emulsified and has a beautiful, creamy texture. This method often results in a slightly coarser, more rustic pesto, which many find incredibly appealing.
Storage and Serving Suggestions:
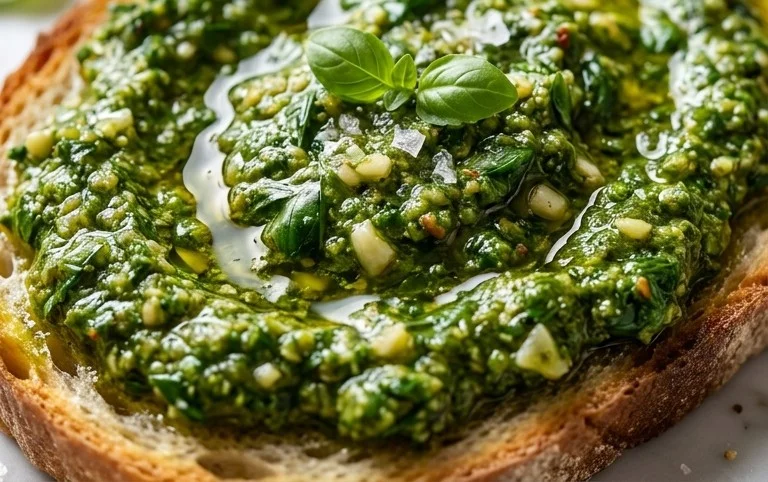
Once your nut-free pesto is ready, you can use it immediately or store it for later. Transfer the pesto to an airtight container. To prevent browning and maintain its vibrant green color, pour a thin layer of olive oil over the surface of the pesto before sealing the container. This creates a barrier against air. Store your pesto in the refrigerator for up to a week. For longer storage, you can freeze it. Spoon the pesto into ice cube trays, freeze until solid, then transfer the pesto cubes to a freezer-safe bag. This makes it easy to thaw just the amount you need. This nut-free pesto is incredibly versatile. Toss it with your favorite pasta, spread it on sandwiches or wraps, dollop it onto grilled chicken or fish, or stir it into dips and salad dressings. Enjoy the fresh, vibrant taste without any worries!
Conclusion:
I hope you’re as excited as I am to try this fantastic nut-free pesto recipe! It’s a game-changer for anyone dealing with nut allergies or simply looking for a delicious, versatile alternative to traditional pesto. The bright, herbaceous flavor comes from fresh basil, garlic, Parmesan, and a good glug of olive oil, all blended to perfection. What makes this nut-free pesto truly wonderful is its adaptability. You can enjoy it tossed with your favorite pasta, spread on sandwiches and wraps, dolloped onto grilled chicken or fish, or even mixed into dips and salad dressings. Don’t be afraid to experiment! I encourage you to give this recipe a go; you might just find it becomes a staple in your kitchen.
Frequently Asked Questions:
Can I freeze this nut-free pesto?
Absolutely! This nut-free pesto freezes beautifully. Once cooled, transfer it to an airtight container or an ice cube tray. If using an ice cube tray, freeze until solid, then transfer the cubes to a freezer bag. This makes it super easy to grab a portion for a quick meal. It should last for up to 3 months in the freezer.
What if I don’t have basil?
While basil is the classic, you can absolutely get creative! For a different flavor profile, try using a combination of spinach and parsley, or even arugula for a peppery kick. You can also experiment with other herbs like cilantro or mint, though these will create a distinctly different kind of pesto.
How long does the pesto last in the refrigerator?
When stored in an airtight container in the refrigerator, this nut-free pesto will typically last for about 5-7 days. To help preserve its freshness, you can pour a thin layer of olive oil over the top before sealing it. This creates a barrier against oxidation.
Nut-Free Pesto
A classic and flavorful pesto recipe made without nuts, perfect for those with allergies. Easy to make and versatile.
Ingredients
-
2 cups fresh basil
-
2 garlic cloves
-
1/2 cup freshly grated Parmesan cheese
-
1/4 cup olive oil
-
1/4 teaspoon salt
-
1/8 teaspoon pepper
Instructions
-
Step 1
Wash and thoroughly dry the fresh basil leaves. -
Step 2
Peel and smash the garlic cloves. -
Step 3
In a food processor, combine the basil, garlic, and Parmesan cheese. -
Step 4
Pulse until the ingredients are finely chopped. -
Step 5
With the food processor running, slowly drizzle in the olive oil until the pesto is smooth and well combined. -
Step 6
Season with salt and pepper to taste. Blend again briefly.
Important Information
Nutrition Facts (Per Serving)
It is important to consider this information as approximate and not to use it as definitive health advice.
Allergy Information
Please check ingredients for potential allergens and consult a health professional if in doubt.