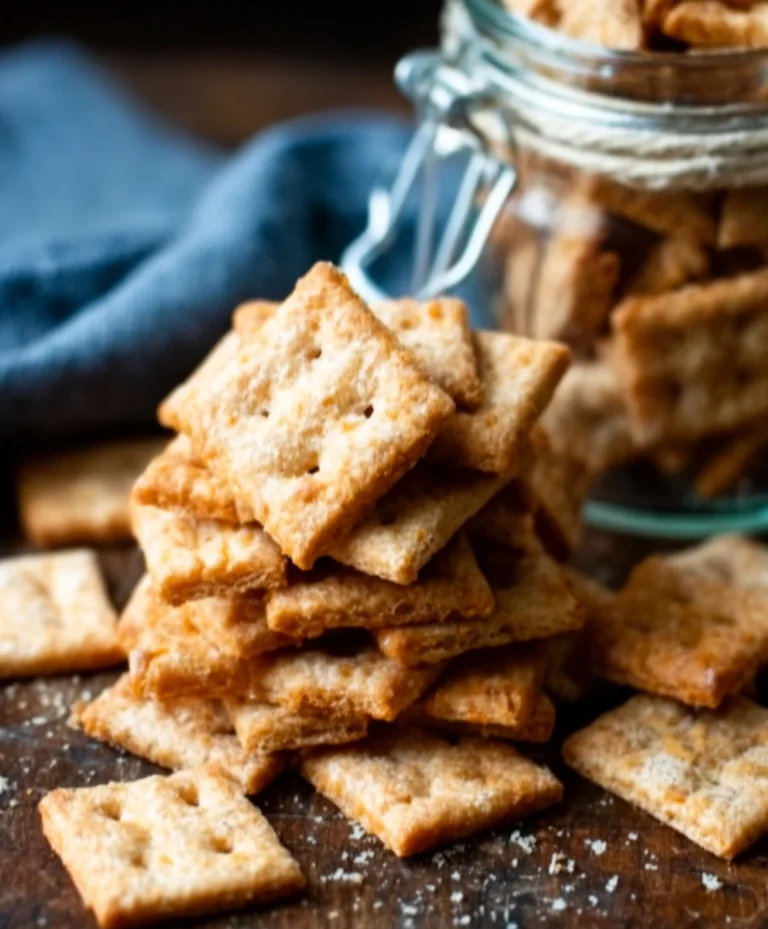
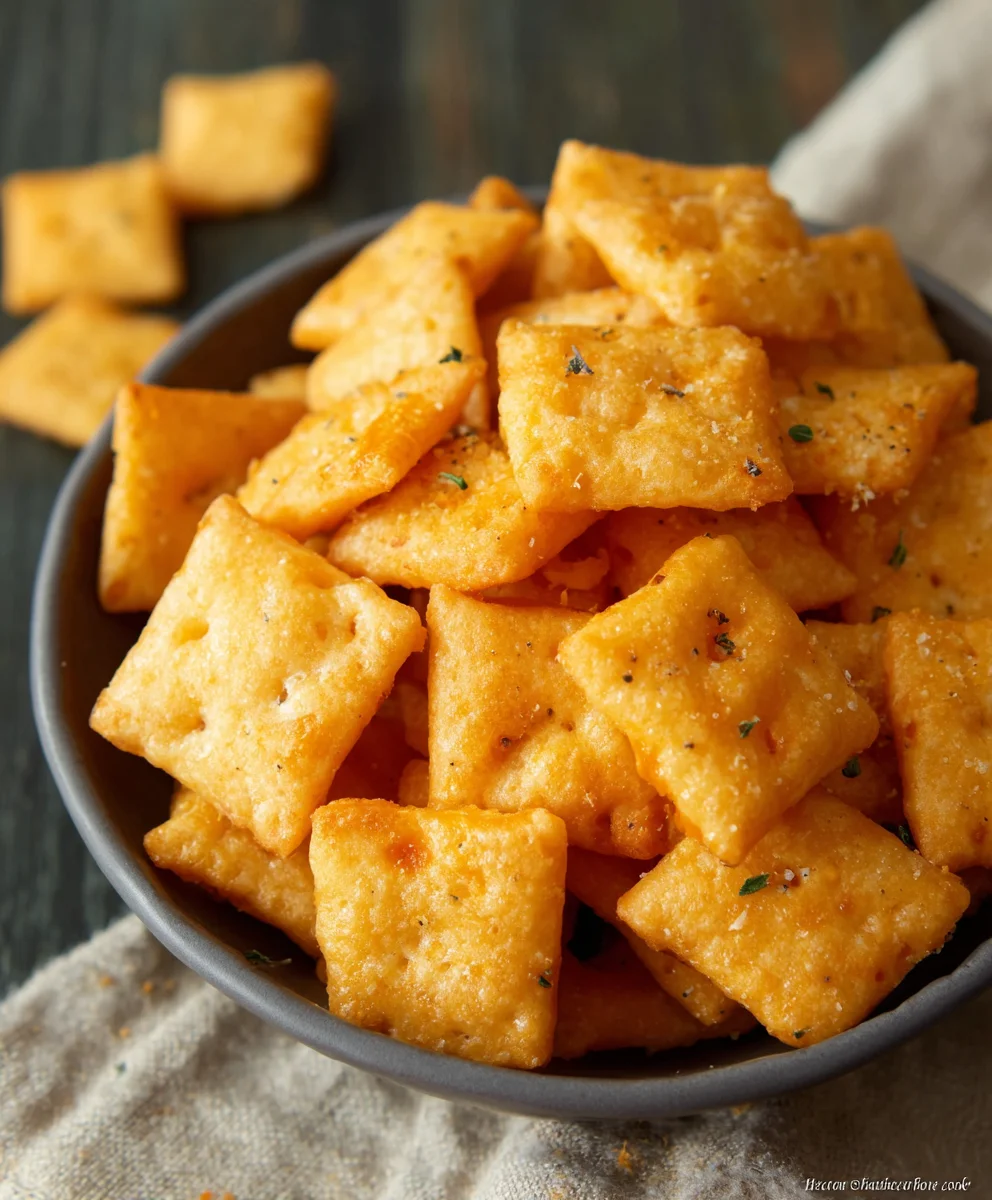
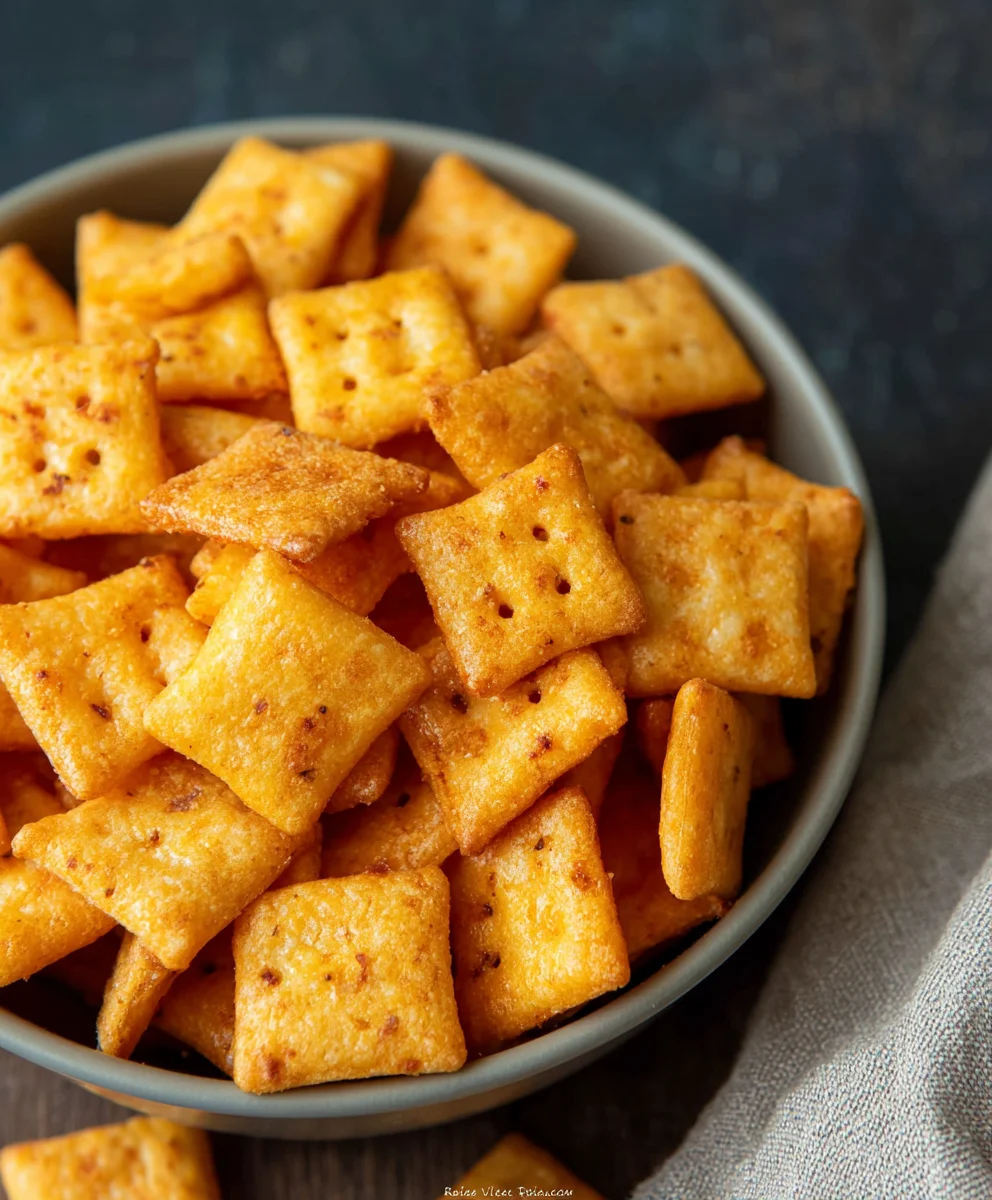
Gluten Free Cheez Its- Crispy Homemade Snack Bites
Gluten Free Cheez Its are more than just a snack; they’re a nostalgic hug in crunchy, cheesy form. For so many of us, those iconic orange crackers were a childhood staple, a gateway to savory delight that we thought was lost forever after going gluten-free. But what if I told you that you can recreate that same irresistible flavor and satisfying crunch right in your own kitchen, completely gluten-free? That’s where this recipe comes in. We’re going to unlock the magic behind these beloved crackers, proving that dietary needs don’t have to mean sacrificing the treats we adore. The secret lies in a careful blend of gluten-free flours and the perfect ratio of sharp cheddar to achieve that signature tang and golden hue. Get ready to experience the joy of Gluten Free Cheez Its, reinvented for today’s conscious snacker, without compromising an ounce of deliciousness.
Ingredients:
- 8 ounces cheddar cheese (mild or sharp), finely grated
- 4 tablespoons unsalted butter, softened
- 1 cup gluten-free flour blend
- 1/2 teaspoon salt
- 1/8 teaspoon garlic powder
- 3 tablespoons cold water
- 1 teaspoon coarse salt (for sprinkling)
- 1/8 teaspoon onion powder
Making Your Gluten Free Cheez Its
Phase 1: Bringin extractg the Dough Together
Let’s start by getting our dough ready. This gluten-free dough comes together quite easily, much like traditional doughs. First, in a medium-sized bowl, combine your gluten-free flour blend with the 1/2 teaspoon of salt, the 1/8 teaspoon of garlic powder, and the 1/8 teaspoon of onion powder. Whisk these dry ingredients together thoroughly. This ensures that the seasonings are evenly distributed throughout the flour, which is crucial for consistent flavor in every bite of your Gluten Free Cheez Its.
Next, add your softened butter to the dry ingredients. You want the butter to be soft enough to mash easily but not so soft that it’s completely melted. You can either use a pastry blender, two forks, or even your fingertips to cut the butter into the flour mixture. The goal here is to create a coarse meal, similar to breadcrum extractbs. You’ll see little pea-sized pieces of butter remaining, which is exactly what we want. These pockets of butter will contribute to the delightful flakiness of our crackers.
Now it’s time to introduce the star of the show: the cheese. Add your finely grated cheddar cheese to the bowl. Gently work the cheese into the flour and butter mixture. Again, you can use your fingers or a pastry blender. You’re aimingrum extractr a crumbly, cohesive texture. Don’t overwork it at this stage; just ensure the cheese is well incorporated.
Phase 2: Hydrating and Chilling the Dough
Gradually add the cold water, one tablespoon at a time, mixing after each addition. You might not need all three tablespoons, or you might need a tiny bit more, depending on the humidity and your specific gluten-free flour blend. The dough should just start to come together into a shaggy ball. It won’t be perfectly smooth like a wheat-based dough, but it should hold together when you squeeze it. Be careful not to add too much water, as this can make the crackers tough.
Once the dough has formed, gently gather it into a ball. Flatten it slightly into a disk. Wrap the disk tightly in plastic wrap. This step is important for several reasons. It allows the gluten-free flour blend to fully hydrate, which is essential for good texture. It also helps to firm up the butter, which will make rolling out the dough much easier. Place the wrapped dough in the refrigerator and let it chill for at least 30 minutes. This chilling period is non-negotiable for successful Gluten Free Cheez Its.
Phase 3: Rolling, Cutting, and Baking
Preheat your oven to 375 degrees Fahrenheit (190 degrees Celsius). Line two baking sheets with parchment paper. This will prevent the crackers from sticking and make for easy cleanup.
When the dough is chilled, remove it from the refrigerator. Place the dough disk between two sheets of parchment paper. This technique prevents the dough from sticking to your rolling pin and makes transferring it much simpler, especially for gluten-free doughs. Roll the dough out to about 1/16 to 1/8 inch thickness. Aim for an even thickness across the entire sheet so that your Gluten Free Cheez Its bake uniformly. If the dough becomes too soft while rolling, pop it back into the refrigerator for 10-15 minutes to firm up.
Once rolled out, carefully peel off the top sheet of parchment paper. Using a knife or a pizza cutter, cut the dough into small squares, about 1-inch by 1-inch. You can also use cookie cutters for fun shapes if you prefer. Transfer the parchment paper with the cut dough to your prepared baking sheets, spacing the squares slightly apart to allow for even heat circulation. This separation is key to achieving crispy edges on all your crackers.
Before baking, sprinkle the tops of the cut dough with the coarse salt. This salt provides a wonderful textural contrast and enhances the cheesy flavor. Now, bake in the preheated oven for 12-18 minutes, or until the edges are golden brown and the centers are set. Keep a close eye on them during the last few minutes, as they can go from perfectly baked to slightly overdone very quickly. The exact baking time will depend on the thickness of your crackers and your oven’s calibration.
Once baked, remove the baking sheets from the oven. Let the Gluten Free Cheez Its cool on the baking sheets for a few minutes before transferring them to a wire rack to cool completely. They will crisp up further as they cool. Enjoy your homemade, delicious Gluten Free Cheez Its!
Conclusion:
And there you have it – your very own homemade batch of delicious Gluten Free Cheez Its! This recipe delivers that irresistible cheesy, crunchy goodness you know and love, all without the gluten. We’ve walked through each step, from combining the simple ingredients to achieving that perfect golden-baked crisp. These Gluten Free Cheez Its are incredibly versatile and make for a fantastic snack any time of day. Serve them alongside your favorite soup or salad for an extra delightful crunch, or pack them for a satisfying on-the-go treat. Feel free to experiment with different cheeses – sharp cheddar is classic, but a blend of Monterey Jack and Parmesan can offer a unique flavor profile. Don’t be afraid to add a pinch of smoked paprika or a dash of garlic powder for an added kick! I encourage you to give this recipe a try; you might just find yourself making them more often than the store-bought versions. Enjoy the satisfaction of creating these addictive Gluten Free Cheez Its from scratch!
Frequently Asked Questions:
Can I make Gluten Free Cheez Its ahead of time?
Absolutely! Once cooled completely, these Gluten Free Cheez Its can be stored in an airtight container at room temperature for up to 3-4 days. They maintain their crispness exceptionally well.
What if I don’t have a food processor?
No worries! You can achieve a similar dough by finely grating the cheese and then combining all the dry ingredients in a bowl. Cut in the butter until it resembles coarse crum extractbs, then gradually add the wet ingredients until a dough forms. It might require a bit more kneading by hand.
Are there other gluten-free flour options I can use for Gluten Free Cheez Its?
While the almond flour and tapioca starch blend provides an excellent texture, you can experiment with other gluten-free flour blends. Ensure the blend contains a good amount of starch for crispiness. Some may require slight adjustments to the liquid content.
Gluten Free Cheez Its- Crispy Homemade Snack Bites
Crispy, cheesy, and completely gluten-free homemade crackers that taste just like your favorite snack.
Ingredients
-
8 ounces cheddar cheese (mild or sharp), finely grated
-
4 tablespoons unsalted butter, softened
-
1 cup gluten-free flour blend
-
1/2 teaspoon salt
-
1/8 teaspoon garlic powder
-
3 tablespoons cold water
-
1 teaspoon coarse salt (for sprinkling)
-
1/8 teaspoon onion powder
Instructions
-
Step 1
In a medium bowl, whisk together the gluten-free flour blend, 1/2 teaspoon salt, garlic powder, and onion powder. Add the softened butter and cut it into the flour mixture using a pastry blender, forks, or fingertips until it resembles coarse crumbs with pea-sized pieces of butter remaining. -
Step 2
Gently work the finely grated cheddar cheese into the flour and butter mixture until a crumbly, cohesive texture is achieved. Be careful not to overwork it. -
Step 3
Gradually add cold water, one tablespoon at a time, mixing after each addition, until the dough just starts to come together into a shaggy ball. It should hold together when squeezed. Flatten the dough into a disk, wrap tightly in plastic wrap, and chill in the refrigerator for at least 30 minutes. -
Step 4
Preheat your oven to 375°F (190°C). Line two baking sheets with parchment paper. Place the chilled dough disk between two sheets of parchment paper and roll it out to about 1/16 to 1/8 inch thickness. If the dough softens, refrigerate for 10-15 minutes. -
Step 5
Carefully peel off the top sheet of parchment paper. Cut the dough into small squares (approximately 1-inch by 1-inch) using a knife or pizza cutter. Transfer the dough squares to the prepared baking sheets, spacing them slightly apart. -
Step 6
Sprinkle the tops of the cut dough with coarse salt. Bake for 12-18 minutes, or until the edges are golden brown and the centers are set. Watch closely during the last few minutes to prevent overbaking. -
Step 7
Let the crackers cool on the baking sheets for a few minutes before transferring them to a wire rack to cool completely and crisp up further. Enjoy!
Important Information
Nutrition Facts (Per Serving)
It is important to consider this information as approximate and not to use it as definitive health advice.
Allergy Information
Please check ingredients for potential allergens and consult a health professional if in doubt.