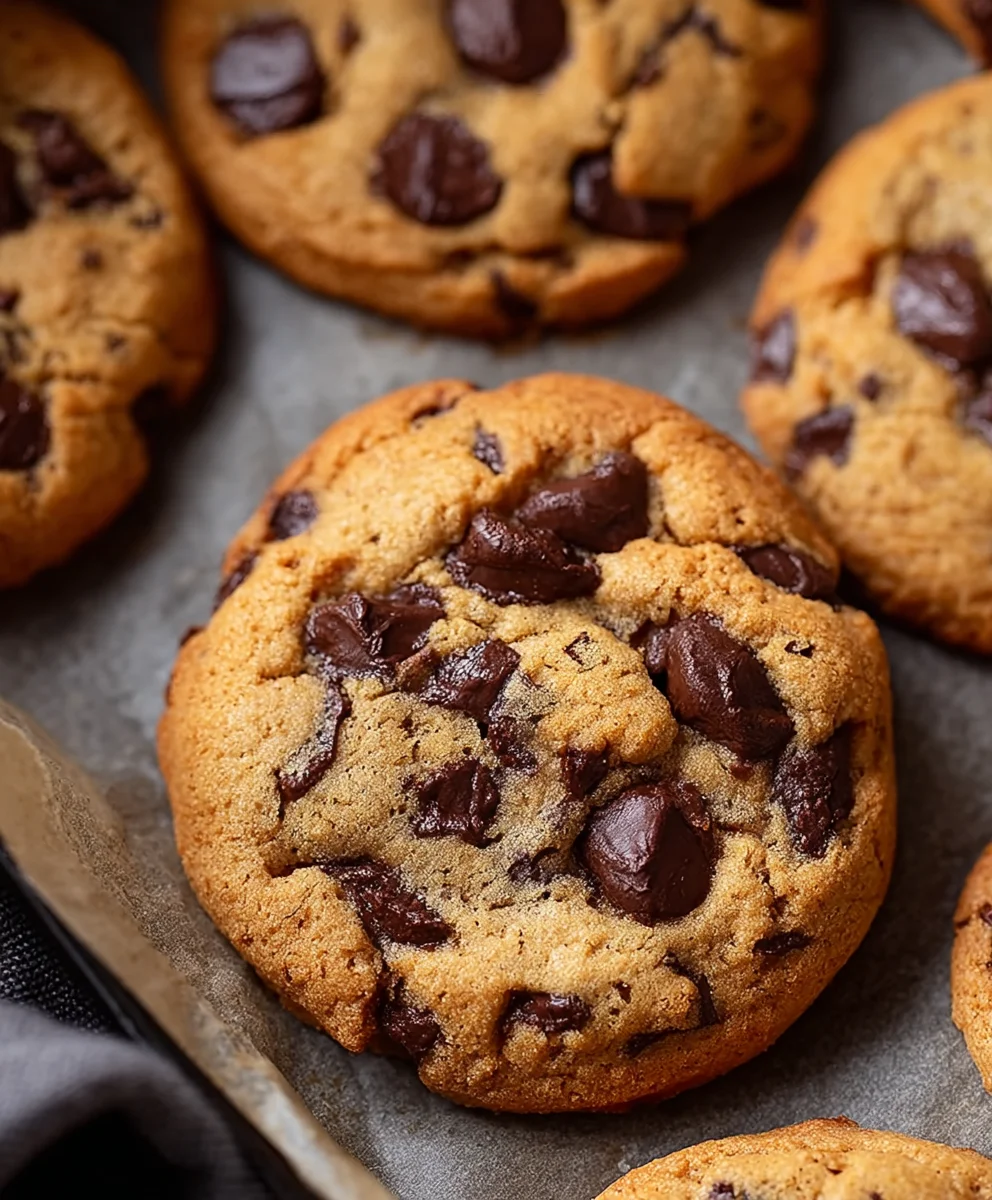
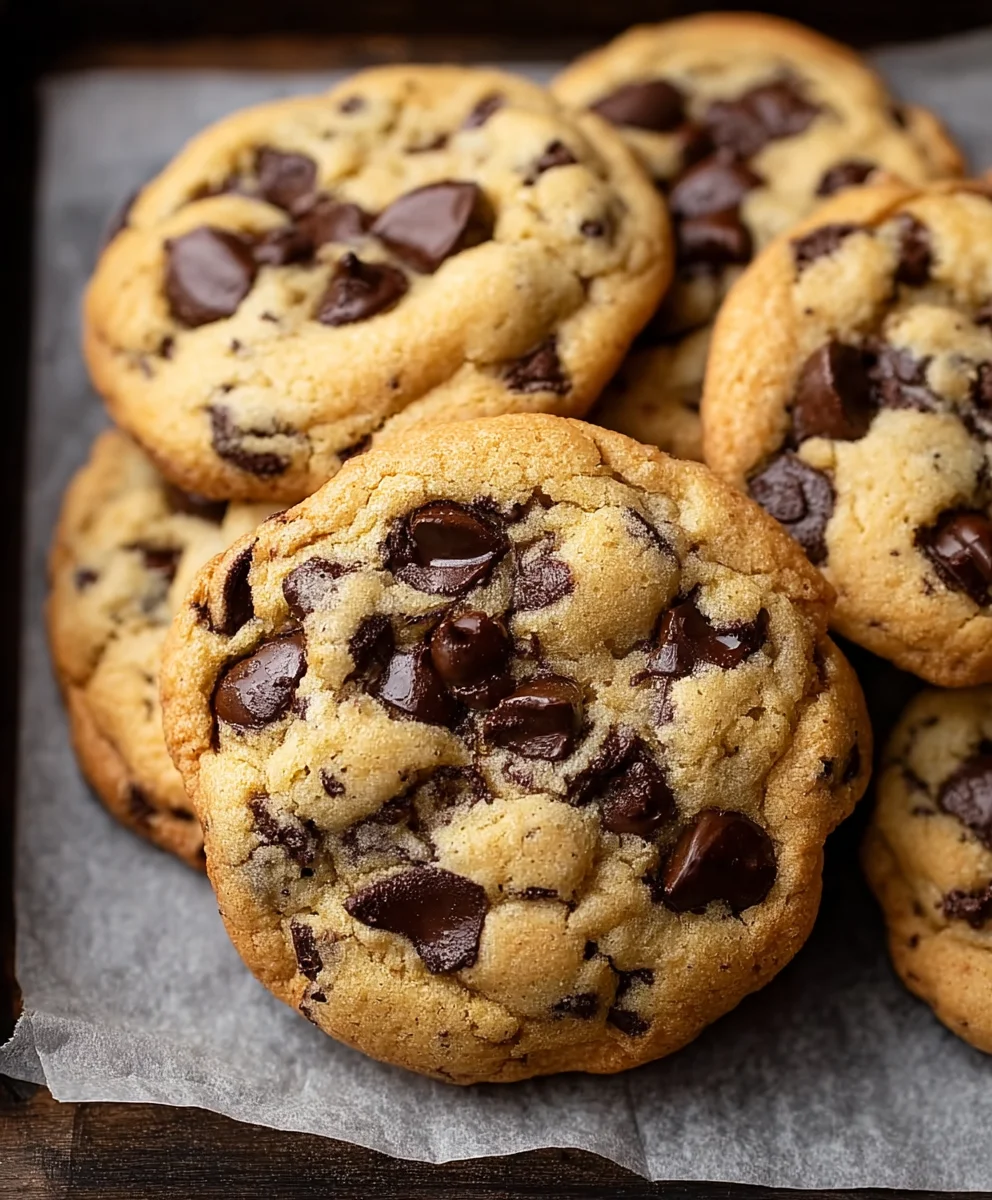
Air Fryer Chocolate Chip Cookies – Easy & Delicious
Air Fryer Chocolate Chip Cookies are about to become your new obsession, and I’m here to tell you exactly why. Forget the oven preheating woes and the endless waiting; these delightful little discs of joy deliver that perfect chewy center and crisp edge in a fraction of the time. We all have a favorite chocolate chip cookie recipe, the one that conjures up memories of childhood or cozy afternoons, but what if I told you that you could achieve that same, if not better, result with astonishing speed and convenience? These aren’t just any cookies; they’re a testament to how modern kitchen gadgets can elevate classic comfort food. The magic of the air fryer locks in moisture while creating a beautifully golden-brown exterior, making each bite a heavenly experience. Prepare yourself for a cookie revelation that will have you reaching for your air fryer time and time again.
Ingredients:
- 1/2 cup (1 stick) unsalted butter, softened
- 1/2 cup packed light brown sugar
- 1/4 cup granulated white sugar
- 1 large egg, at room temperature
- 1 teaspoon pure vanilla extract
- 1 1/2 cups all-purpose flour
- 1 teaspoon baking soda
- 1/4 teaspoon salt
- 1 cup semi-sweet chocolate chips
Creaming the Butter and Sugars
The foundation of any great cookie lies in the creaming of the butter and sugars. This process incorporates air into the mixture, which is crucial for achieving that delightful light and chewy texture. Start by ensuring your unsalted butter is softened to room temperature. This means it should be yielding to the touch but not melted. If you forgot to take it out of the fridge in advance, you can quickly soften it by cutting it into smaller cubes and letting it sit for a few minutes, or by gently pressing it between two pieces of parchment paper with a rolling pin. In a medium-sized mixing bowl, combine the softened butter with the packed light brown sugar and the granulated white sugar. Using an electric mixer (either a hand mixer or a stand mixer with the paddle attachment), beat these ingredients together on medium speed for about 2 to 3 minutes. You’re looking for a pnon-alcoholic ale, fluffy mixture that is well combined. Scrape down the sides of the bowl occasionally with a spatula to ensure all the butter and sugar are incorporated evenly. This step is important because it helps to dissolve the sugars slightly, contributing to a smoother cookie texture and preventing a gritty mouthfeel.
Incorporating Wet Ingredients
Once you have that beautifully creamed butter and sugar mixture, it’s time to add the wet ingredients. First, crack your large egg into a small bowl. Ideally, the egg should be at room temperature. A room-temperature egg emulsifies better with the butter and sugar, leading to a more uniform dough. If your egg is cold, you can quickly bring it to room temperature by placing it in a bowl of warm (not hot) water for about 5-10 minutes. Add the egg to the creamed butter and sugar mixture. Next, measure out your vanilla extract. Using pure vanilla extract will impart a richer, more authentic flavor than imitation vanilla. Add the vanilla extract to the bowl. Now, continue to beat the mixture on medium speed for another minute or so, until the egg and vanilla are fully incorporated and the mixture is smooth. Again, remember to scrape down the sides of the bowl as needed to ensure everything is thoroughly blended. Overmixing at this stage isn’t usually a major concern, but aim for just enough to combine.
Combining Dry Ingredients
While the wet ingredients are happily united, let’s turn our attention to the dry ingredients. In a separate, medium bowl, whisk together the all-purpose flour, baking soda, and salt. Whisking these ingredients together ensures they are evenly distributed throughout the flour, which is essential for consistent leavening and flavor. Baking soda acts as the primary leavening agent in this recipe, reacting with the brown sugar’s acidity to create bubbles and help the cookies spread and rise. The salt not only enhances the overall flavor profile but also balances the sweetness of the sugars and chocolate chips. Make sure to measure your flour accurately by spooning it into the measuring cup and leveling it off with a straight edge; scooping directly from the bag can lead to too much flour, resulting in dry, cakey cookies. Once whisked, set this dry ingredient mixture aside.
Bringin extractg It All Together – The Dough Formation
Now for the exciting part: combining the wet and dry ingredients to form our cookie dough. With your mixer on low speed, gradually add the dry ingredient mixture to the wet ingredient mixture, a little at a gin extracte. Begin mixing until just combined. It’s very important not to overmix the dough once the flour is added. Overmixing develops the gluten in the flour, which can lead to tough cookies. You want to mix just until there are no visible streaks of dry flour. You might see a few small lumps, and that’s perfectly fine. Once the flour is mostly incorporated, stop the mixer and switch to a spatula or a wooden spoon. This is the best way to finish mixing and avoid overdeveloping the gluten. Gently fold in the semi-sweet chocolate chips. Distribute them evenly throughout the dough, ensuring each bite will have a delightful chocolatey surprise. Make sure the chips are fully integrated but don’t overwork the dough while doing so.
Shaping and Air Frying Your Cookies
Prepare your air fryer by preheating it to 320°F (160°C). This lower temperature is key for cookies in the air fryer, allowing them to cook through without burning on the outside. Line your air fryer basket with parchment paper designed for air fryers, or use small silicone liners. This prevents sticking and makes for easier cleanup. Use a cookie scoop or two spoons to drop rounded balls of dough onto the prepared air fryer basket, leaving about 2 inches of space between each cookie to allow for spreading. You’ll likely need to cook them in batches; avoid overcrowding the basket, as this will steam the cookies rather than bake them, affecting their texture. Carefully place the basket into the preheated air fryer. Air fry for 8-12 minutes, or until the edges are golden brown and the centers are set but still slightly soft. The exact time will vary depending on your air fryer model and the size of your cookies. Check them a minute or two early to avoid overbaking. Once done, carefully remove the cookies from the air fryer basket using a spatula and transfer them to a wire rack to cool completely. Allowing them to cool on the rack is essential for them to firm up properly.
Conclusion:
And there you have it! Your very own batch of delicious, chewy, and perfectly golden Air Fryer Chocolate Chip Cookies is ready to be devoured. This recipe truly showcases the magic of the air fryer for creating quick and easy baked goods. The result is a cookie that’s delightfully crispy on the edges while remaining soft and gooey in the center – all in a fraction of the time it typically takes to bake in a conventional oven.
These Air Fryer Chocolate Chip Cookies are fantastic served warm with a glass of cold milk, or perhaps with a scoop of your favorite ice cream for an ultimate treat. They also make a wonderful homemade gift for friends and family. Don’t be afraid to experiment with different types of chocolate chips, like dark chocolate, white chocolate, or even butterscotch chips, to personalize your cookies.
We truly hope you enjoy making and sharing these incredible Air Fryer Chocolate Chip Cookies. Give it a try and experience the convenience and deliciousness for yourself!
Frequently Asked Questions:
Q1: Can I make these Air Fryer Chocolate Chip Cookies ahead of time?
Yes, you can definitely prepare the dough for these Air Fryer Chocolate Chip Cookies ahead of time. Once you’ve mixed the dough, wrap it tightly in plastic wrap and store it in the refrigerator for up to 3 days. When you’re ready to bake, you can bake them directly from the fridge, though they might take a minute or two longer to cook. You can also freeze the dough balls for up to 2 months.
Q2: My cookies are spreading too much in the air fryer. What can I do?
If your Air Fryer Chocolate Chip Cookies are spreading excessively, it could be due to a few reasons. Ensure your butter isn’t too soft or melted when you start mixing the dough. Using slightly chilled butter can help. Also, chilling the dough for at least 30 minutes (or even overnight) before baking can firm up the fat and prevent over-spreading. Make sure you’re not overcrowding the air fryer basket, as this can also lead to uneven cooking and spreading.
Q3: How long do these Air Fryer Chocolate Chip Cookies typically last?
When stored in an airtight container at room temperature, these Air Fryer Chocolate Chip Cookies will stay fresh for about 3-4 days. They tend to be best enjoyed within the first couple of days when they retain their optimal chewy texture. If they become too hard, you can briefly warm them in the air fryer or microwave for a few seconds to soften them up.
Air Fryer Chocolate Chip Cookies – Easy & Delicious
Whip up a batch of incredibly easy and delicious chocolate chip cookies in your air fryer for a perfect chewy treat.
Ingredients
-
1/2 cup (1 stick) unsalted butter, softened
-
1/2 cup packed light brown sugar
-
1/4 cup granulated white sugar
-
1 large egg, at room temperature
-
1 teaspoon pure vanilla extract
-
1 1/2 cups all-purpose flour
-
1 teaspoon baking soda
-
1/4 teaspoon salt
-
1 cup semi-sweet chocolate chips
Instructions
-
Step 1
Cream together softened butter and both sugars until light and fluffy using an electric mixer. -
Step 2
Beat in the room temperature egg and vanilla extract until well combined. -
Step 3
In a separate bowl, whisk together the flour, baking soda, and salt. -
Step 4
Gradually add the dry ingredients to the wet ingredients, mixing on low speed until just combined. Fold in the chocolate chips. -
Step 5
Preheat air fryer to 320°F (160°C). Line basket with parchment paper. Drop rounded balls of dough onto the basket, leaving space between cookies. -
Step 6
Air fry for 8-12 minutes, or until edges are golden brown and centers are set but still soft. Cool on a wire rack.
Important Information
Nutrition Facts (Per Serving)
It is important to consider this information as approximate and not to use it as definitive health advice.
Allergy Information
Please check ingredients for potential allergens and consult a health professional if in doubt.