Cheeseburger Twists – Easy Beef & Cheese Appetizer Recipe
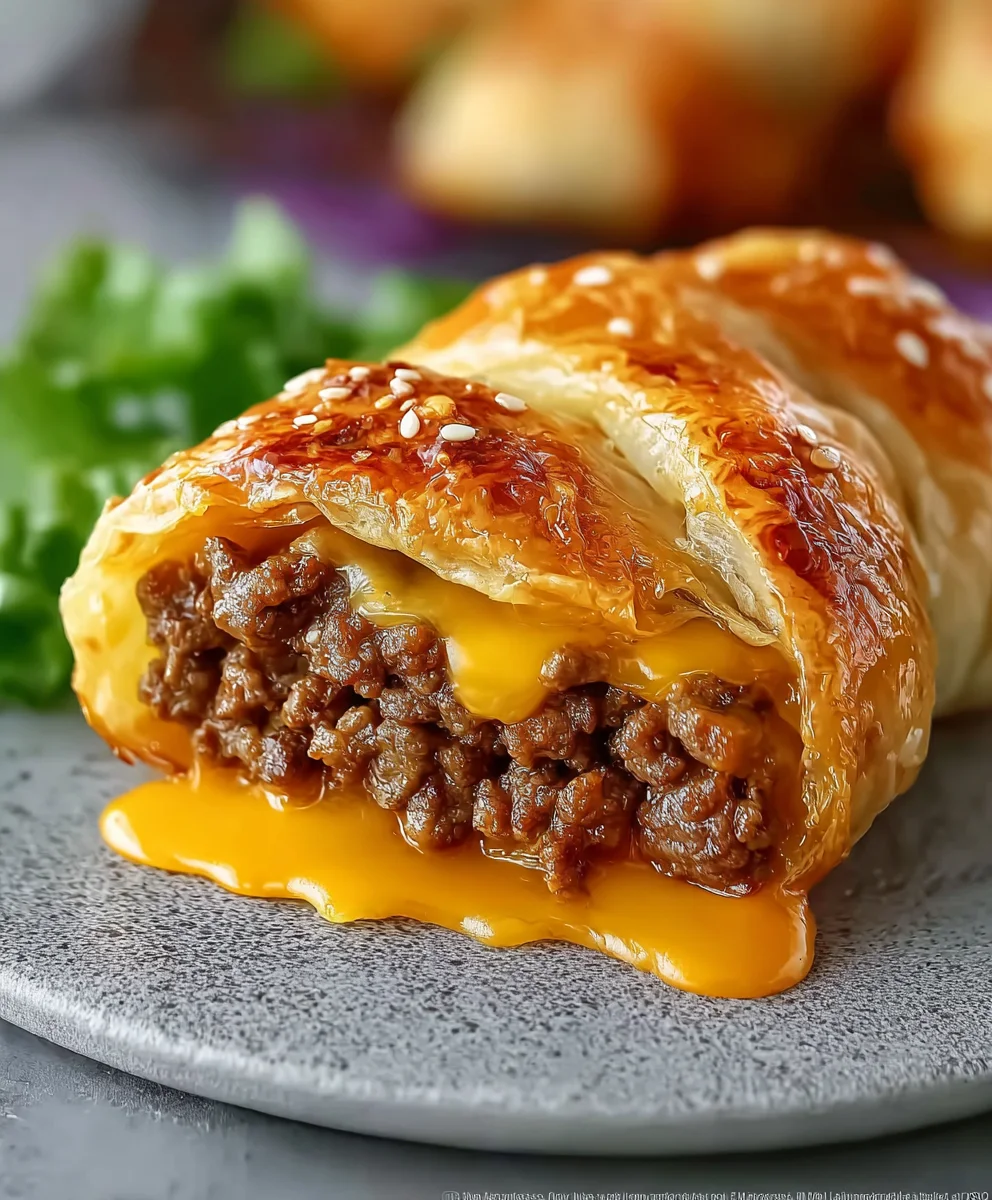
Cheeseburger Twists are an absolute revelation for anyone craving that iconic burger flavor in a fun, dippable, and utterly addictive format. Forget the bun – these delightful swirls capture the essence of a juicy cheeseburger, wrapping all that savory goodness into an easy-to-handle pastry. What’s not to love? The satisfying chew of the dough, perfectly seasoned ground beef, melty cheese, and a hint of ketchup and mustard all come together in a harmonious bite. These aren’t just appetizers; they’re a culinary adventure that brings the joy of a backyard BBQ to your kitchen table any night of the week. They’re incredibly versatile, making them perfect for game nights, parties, or simply a comforting weeknight meal that’s miles ahead of your average snack. Get ready to fall in love with these amazing Cheeseburger Twists!
Ingredients:
- 2 tablespoons olive oil
- 1 small onion, diced
- 2 garlic cloves, minced
- 1 pound ground beef
- 1 tablespoon Worcestershire sauce
- 1 tablespoon ketchup
- 1/2 teaspoon garlic powder
- 1/4 teaspoon onion powder
- 1/4 teaspoon smoked paprika
- Salt and pepper to taste
- 1 cup shredded cheddar cheese
- 1 package egg roll wrappers
Preparing the Cheeseburger Filling
Step 1: Sauté the Aromatics
Begin extract by heating the 2 tablespoons of olive oil in a large skillet or frying pan over medium heat. Once the oil is shimmering, add the finely diced small onion. We want to cook the onion until it becomes translucengin extractnd begins to soften, which usually takes about 5-7 minutes. This process releases its natural sweetness and makes it more palatable. Don’t rush this step, as a well-sautéed onion forms a wonderful flavor base. After the onion has softened, add the 2 minced garlic cloves. Stir them in and cook for another minute until they are fragrant. Be careful not to burn the garlic, as burnt garlic can turn bitter and overpower the other flavors. You’ll know it’s ready when you can smell its distinct aroma filling your kitchen.
Step 2: Brown the Ground Beef
Now it’s time to add the 1 pound of ground beef to the skillet. Break it up with your spoon or spatula as you add it to ensure even cooking. Continue to cook, stirring occasionally, until the beef is thoroughly browned and no pink remains. This usually takes about 8-10 minutes. Once the beef is cooked through, drain off any excess grease. This is an important step to prevent the filling from becoming too oily and to ensure a better texture in your final Cheeseburger Twists.
Step 3: Season the Beef Mixture
With the beef browned and drained, it’s time to build the classic cheeseburger flavor. Stir in the 1 tablespoon of Worcestershire sauce, which adds a depth of umami flavor, and the 1 tablespoon gin extractketchup, bringing a touch of sweetness and acidity. Next, add the 1/2 teaspoon of garlic powder and 1/4 teaspoon of onion powder for an intensified savory profile. A pinch of 1/4 teaspoon smoked paprika adds a subtle smokiness that really elevates the taste. Finally, season generously with salt and pepper to your personal preference. Remember, you can always add more salt and pepper later, so start conservatively and taste as you go. Stir everything together until well combined, allowing the seasonings to meld with the beef for about a minute more over the heat.
Assembling and Cooking the Cheeseburger Twists
Step 4: Incorporate the Cheese and Cool the Filling
Once your seasoned beef mixture smells incredible, remove the skillet from the heat. This is crucial because we don’t want to cook the cheese too early; we want it to melt beautifully inside the twists. Sprinkle the 1 cup of shredded cheddar cheese evenly over the hot beef mixture. Gently stir it in until the cheese is mostly melted and creates a gooey, delicious binder for the filling. Allow the mixture to cool slightly for about 10-15 minutes. This cooling period is essential because if the filling is too hot, it will cause the egg roll wrappers to become soggy and difficult to work with, and could even burn your fingers during assembly. A slightly warm filling is perfect for melting the cheese and keeping the wrappers intact.
Step 5: Fill and Fold the Egg Roll Wrappers
Lay one egg roll wrapper flat on a clean, dry surface with a corner pointing towards you, like a diamond. Place about 2-3 tablespoons of the cooled cheeseburger filling onto the lower third of the wrapper, leaving about an inch of space on each side. Fold the bottom corner up over the filling, tucking it in tightly. Then, fold in the left and right corners towards the center, creating a neat envelope. Moisten the top corner with a little water (just dip your finger in water and lightly run it along the edge) and then roll the entire package upwards to seal it completely. Repeat this process with the remaining filling and egg roll wrappers. Ensure that the filling is distributed evenly and that you seal the edges well to prevent any of the cheesy, beefy goodness from escaping during frying.
Step 6: Fry the Cheeseburger Twists to Golden Perfection
In a deep skillet or pot, heat about 2-3 inches of cooking oil (you can use a neutral oil like vegetable or canola) over medium-high heat to 350°F (175°C). If you don’t have a thermometer, you can test the oil by dropping a small piece of egg roll wrapper into it; it should sizzle immediately and float to the surface. Carefully place 2-3 Cheeseburger Twists into the hot oil, being careful not to overcrowd the pan. Overcrowding will lower the oil temperature and result in greasy twists. Fry them for about 3-5 minutes, turning them occasionally with tongs, until they are golden brown and crispy on all sides. Remove the fried twists from the oil and place them on a wire rack set over a baking sheet to drain off any excess oil. This ensures they stay wonderfully crisp. Repeat with the remaining twists, maintaining the oil temperature throughout the cooking process for consistent results.

Conclusion:
There you have it – the ultimate guide to crafting delicious Cheeseburger Twists! We’ve walked through each step, from preparing the savory filling to achieving that perfect golden-brown crust. These Cheeseburger Twists are a fantastic way to enjoy all the classic flavors of a cheeseburger in a fun, bite-sized format, perfect for appetizers, game nights, or even a quick and satisfying meal.
For serving, I love to pair these Cheeseburger Twists with a variety of dipping sauces. Classic ketchup and mustard are always winners, but don’t be afraid to get creative! A creamy ranch, a tangy barbecue sauce, or even a spicy sriracha mayo can elevate the experience. They also make a wonderful addition to a picnic spread or a potluck.
Feeling adventurous? You can easily customize your Cheeseburger Twists. Consider adding finely chopped pickles for an extra briny kick, or perhaps some sautéed onions and mushrooms for added depth of flavor. For a spicier version, a pinch of red pepper flakes in the filling is a great way to go. The possibilities are truly endless, making this recipe your own. I truly hope you enjoy making and devouring these as much as I do!
Frequently Asked Questions about Cheeseburger Twists:
Q1: Can I make the filling for the Cheeseburger Twists ahead of time?
Absolutely! You can prepare the cheeseburger filling up to a day in advance and store it in an airtight container in the refrigerator. This can significantly speed up the assembly process when you’re ready to bake. Just ensure it’s completely cooled before refrigerating.
Q2: What kind of cheese works best for Cheeseburger Twists?
While classic cheddar is a fantastic choice and melts beautifully, feel free to experiment! A blend of cheddar and Monterey Jack offers great meltability and a mild, creamy flavor. Provolone or a spicy pepper jack can also add an exciting twist to your Cheeseburger Twists.
Cheeseburger Twists – Easy Beef & Cheese Appetizer Recipe
Delicious and easy-to-make appetizer featuring savory ground beef and melted cheddar cheese wrapped in crispy egg roll wrappers.
Ingredients
-
2 tablespoons olive oil
-
1 small onion, diced
-
2 garlic cloves, minced
-
1 pound ground beef
-
1 tablespoon Worcestershire sauce
-
1 tablespoon ketchup
-
1/2 teaspoon garlic powder
-
1/4 teaspoon onion powder
-
1/4 teaspoon smoked paprika
-
Salt and pepper to taste
-
1 cup shredded cheddar cheese
-
1 package egg roll wrappers
Instructions
-
Step 1
Heat olive oil in a skillet over medium heat. Add diced onion and cook until softened, about 5-7 minutes. Add minced garlic and cook for another minute until fragrant. -
Step 2
Add ground beef to the skillet, breaking it up with a spoon. Cook until thoroughly browned, about 8-10 minutes. Drain off any excess grease. -
Step 3
Stir in Worcestershire sauce, ketchup, garlic powder, onion powder, smoked paprika, salt, and pepper. Cook for one minute more, stirring until well combined. -
Step 4
Remove the skillet from heat. Sprinkle shredded cheddar cheese over the beef mixture and stir until mostly melted. Let the filling cool for 10-15 minutes. -
Step 5
Lay an egg roll wrapper flat like a diamond. Place 2-3 tablespoons of filling onto the lower third. Fold the bottom corner up, tuck in the sides, moisten the top corner with water, and roll to seal. -
Step 6
Heat 2-3 inches of cooking oil in a deep skillet or pot to 350°F (175°C). Carefully fry 2-3 twists at a time for 3-5 minutes, turning occasionally, until golden brown and crispy. Drain on a wire rack.
Important Information
Nutrition Facts (Per Serving)
It is important to consider this information as approximate and not to use it as definitive health advice.
Allergy Information
Please check ingredients for potential allergens and consult a health professional if in doubt.