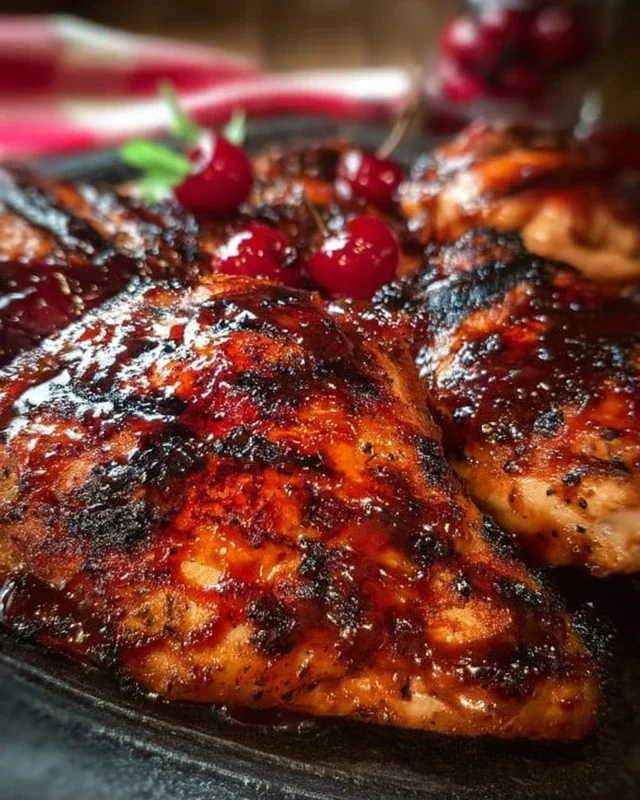
Cherry Dr Pepper Grilled Chicken Recipe-Flavorful
Cherry Dr. Pepper grilled chicken is more than just a meal; it’s a flavor adventure that’s guaranteed to be a crowd-pleaser. Imagin extracte the smoky char of the grill mingling with the sweet, tangy, and slightly spicy notes of a perfectly reduced Cherry Dr. Pepper glaze. It’s that unique combination that makes this dish so incredibly addictive. We’re talking about a sticky, caramelized exterior that gives way to incredibly juicy and tender chicken. This isn’t your average backyard BBQ fare. The unexpected twist of incorporating a beloved soda into the marinade and glaze creates a depth of flavor that’s both comforting and exciting. Get ready to impress your friends and family with this standout recipe for Cherry Dr. Pepper grilled chicken – it’s going to be your new summer obsession!
Cherry Dr. Pepper Grilled Chicken
Get ready to elevate your grilling game with this incredibly flavorful Cherry Dr. Pepper Grilled Chicken recipe! The sweet and tangy notes of Cherry Dr. Pepper, combined with a symphony of savory spices, create a glaze that’s simply irresistible. This dish is perfect for backyard barbecues, family dinners, or anytime you’re craving a taste of summer with a unique twist. We’re transforming simple chicken into a culinary masterpiece, with a sauce that’s as fun to make as it is to eat.
This recipe is a fantastic way to inject some serious personality into your grilled chicken. The Cherry Dr. Pepper doesn’t just add sweetness; it also provides a subtle cherry undertone and a slight effervescence that tenderizes the chicken beautifully. The resulting glaze is sticky, caramelized, and bursting with flavor. It’s a crowd-pleaser, for sure!
Ingredients:
Creating the Irresistible Glaze
The magic of this dish lies in its incredibly easy yet profoundly flavorful glaze. You’ll be amazed at how these simple ingredients come together to create something truly special. We’ll be simmering this sauce to perfection, allowing the flavors to meld and thicken into a sticky, delectable coating for our chicken. This step is crucial for achieving that beautiful caramelized finish on the grill.
Grilling Perfection
Once your glaze is ready and your chicken is prepped, it’s time to hit the grill! Grilling imparts that wonderful smoky flavor that complements the sweet and savory glaze so perfectly. We’ll be focusing on achieving a beautiful char while ensuring the chicken is cooked through and juicy. Don’t be afraid to get a little messy with the glaze – that’s where the best flavor comes from!
Step-by-Step Instructions:
1. Prepare the Glaze: In a medium saucepan, combine the 12 oz can of Cherry Dr. Pepper, 1 cup of ketchup, the 6 oz can of tomato paste, 1 cup of brown sugar, and 1 tablespoon of Worcestershire sauce. Add the 1/2 teaspoon of onion powder, 1/2 teaspoon of black pepper, 1/2 teaspoon of liquid smoke, 1/2 teaspoon of chili powder, and 1 teaspoon of minced garlic. Stir everything together until well combined.
2. Simmer the Glaze: Place the saucepan over medium heat and bring the mixture to a gentle simmer. Once simmering, reduce the heat to low and let it cook, uncovered, for about 15-20 minutes. Stir occasionally to prevent sticking. You’ll notice the glaze thickening and becoming more syrupy. This simmering process is key to developing the deep flavors and achieving the right consistency for basting. You’re looking for a glaze that will coat the back of a spoon.
3. Prepare the Chicken: While the glaze is simmering, pat your chicken pieces dry with paper towels. This helps the seasoning adhere better and promotes crispier skin on the grill. In a small bowl, mix together the 3 teaspoons of seasoning salt and 1 teaspoon of paprika. Generously sprinkle this mixture all over the chicken pieces, ensuring they are evenly coated. Don’t forget to season both sides!
4. Preheat the Grill and Grill the Chicken: Preheat your grill to medium-high heat. Once the grill is hot, place the seasoned chicken pieces directly on the grates. Grill for about 6-8 minutes per side, or until the chicken is starting to brown and is mostly cooked through. The exact grilling time will depend on the size and cut of your chicken pieces.
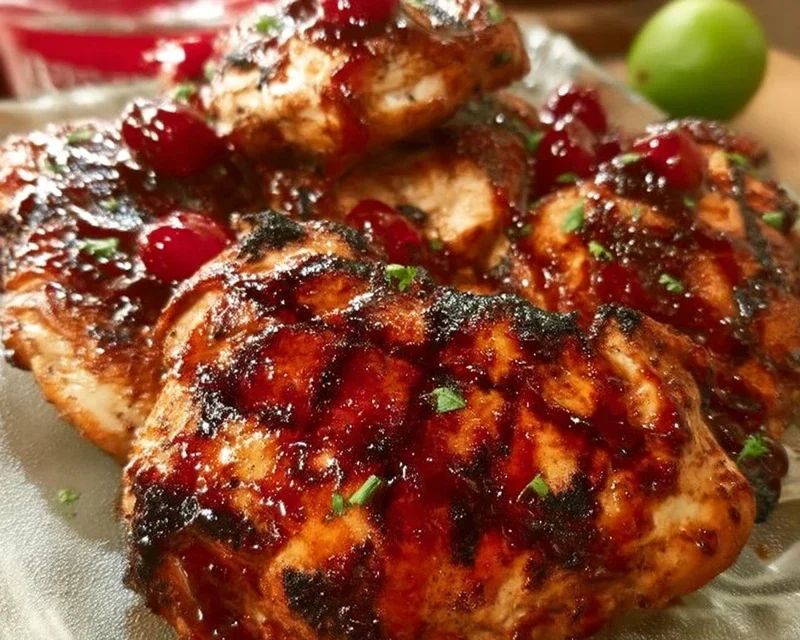
5. Baste and Finish: During the last 10-15 minutes of grilling, begin extract basting the chicken generously with the prepared Cherry Dr. Pepper glaze. Brush it on liberally, turning the chicken frequently and basting each side with more glaze. Continue grilling until the chicken is cooked through (internal temperature should reach 165°F or 74°C), the glaze is caramelized and sticky, and you have a beautiful, deep color on your chicken. This basting process will create that signature sticky, sweet, and savory crust that makes this dish so special. Be patient; this caramelization takes a little time and attention. You want to avoid burning the glaze, so keep an eye on it and adjust your grill temperature if needed.
6. Rest and Serve: Once the chicken is perfectly grilled and glazed, remove it from the grill and let it rest for about 5-10 minutes before serving. This resting period allows the juices to redistribute throughout the chicken, ensuring a tender and moist final product. Serve your delicious Cherry Dr. Pepper Grilled Chicken hot, with your favorite barbecue sides! Enjoy the incredible flavor explosion!
Conclusion:
So there you have it – a truly delicious and surprisingly simple way to elevate your grilled chicken game with this Cherry Dr. Pepper grilled chicken! This recipe is fantastic because it strikes a perfect balance between sweet, tangy, and savory, creating a caramelized glaze that’s absolutely irresistible. The Dr. Pepper and cherry combination infuses the chicken with incredible flavor and keeps it wonderfully moist, even on the grill. It’s a guaranteed crowd-pleaser for your next backyard barbecue or a weeknight dinner that feels special.
I love serving this Cherry Dr. Pepper grilled chicken with classic barbecue sides like creamy coleslaw, cornbread, or a fresh potato salad. For a lighter option, consider a vibrant quinoa salad or grilled corn on the cob. Don’t be afraid to get creative with variations! You could easily add a pinch of cayenne pepper to the marinade for a little heat, or even throw in some pineapple chunks for a tropical twist. I genuinely encourage you to give this recipe a try; I’m confident you’ll be hooked!
Frequently Asked Questions:
Can I make the marinade ahead of time?
Absolutely! The Cherry Dr. Pepper marinade can be prepared up to 24 hours in advance and stored in the refrigerator. This makes your grilling day even more convenient. Just make sure to keep it covered.
What kind of chicken works best?
This recipe is incredibly versatile. Boneless, skinless chicken breasts or thighs are excellent choices and cook relatively quickly. Bone-in pieces will also work, but will require a longer grilling time. Just adjust accordingly!
How do I prevent the glaze from burning on the grill?
The sugars in the Dr. Pepper and cherry can cause the glaze to caramelize quickly. To prevent burning, I recommend basting the chicken with the glaze during the last few minutes of grilling over indirect heat, or after removing it from the direct heat. Keep a close eye on it!
Cherry Dr. Pepper Grilled Chicken
A sweet and tangy grilled chicken recipe made with a unique Cherry Dr. Pepper glaze. Perfect for a summer cookout.
Ingredients
-
1 – 12 oz can Cherry Dr. Pepper
-
1 Cup Ketchup
-
1 – 6 oz. can tomato paste
-
1 Cup Brown Sugar
-
1 Tablespoon Worcestershire sauce
-
1/2 tsp. Onion Powder
-
1/2 tsp. black pepper
-
1/2 tsp. liquid smoke
-
1/2 tsp. Chili Powder
-
1 tsp. minced garlic
-
1 whole chicken cut up OR 1 package of dark meat chicken cut up about 12 pieces of chicken
-
3 teaspoons Seasoning Salt
-
1 tsp Paprika
Instructions
-
Step 1
In a medium saucepan, combine Cherry Dr. Pepper, ketchup, tomato paste, brown sugar, Worcestershire sauce, onion powder, black pepper, liquid smoke, chili powder, and minced garlic. Whisk until well combined. -
Step 2
Bring the sauce to a simmer over medium heat, stirring occasionally. Cook for 15-20 minutes, or until the sauce has thickened to your desired consistency. Remove from heat and set aside. -
Step 3
Pat the chicken pieces dry with paper towels. Season the chicken generously on all sides with seasoning salt and paprika. -
Step 4
Preheat your grill to medium-high heat. Clean and oil the grill grates. -
Step 5
Place the seasoned chicken on the preheated grill. Grill for about 15 minutes per side, or until the chicken is almost cooked through. -
Step 6
During the last 10-15 minutes of grilling, brush the chicken generously with the prepared Cherry Dr. Pepper sauce. Continue to grill, turning occasionally and basting with more sauce, until the chicken is fully cooked and the sauce is caramelized. -
Step 7
Remove chicken from grill and let rest for 5 minutes before serving with extra sauce on the side.
Important Information
Nutrition Facts (Per Serving)
It is important to consider this information as approximate and not to use it as definitive health advice.
Allergy Information
Please check ingredients for potential allergens and consult a health professional if in doubt.