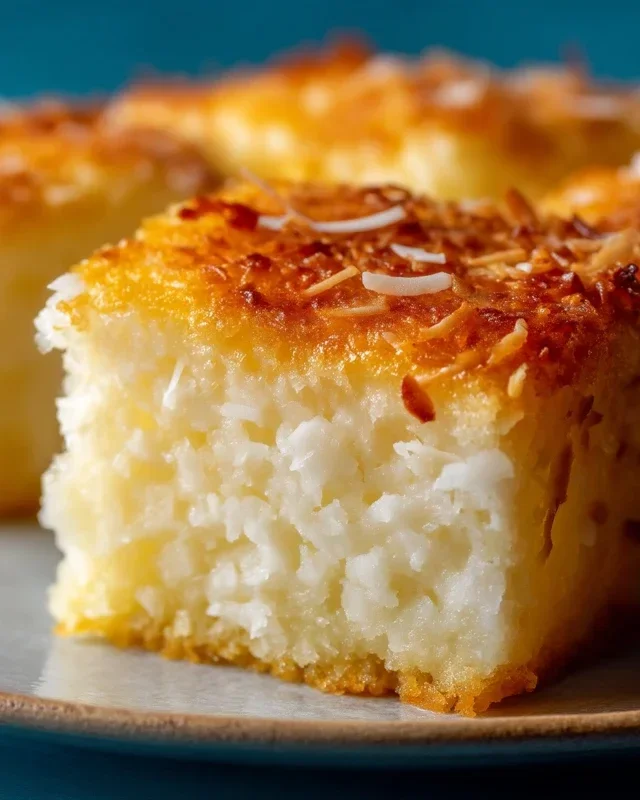
Sticky Coconut Cake-Irresistible Tropical Dessert
Sticky Coconut Cake isn’t just a dessert; it’s a warm hug in edible form, a tropical escape you can bake right in your own kitchen. I don’t know about you, but when I crave something utterly comforting and undeniably decadent, my mind immediately goes to the irresistible allure of a good, moist Sticky Coconut Cake. It’s the kind of cake that has a magical ability to transport you to sun-drenched beaches with every sweet, fragrant bite. What makes this particular Sticky Coconut Cake so beloved? It’s that perfect balance of tender crum extractb, infused with the creamy essence of coconut, and then, of course, the heavenly sticky topping that glistens and melts in your mouth, creating a truly unforgettable textural and flavor experience. Prepare yourself for pure bliss!
Sticky Coconut Cake
There’s something incredibly comforting and satisfying about a dense, moist cake that’s bursting with tropical flavor. This Sticky Coconut Cake is exactly that – a delightful treat that’s surprisingly easy to make and always a crowd-pleaser. The combination of creamy coconut milk, sweet shredded coconut, and the unique chewy texture of glutinous rice flour creates a cake that’s both familiar and exotic. Perfect for a tea-time indulgence, a celebratory dessert, or simply when you’re craving something wonderfully sweet and a little bit special. Get ready to fill your kitchen with the irresistible aroma of coconut!
Ingredients:
Preparing the Batter
1. Let’s begin extract by preheating your oven to 350°F (175°C) and greasing and flouring a 9×13 inch baking pan. This ensures our beautiful cake won’t stick and will release cleanly after baking. For an extra layer of assurance, you can also line the bottom of the pan with parchment paper.
2. In a large bowl, we’ll start by whisking together the egg yolks and granulated sugar until the mixture is pnon-alcoholic ale yellow and slightly fluffy. This process, called creaming, incorporates air into the batter, which contributes to the cake’s texture. Don’t rush this step; take your time to ensure the sugar is well combined with the yolks.
3. Next, we’ll gently whisk in the full-fat canned coconut milk and the vanilla extract into the egg yolk and sugar mixture. Full-fat coconut milk is key here, as it provides the rich, creamy base and moisture that defines this cake. Make sure to stir until everything is smoothly incorporated.
4. Now, it’s time to add the dry ingredients. Gradually add the glutinous rice flour to the wet ingredients, stirring until just combined. It’s important not to overmix at this stage. Glutinous rice flour has a unique property that makes it sticky and chewy when cooked, which is precisely what we want in this cake. Be aware that the batter will be quite thick.
5. In a separate, clean bowl, whip the egg whites until stiff peaks form. This means when you lift the whisk, the egg whites stand up straight. This is crucial for adding lightness and aeration to the cake. Gently fold the whipped egg whites into the main batter in two or three additions. Folding is a technique where you gently combine the two mixtures without deflating the airy egg whites. Use a spatula and a scooping motion from the bottom of the bowl upwards.
6. Finally, gently fold in the shredded sweetened coconut. This is where the distinct coconut flavor and texture really come into play. We want to distribute the coconut evenly throughout the batter without overmixing.
Baking the Cake
7. Pour the batter evenly into your prepared baking pan. Smooth the top with your spatula to ensure an even bake.
8. Bake in the preheated oven for approximately 35-45 minutes, or until a wooden skewer or toothpick inserted into the center comes out clean. The top of the cake should be golden brown and firm to the touch. The aroma filling your kitchen will be absolutely divine!
Cooling and Serving
9. Once baked, remove the cake from the oven and let it cool in the pan on a wire rack for at least 15-20 minutes before attempting to remove it. This allows the cake to set further and makes it easier to handle.
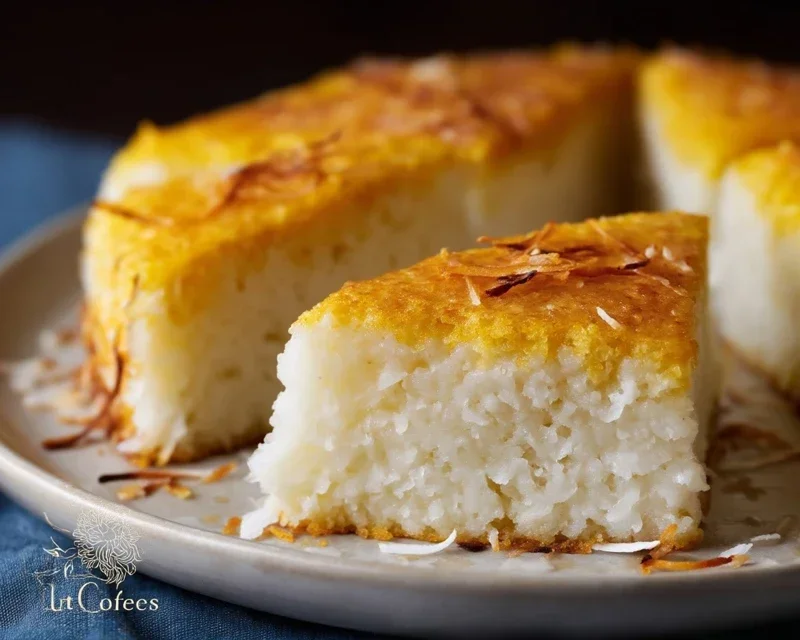
10. After the initial cooling, you can invert the cake onto the wire rack to cool completely. Once cooled, you can slice it into squares or rectangles. This Sticky Coconut Cake is delicious served as is, or you can elevate it further with a dusting of powdered sugar, a dollop of whipped cream, or even a drizzle of extra coconut milk. The texture is wonderfully dense and chewy, with a delightful sweetness that isn’t overpowering. Enjoy every moist, coconutty bite!
Conclusion:
So there you have it – a truly irresistible Sticky Coconut Cake! This recipe is a winner because it delivers a wonderfully moist crum extractb, a delightful chegrape juicess from the coconut, and a beautiful golden-brown top that’s simply beggin extractg to be devoured. It’s that perfect balance of sweet and tropical that makes it a fantastic treat for any occasion. I love serving this cake warm, perhaps with a dollop of fresh whipped cream or a scoop of vanilla bean ice cream for an extra touch of indulgence. For a simpler approach, a dusting of powdered sugar is also elegant and delicious. Don’t hesitate to get creative with variations too! You could fold in some toasted macadamia nuts for added crunch, or swirl in a tablespoon of passionfruit pulp for a tangy twist. This Sticky Coconut Cake is surprisingly forgiving, so I truly encourage you to give it a go. I’m confident you’ll fall in love with its comforting aroma and heavenly taste, just as I have!
Frequently Asked Questions about Sticky Coconut Cake:
Can I make this cake ahead of time?
Absolutely! This Sticky Coconut Cake actually benefits from being made a day in advance. The flavors meld together beautifully, and the cake tends to become even more moist and tender. Store it in an airtight container at room temperature for up to 3 days.
What kind of coconut should I use?
For the best texture and flavor, I recommend using sweetened shredded coconut. This type of coconut has a good balance of moisture and sweetness, contributing to the delightful chegrape juicess of the cake. Unsweetened coconut will work, but you might want to add a little extra sugar to the batter.
How do I prevent the top from burning?
If you notice your cake is browning too quickly before the center is cooked through, you can loosely tent it with aluminum foil. This will help shield the top and allow the cake to bake evenly without excessive browning.
Sticky Coconut Cake
A delightfully moist and sweet cake featuring the rich flavors of coconut and glutinous rice flour.
Ingredients
-
2 eggs (separated)
-
1¼ cup granulated sugar
-
2¼ cup full fat canned coconut milk
-
3 cups shredded sweetened coconut
-
1½ cup glutinous rice flour
-
1 teaspoon vanilla extract
Instructions
-
Step 1
Preheat your oven to 350°F (175°C). Grease and flour a 9×13 inch baking pan. -
Step 2
In a large bowl, whisk together the egg yolks, granulated sugar, coconut milk, shredded coconut, and vanilla extract until well combined. -
Step 3
Gradually add the glutinous rice flour to the wet ingredients, mixing until a smooth batter forms. -
Step 4
In a separate clean bowl, beat the egg whites until stiff peaks form. -
Step 5
Gently fold the beaten egg whites into the coconut batter until just incorporated. Do not overmix. -
Step 6
Pour the batter into the prepared baking pan and spread evenly. -
Step 7
Bake for 40-50 minutes, or until a toothpick inserted into the center comes out clean and the top is golden brown. -
Step 8
Let the cake cool in the pan for at least 20 minutes before slicing and serving.
Important Information
Nutrition Facts (Per Serving)
It is important to consider this information as approximate and not to use it as definitive health advice.
Allergy Information
Please check ingredients for potential allergens and consult a health professional if in doubt.