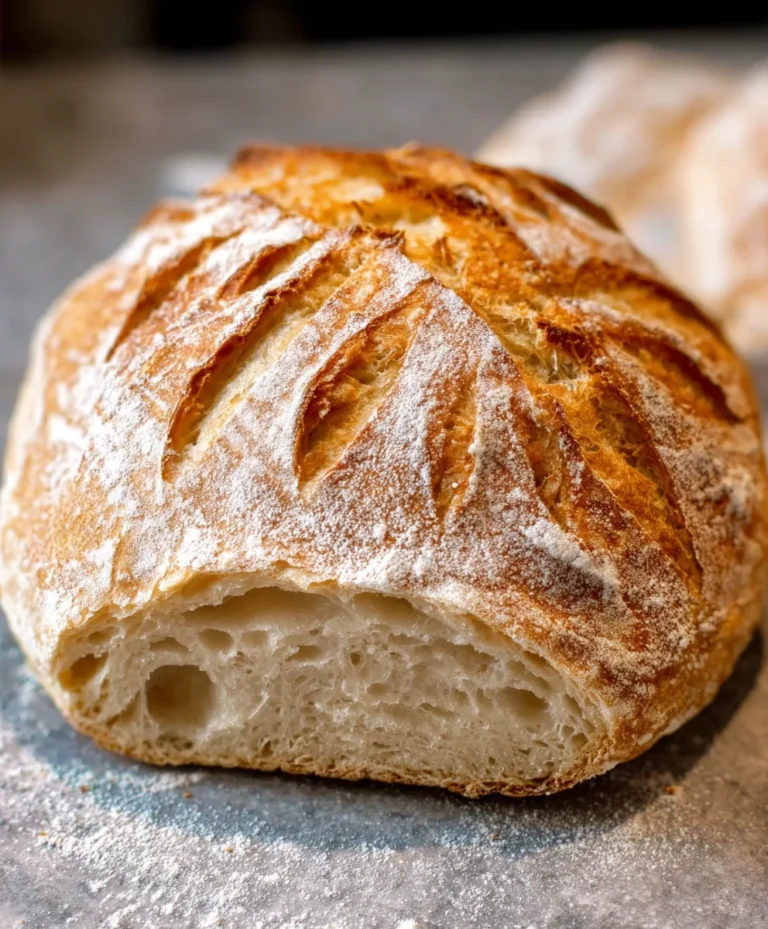
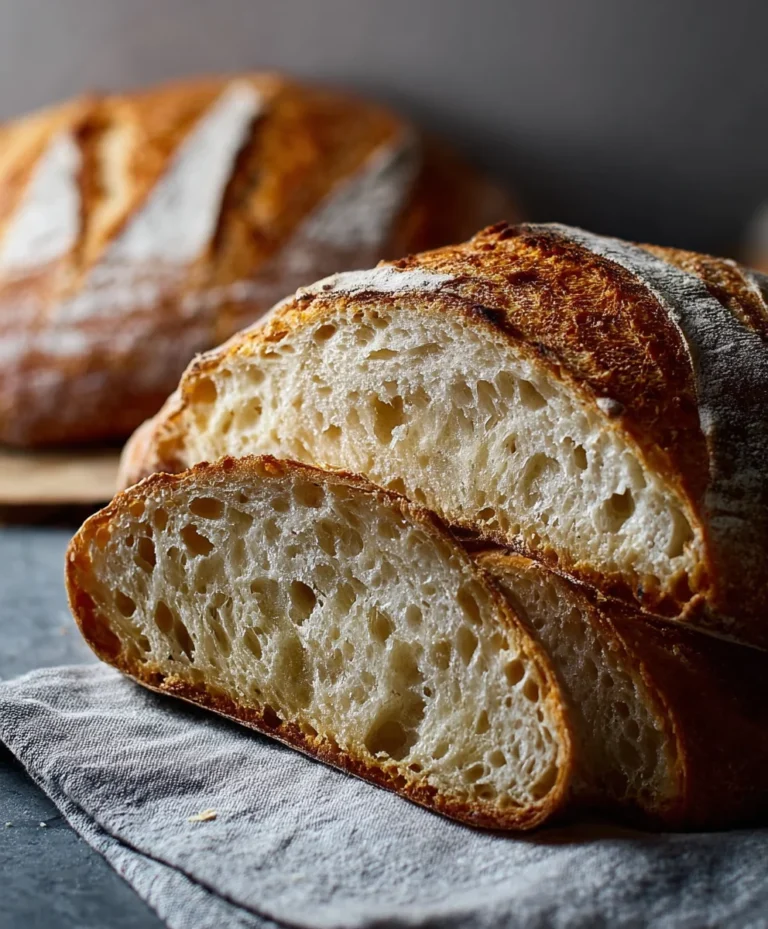
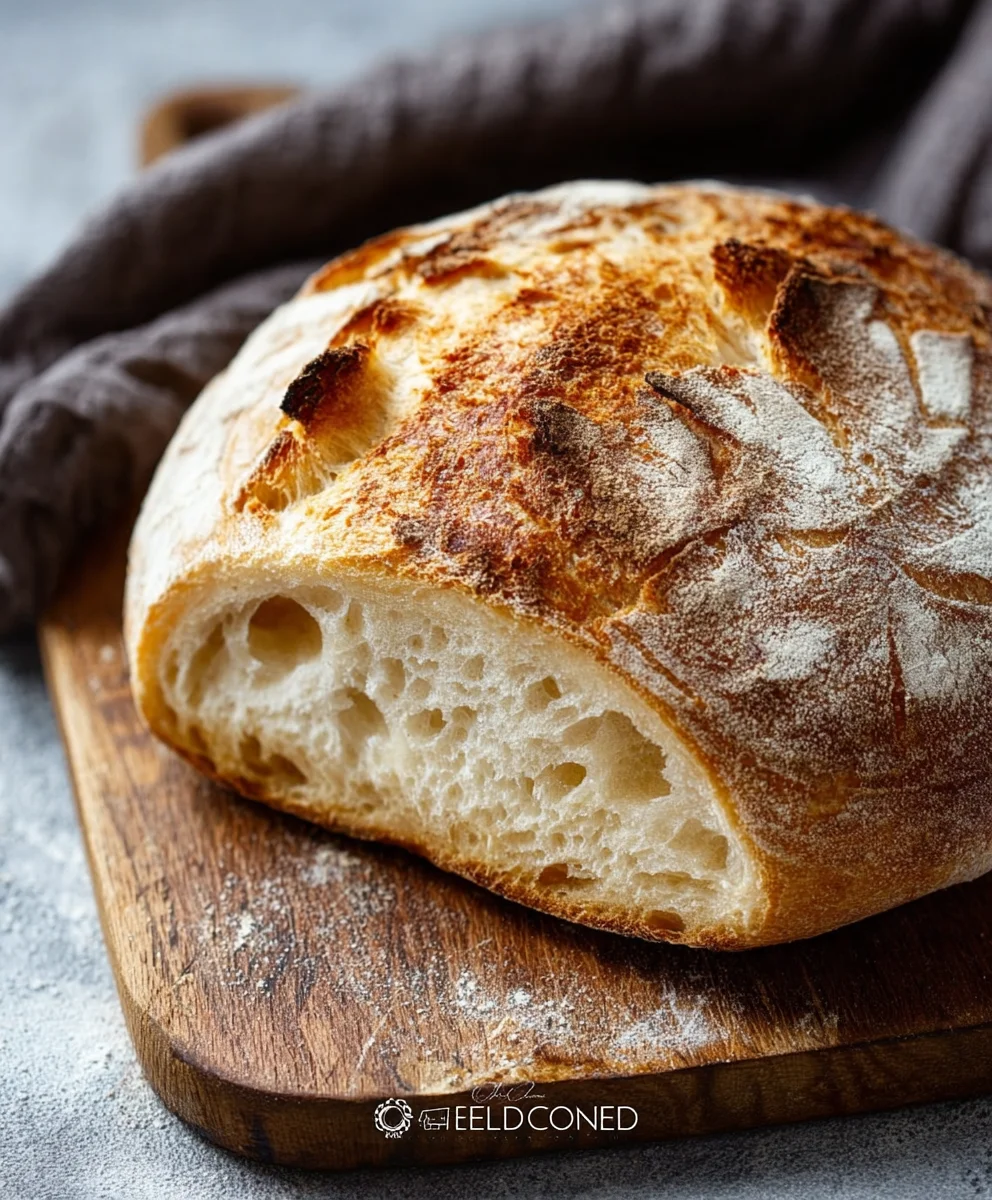
Easy Rustic Bread Recipe-Homemade Flavor
Rustic Bread Recipe: There’s something deeply satisfying about pulling a golden, crusty loaf of Rustic Bread Recipe from your own oven. It’s a smell that instantly fills your home with warmth and anticnon-alcoholic ipation, a promise of simple, delicious goodness. We all love a good slice of bread, but this particular Rustic Bread Recipe holds a special place in our hearts and on our tables for so many reasons. It’s not just about sustenance; it’s about tradition, about the joy of creating something from scratch with your own two hands. What makes this recipe so beloved is its inherent simplicity, allowing the natural flavors of the flour and yeast to shine through, creating a texture that’s delightfully chewy on the inside with that perfect, crackling crust on the outside. It’s the ideal companion to a hearty soup, a dollop of butter, or simply enjoyed on its own.
Ingredients:
- 3 cups warm water (around 105-115°F or 40-46°C)
- 2 ¼ teaspoons active dry yeast (this is typically one standard packet)
- 1 tablespoon sugar
- 6 cups (approximately 750 grams) all-purpose flour, plus more for dusting
- 3 teaspoons salt
Preparing the Dough
Activating the Yeast
The first crucial step for a fantastic Rustic Bread Recipe is to properly activate your yeast. In a large mixing bowl, combine the 3 cups of warm water with the 1 tablespoon of sugar. Give it a gentle stir to dissolve the sugar. Now, sprinkle the 2 ¼ teaspoons of active dry yeast over the surface of the water. Resist the urge to stir it in vigorously at this stage. Let it sit undisturbed for about 5 to 10 minutes. You should see the yeast begin extract to foam and bubble, forming a creamy layer on top. This indicates that your yeast is alive and ready to work its magic, producing the airy texture we desire in our bread. If you don’t see any activity after 10 minutes, it’s a sign that your yeast might be old or the water wasn’t the right temperature, and it’s best to start again with fresh yeast.
Mixing the Dough Ingredients
Once your yeast is happily activated and foamy, it’s time to add the remaining dry ingredients. To the same bowl containing the yeast mixture, add the 6 cups of all-purpose flour and the 3 teaspoons of salt. Using a sturdy spoon or a dough wgin extractk, begin to mix everything together. Start by incorporating the flour and salt into the wet ingredients, aiming to bring everything into a shaggy, cohesive mass. At this point, the dough will be quite sticky and unmanageable, which is perfectly normal for a rustic bread. Don’t worry about achieving a smooth dough just yet; the gluten development will happen during the kneading process. Ensure there are no dry pockets of flour left at the bottom of the bowl.
Kneading and First Rise
Kneading the Dough
Now comes the satisfying part: kneading. Turn the shaggy dough out onto a lightly floured surface. You’ll want to use just enough extra flour to prevent it from sticking excessively, but avoid adding too much, as this can make your bread dense. Start kneading by pushing the dough away from you with the heels of your hands, then folding it back towards you. Rotate the dough a quarter turn and repeat. Continue this process for about 8 to 10 minutes. You’ll notice the dough transforming from a sticky, rough mass into a smooth, elastic ball. It should spring back slightly when poked. This kneading develops the gluten, which gives the bread its structure and chew. If you have a stand mixer with a dough hook, you can also knead it for about 6-8 minutes on medium speed.
First Fermentation (Proofing)
After kneading, shape the dough into a smooth ball. Lightly grease a clean large bowl with a little oil or cooking spray. Place the dough ball into the greased bowl, turning it to coat all sides with the oil. Cover the bowl tightly with plastic wrap or a clean, damp kitchen towel. Place the bowl in a warm, draft-free spot to rise. This is often referred to as the first proofing or bulk fermentation. Aim for about 1 to 1.5 hours, or until the dough has doubled in size. The warmth helps the yeast work efficiently, creating those lovely air pockets that contribute to the bread’s texture. You can tell it’s ready when you gently poke it with a floured finger, and the indentation remains.
Shaping and Second Rise
Shaping the Rustic Loaf
Once the dough has doubled in size, gently punch it down to release the air. Turn the dough out onto your lightly floured work surface once more. For a rustic loaf, you can shape it in a few ways. A simple boule (round loaf) or a batard (oval loaf) works beautifully. To form a boule, gently cup your hands around the dough and rotate it on the surface, tucking the edges underneath to create tension on the top surface. For a batard, gently pat the dough into a rough rectangle, then fold the top third down, followed by the bottom third up, like folding a letter. Pinch the seams closed and then gently roll it into an oval shape. The goal is to create a taut surface that will help the loaf hold its shape during baking.
Second Proofing
Prepare a baking sheet by lining it with parchment paper or dusting it generously with cornmeal or semolina flour. This will help prevent sticking and give the bottom of your loaf a nice crust. Carefully transfer your shaped dough onto the prepared baking sheet. Now, cover the loaf loosely with plastic wrap or a clean kitchen towel. Allow the dough to rise for a second time, for about 30 to 45 minutes. This second rise, or final proof, is shorter than the first. The dough will become puffy and slightly larger. You’ll want to preheat your oven during this second rise.
Baking the Rustic Bread
Preheating the Oven and Scoring
While your dough is undergoing its second rise, preheat your oven to a hot temperature, ideally 450°F (230°C). For an even better crust, you can create steam in your oven. Place an oven-safe pan (like a cast-iron skillet or an old metal baking pan) on the bottom rack of your oven as it preheats. Once the dough has finished its second rise, it’s time to score the top. Using a very sharp knife, a razor blade, or a baker’s lame, make shallow cuts on the surface of the dough. This allows the bread to expand evenly in the oven, preventing it from bursting in unexpected places. A simple cross shape or a few parallel slashes are traditional and beautiful.
Baking with Steam
Carefully place the baking sheet with the scored loaf into the preheated oven. Once you’ve placed the loaf in, carefully pour about 1 cup of hot water into the preheated pan on the bottom rack to create steam. Immediately close the oven door to trap the steam. The steam is essential for achieving a wonderfully crisp and golden-brown crust. Reduce the oven temperature to 425°F (220°C) and bake for approximately 30 to 35 minutes. The bread is done when it sounds hollow when tapped on the bottom and has a deep golden-brown color.
Cooling the Bread
Once baked to perfection, carefully remove the rustic bread from the oven. Transfer it immediately to a wire cooling rack. It’s crucial to let the bread cool completely before slicing. As the bread cools, the interior structure continues to set, and the crust will become perfectly crisp. Slicing too early can result in a gummy texture inside. Patience here will be rewarded with the most delicious, crusty, and airy slice of homemade rustic bread. Enjoy the aroma filling your kitchen!

Conclusion:
You’ve now got the blueprint for creating your very own delicious Rustic Bread Recipe! This simple yet rewarding recipe allows you to transform basic pantry staples into a warm, crusty loaf with a beautifully airy interior. The beauty of this Rustic Bread Recipe lies in its adaptability. Feel free to experiment with different flours, add herbs for an aromatic twist, or even incorporate seeds for added texture and flavor. Remember, baking is a journey, and every loaf is a chance to learn and improve. Don’t be discouraged if your first attempt isn’t perfect; practice makes perfect, and the aroma filling your kitchen will be reward enough. Serve this delightful bread warm with butter, alongside your favorite soups and stews, or as the base for incredible sandwiches.
Frequently Asked Questions:
Can I make this Rustic Bread Recipe without a stand mixer?
Absolutely! While a stand mixer makes kneading easier, you can certainly achieve a great dough by hand. Simply turn the dough out onto a lightly floured surface after the initial mixing and knead for about 10-15 minutes until it becomes smooth and elastic. It’s a great workout and very satisfying!
How should I store my Rustic Bread Recipe loaf?
For the best flavor and texture, it’s ideal to eat your Rustic Bread Recipe loaf within a day or two of baking. Store it at room temperature in a paper bag or a bread box, cut-side down on a cutting board. Avoid plastic bags, as they can make the crust soft. If you need to store it for longer, you can slice it and freeze it for up to 3 months. Thaw at room temperature or toast slices directly from frozen.
Easy Rustic Bread Recipe-Homemade Flavor
A simple and delicious recipe for homemade rustic bread with a wonderfully crisp crust and airy interior. Perfect for any meal.
Ingredients
-
3 cups warm water (around 105-115°F or 40-46°C)
-
2 ¼ teaspoons active dry yeast
-
1 tablespoon sugar
-
6 cups (approximately 750 grams) all-purpose flour, plus more for dusting
-
3 teaspoons salt
Instructions
-
Step 1
Activate the yeast: In a large mixing bowl, combine warm water and sugar. Sprinkle yeast over the surface and let sit undisturbed for 5-10 minutes until foamy. -
Step 2
Mix the dough: Add flour and salt to the yeast mixture. Stir until a shaggy, cohesive mass forms. The dough will be sticky. -
Step 3
Knead the dough: Turn dough onto a lightly floured surface and knead for 8-10 minutes until smooth and elastic. Alternatively, use a stand mixer with a dough hook for 6-8 minutes. -
Step 4
First rise: Shape dough into a ball, place in a lightly greased bowl, cover, and let rise in a warm, draft-free spot for 1 to 1.5 hours, or until doubled in size. -
Step 5
Shape and second rise: Punch down dough, shape into a rustic loaf (boule or batard), place on a prepared baking sheet, cover loosely, and let rise for 30-45 minutes. -
Step 6
Bake: Preheat oven to 450°F (230°C). Score the dough. Carefully place loaf in the oven, add hot water to a preheated pan on the bottom rack for steam, and reduce oven temperature to 425°F (220°C). Bake for 30-35 minutes until golden brown and hollow-sounding. -
Step 7
Cool: Remove bread from oven and transfer to a wire rack to cool completely before slicing.
Important Information
Nutrition Facts (Per Serving)
It is important to consider this information as approximate and not to use it as definitive health advice.
Allergy Information
Please check ingredients for potential allergens and consult a health professional if in doubt.