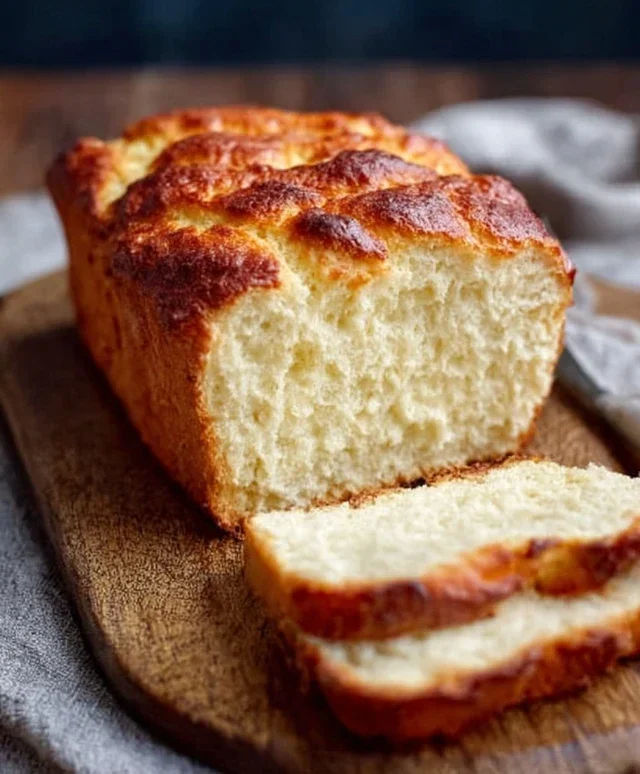
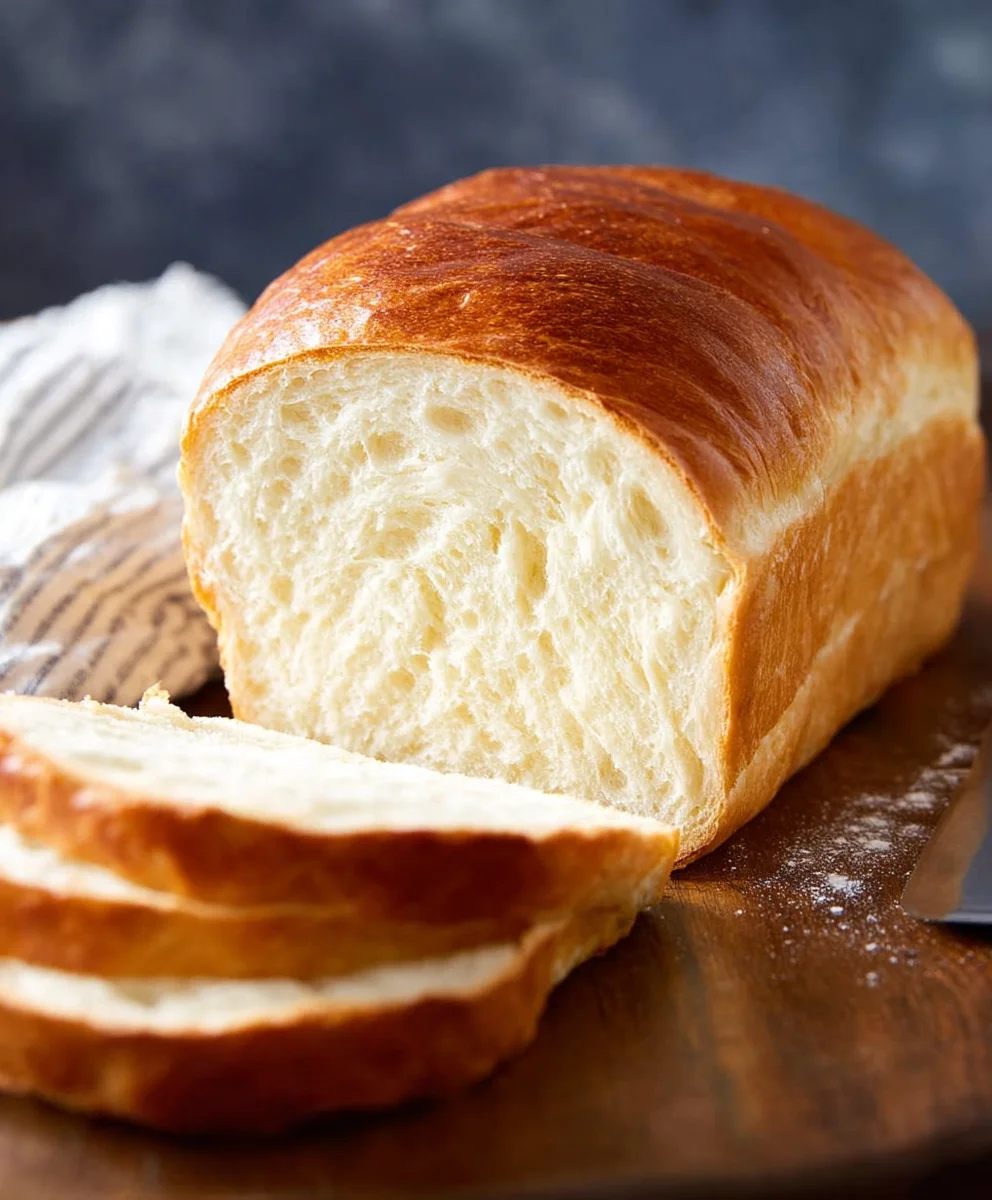
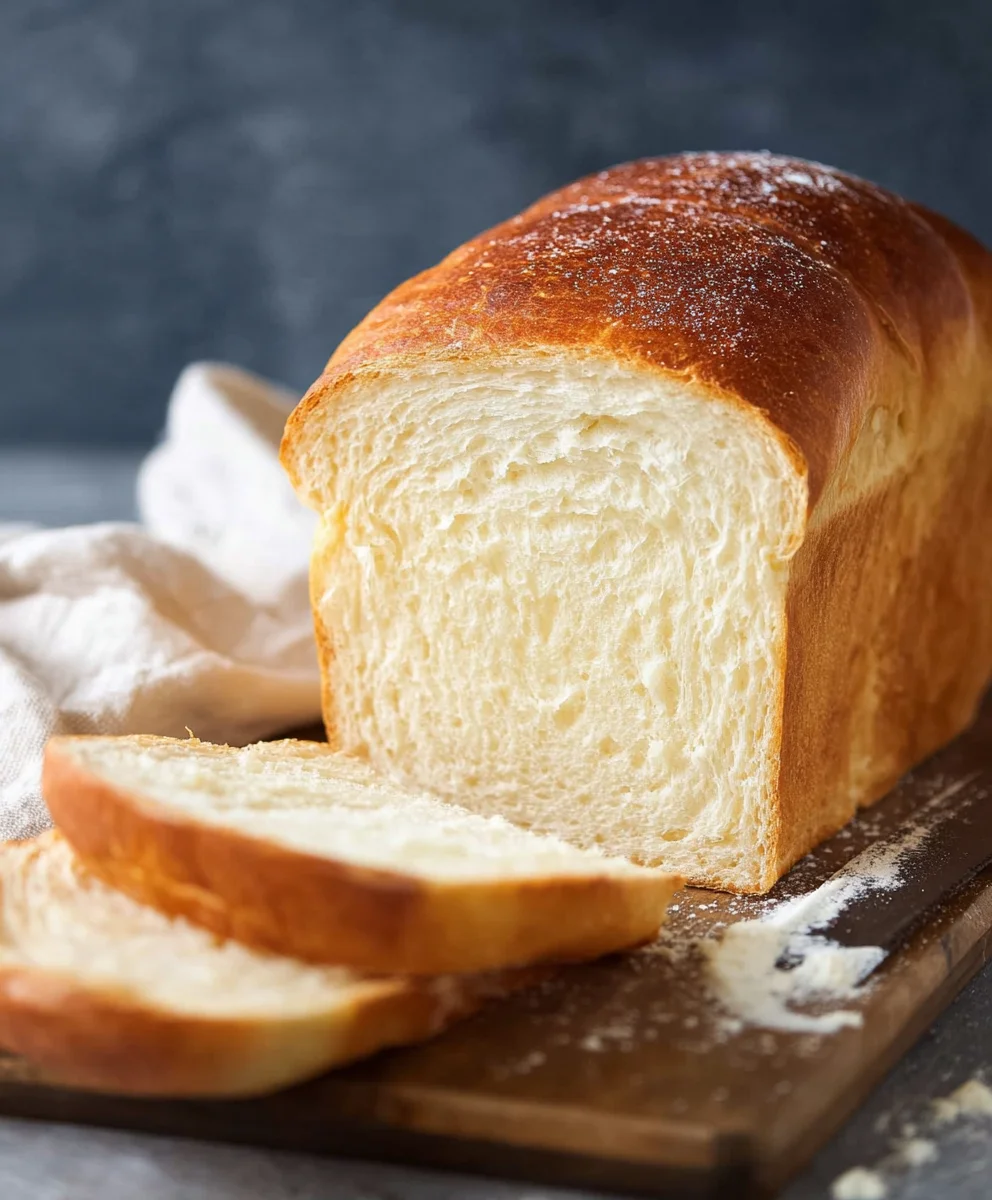
Easy Homemade White Bread Recipe-Soft & Fluffy
White bread, the cornerstone of countless comfort foods and a canvas for culinary creativity, holds a special place in our hearts. It’s more than just a staple; it’s a feeling of home, a memory of childhood sandwiches, and the perfect accompaniment to almost any meal. What is it about this simple dough that makes it so universally beloved? Perhaps it’s its incredibly versatile texture – soft and yielding, yet sturdy enough to hold a generous spread. Or maybe it’s the subtle, slightly sweet flavor that never overpowers, allowing other ingredients to shine. This particular recipe elevates the humble white bread to new heights, transforming it into a delightfully airy loaf with a golden crust that’s simply irresistible. It’s the kind of bread that will have you reaching for a second slice before you’ve even finished your first, proving that even the most basic ingredients, when treated with care and passion, can yield extraordinary results.
Ingredients:
- 1 ⅔ cups lukewarm water (divided)
- 2 ¼ teaspoons instant yeast (or active dry yeast)
- 1 teaspoon sugar
- 1 tablespoon honey (or more sugar)
- 1 teaspoon salt
- 1 ½ tablespoons unsalted butter (cubed at room temperature)
- 4 ½ cups all-purpose flour (divided)
- 1 ½ tablespoons butter (melted for brushing)
Making Your Perfect White Bread
This recipe will guide you through creating a wonderfully soft and flavorful loaf of white bread, perfect for toasting, sandwiches, or simply enjoying with a smear of butter. We’ll be using simple ingredients and a straightforward method to ensure success, even for begin extractners. The key to a great loaf lies in patience and paying attention to the dough’s development.
Activating the Yeast and First Mix
The first crucial step is to ensure our yeast is alive and ready to work its magic. In a large mixing bowl, combine 1 cup of the lukewarm water. It’s important that the water is lukewarm, not hot, as excessively hot water can kill the yeast, and too cold will prevent it from activating properly. Aim for a temperature around 105-115°F (40-46°C). To this water, add the 2 ¼ teaspoons of instant yeast. If you’re using active dry yeast instead of instant, you’ll want to let it sit for about 5-10 minutes until it becomes foamy, indicating it’s active. Sprinkle in the 1 teaspoon of sugar and the 1 tablespoon of honey. The sugar and honey act as food for the yeast, giving it the energy it needs to produce carbon dioxide, which will make our bread rise. Stir this mixture gently to combine and then let it rest for about 5 to 10 minutes. You should see a frothy layer form on the surface, confirming the yeast is active and ready to go. This step is often called “proofing” the yeast.
Developing the Dough
Once the yeast mixture is bubbly and fragrant, it’s time to add the remaining ingredients to create our dough. To the activated yeast mixture, add the 1 teaspoon of salt. Salt is essential not only for flavor but also for controlling the yeast’s activity and strengthening the gluten structure of the dough. Now, gradually add 4 cups of the all-purpose flour. Reserve the remaining ½ cup of flour for later, as you might need it to adjust the dough’s consistency. Add the 1 ½ tablespoons of unsalted butter, cut into small cubes. This butter will add richness and tenderness to the finished bgin extractd. Begin mixing everything together with a sturdy spoon or a dough whisk until a shaggy dough forms. At this point, the dough will be quite sticky. Turn the dough out onto a lightly floured surface. You’ll use the reserved ½ cup of flour here as needed. Start kneading the dough by folding it over on itself and pushing down and away with the heels of your hands. Continue kneading for about 8 to 10 minutes. The dough will gradually become smoother, more elastic, and less sticky. You’ll know it’s ready when it springs back slowly when you gently poke it with your finger. This kneading process develops the gluten, which gives bread its structure.
First Rise: The Bulk Fermentation
Now that we have a well-kneaded dough, it needs time to rise and develop flavor. Lightly grease a large, clean bowl with a little bit of oil or cooking spray. Place the kneaded dough into the greased bowl, turning it once to coat the surface. Cover the bowl tightly with plastic wrap or a damp kitchen towel. Find a warm, draft-free spot for the dough to rise. This could be a slightly warm oven (turned off, but with the oven light on), or simply a quiet corner of your kitchen. Let the dough rise for about 1 to 1 ½ hours, or until it has doubled in size. This period of fermentation is crucial for developing the complex flavors and airy texture we desire in our white bread. Don’t be tempted to rush this step. Patience here will reward you with a significantly better loaf. You can tell if it’s ready by gently pressing two fingers into the dough; if the indentation remains, it’s ready for the next stage.
Shaping and Second Rise
Once the dough has doubled, gently punch it down to release the trapped air. This is often referred to as “degassing” the dough. Turn the dough out onto a lightly floured surface again. For a standard loaf pan, shape the dough into a rectangle that is roughly the length of your pan. Then, starting from one of the short ends, tightly roll up the dough like a jelly roll. Pinch the seams together to seal them, especially along the bottom and the two ends. This tight shaping helps create a good crum extractb structure and prevents the loaf from spreading too much during baking. Grease your loaf pan (a standard 9×5 inch pan works well) with butter or cooking spray. Carefully place the shaped dough seam-side down into the prepared pan. Cover the pan loosely with plastic wrap or a clean kitchen towel and let it rise again in a warm place for another 30 to 45 minutes, or until the dough has risen about 1 inch above the rim of the pan. This second rise is often called the “proofing” stage and is essential for a light and airy texture.
Baking to Golden Perfection
Preheat your oven to 375°F (190°C) during the final 15-20 minutes of the dough’s second rise. This ensures the oven is at the correct temperature when the bread is ready to bake. Once the dough has finished its second rise, carefully remove the plastic wrap or towel. In a small bowl, melt the 1 ½ tablespoons of butter. Using a pastry brush, gently brush the melted butter over the top of the loaf. This will give the crust a beautiful golden-brown color and a soft, slightly rich finish. Place the loaf pan on the center rack of the preheated oven. Bake for 30 to 35 minutes. You’ll know the bread is done when the crust is a deep golden brown and the internal temperature reaches around 195-200°F (90-93°C) on an instant-read thermometer. Another good indicator is that the loaf will sound hollow when tapped on the bottom.
Cooling and Enjoying
Once baked, immediately remove the bread from the loaf pan and place it on a wire cooling rack. This is a crucial step to prevent the bottom of the crust from becoming soggy. Let the bread cool completely, or at least for about an hour, before slicing. Slicing hot bread can result in a gummy texture. Once cooled, slice your beautiful homemade white bread and enjoy the fruits of your labor! It’s wonderful on its own, or perfect for your favorite sandwich fillings.
Conclusion:
There you have it – a simple yet incredibly satisfying recipe for classic White Bread! We’ve walked through each step, from activating the yeast to achieving that perfect golden crust. This homemade White Bread is a testament to the magic of basic ingredients coming together to create something truly special. It’s wonderfully versatile, perfect for toasting with butter, making hearty sandwiches, or even as a side for your favorite soups and stews. Don’t be afraid to experiment with this foundational recipe; consider adding herbs, cheese, or even a touch of honey for different flavor profiles. We encourage you to embrace the process and enjoy the delightful aroma that will fill your kitchen as it bakes. Happy baking!
Frequently Asked Questions about White Bread:
Q1: My White Bread didn’t rise well. What could have gone wrong?
Several factors can affect rising. Ensure your yeast was fresh and properly activated – it should be foamy. Check that your liquid (water or milk) was warm, not hot, as extreme temperatures can kill yeast. Also, make sure you allowed sufficient time for the dough to proof in a warm, draft-free place.
Q2: Can I make this White Bread recipe without a stand mixer?
Absolutely! While a stand mixer makes kneading easier, you can achieve excellent results by hand. Kneading by hand for about 10-15 minutes, until the dough is smooth and elastic, is perfectly effective for this White Bread recipe.
Q3: How should I store my homemade White Bread?
Once completely cooled, store your White Bread in an airtight container or a bread bag at room temperature. It’s best enjoyed within 2-3 days. For longer storage, you can slice it and freeze it. Just toast the slices directly from frozen!
Easy Homemade White Bread Recipe-Soft & Fluffy
A straightforward recipe for a wonderfully soft and flavorful loaf of white bread, perfect for toasting, sandwiches, or enjoying with butter.
Ingredients
-
1 ⅔ cups lukewarm water (divided)
-
2 ¼ teaspoons instant yeast (or active dry yeast)
-
1 teaspoon sugar
-
1 tablespoon honey
-
1 teaspoon salt
-
1 ½ tablespoons unsalted butter (cubed at room temperature)
-
4 ½ cups all-purpose flour (divided)
-
1 ½ tablespoons butter (melted for brushing)
Instructions
-
Step 1
In a large mixing bowl, combine 1 cup of lukewarm water (105-115°F), instant yeast, sugar, and honey. Stir and let rest for 5-10 minutes until frothy. -
Step 2
Add the remaining ⅔ cup of lukewarm water, salt, 4 cups of all-purpose flour, and cubed unsalted butter to the yeast mixture. Mix until a shaggy dough forms. Turn out onto a lightly floured surface and knead for 8-10 minutes until smooth and elastic, adding reserved flour as needed. -
Step 3
Place the kneaded dough in a lightly greased bowl, cover tightly, and let rise in a warm, draft-free spot for 1 to 1 ½ hours, or until doubled in size. -
Step 4
Gently punch down the dough, shape it into a rectangle, and then roll it tightly into a jelly roll. Pinch seams to seal and place seam-side down into a greased loaf pan. -
Step 5
Cover the loaf pan loosely and let rise in a warm place for another 30-45 minutes, or until about 1 inch above the rim. -
Step 6
Preheat oven to 375°F (190°C). Brush the top of the loaf with melted butter. Bake for 30-35 minutes until deep golden brown and the internal temperature reaches 195-200°F. -
Step 7
Immediately remove the bread from the pan and cool completely on a wire rack before slicing.
Important Information
Nutrition Facts (Per Serving)
It is important to consider this information as approximate and not to use it as definitive health advice.
Allergy Information
Please check ingredients for potential allergens and consult a health professional if in doubt.