Renee Paj Recipe- Easy & Delicious Dessert Treat
Renee Paj is more than just a dessert; it’s a warm hug in a bowl, a nostalgic trip back to Grandma’s kitchen, and a guaranteed crowd-pleaser. Have you ever tasted something so utterly comforting, so perfectly balanced between sweet and tart, that it instantly makes you feel… good? That’s the magic of Renee Paj. This isn’t your average fruit crum extractble or pie. What truly sets Renee Paj apart is its unique textural symphony. Imagin extracte a tender, baked fruit base, bursting with vibrant flavor, lovingly crowned with a golden, crum extractbly topping that offers a delightful, buttery crunch with every bite. It’s this irresistible combination of soft fruit and crisp topping that has made Renee Paj a beloved classic, a recipe passed down through generations and cherished for its simple yet profound deliciousness. I can’t wait to share my version with you!
Renee Paj
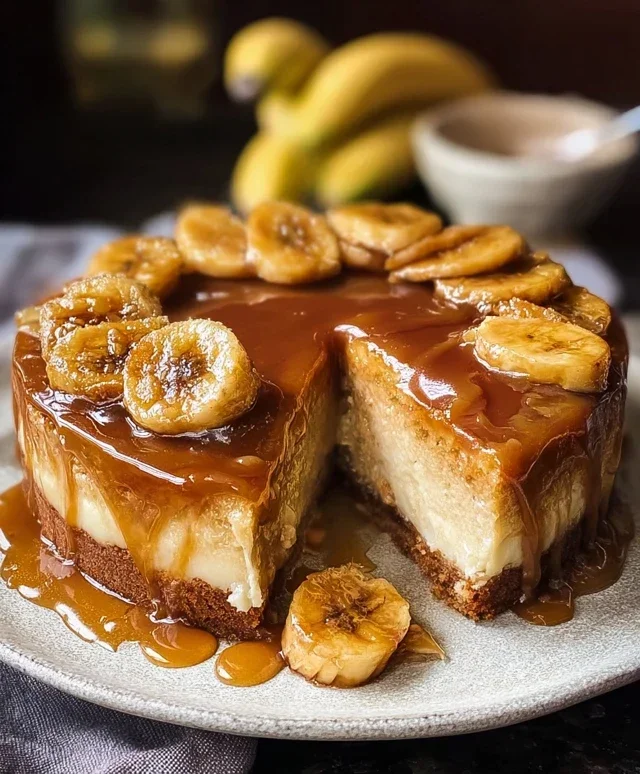
This recipe for “Renee Paj” is a delightful and comforting baked treat that perfectly balances the sweetness of ripe bananas with a hint of cinnamon and the satisfying crunch of oats. It’s a fantastic way to use up those overripe bananas that are just beggin extractg to be transformed into something delicious. Whether you’re looking for a wholesome breakfast option, a comforting afternoon snack, or a simple dessert, Renee Paj delivers. The texture is somewhere between a dense cake and a hearty crum extractble, making it incredibly versatile. I find it’s best served slightly warm, perhaps with a dollop of yogurt or a drizzle of honey, but it’s equally wonderful at room temperature. The optional walnuts add a lovely nutty counterpoint, which I highly recommend if you have them on hand. The beauty of this recipe lies in its simplicity and the readily available ingredients, making it a go-to for busy weeknights or when you’re craving something homemade and satisfying. Let’s get started on creating this delicious Renee Paj!
Ingredients:
Cooking Instructions:
Preparing the Dry Ingredients
Begin extract by preheating your oven to 375 degrees Fahrenheit (190 degrees Celsius). This ensures that your Renee Paj bakes evenly and develops a lovely golden-brown crust. Next, lightly grease and flour an 8×8 inch baking dish or a similar-sized oven-safe dish. This step is crucial to prevent sticking and to ensure your Renee Paj slides out of the dish cleanly once it’s baked. In a large mixing bowl, combine the old fashioned oats, all purpose flour, light brown sugar, kosher salt, baking soda, baking powder, and ground cinnamon. Whisk these dry ingredients together thoroughly. Ensuring that the baking soda and baking powder are evenly distributed is important for proper leavening, which gives the Paj its tender texture. The cinnamon will infuse every bite with warmth and spice. I like to give it a good whisk for at least 30 seconds to make sure everything is well incorporated.
Mashing the Bananas and Wet Ingredients
In a separate medium bowl, add your 3 large, ripe bananas. The riper the bananas, the sweeter and more flavorful your Renee Paj will be. Mash them with a fork until they are mostly smooth, with just a few small lumps remaining for texture. Don’t worry about getting them perfectly pureed; those little banana bits add character! To the mashed bananas, add the 2 large eggs, 1 tsp. of pure vanilla extract, and 3 TBSP of your chosen cooking oil. I typically use canola oil as it has a neutral flavor, but corn oil or even a light vegetable oil will work wonderfully. Whisk these wet ingredients together until they are well combined and have a uniform consistency. The vanilla extract enhances the sweetness of the bananas and adds a lovely aromatic depth.
Combining Wet and Dry Ingredients
Now, it’s time to bring everything together. Pour the wet banana mixture into the bowl with the dry ingredients. If you are using the chopped walnuts, stir them into the dry ingredients now, or you can fold them in after combining the wet and dry ingredients to ensure they are more evenly distributed throughout the batter. Using a spatula or a wooden spoon, gently fold the wet ingredients into the dry ingredients until just combined. Be careful not to overmix. Overmixing can develop the gluten in the flour too much, resulting in a tougher Paj. You want to see just a few streaks of flour remaining; it’s okay if the batter is a little lumpy. The goal is to create a cohesive batter that holds together but isn’t overly smooth.
Baking Your Renee Paj
Pour the batter evenly into your prepared baking dish. Use your spatula to spread it out so that it reaches all the corners. The batter will be quite thick, which is exactly what you want. Place the baking dish in the preheated oven and bake for 30-40 minutes, or until a toothpick inserted into the center comes out clean and the top is golden brown and slightly puffed. The baking time can vary depending on your oven, so it’s always a good idea to check for doneness a few minutes before the suggested baking time. If the top starts to brown too quickly before the inside is cooked, you can loosely tent it with aluminum foil.
Cooling and Serving
Once baked, carefully remove the Renee Paj from the oven. Let it cool in the baking dish for at least 15-20 minutes before attempting to cut into it. This cooling period allows the Paj to set properly, making it easier to slice and serve without crum extractbling. You can serve it warm directly from the dish, or carefully invert it onto a wire rack to cool completely if you prefer to serve it at room temperature. Renee Paj is delicious on its own, but I often enjoy it with a simple dusting of powdered sugar, a spoonful of Greek yogurt, or even a scoop of vanilla ice cream for a more indulgent treat. It stores well at room temperature for a day or two, or can be refrigerated for up to 4 days. Enjoy this comforting and flavorful creation!

Conclusion:
I truly hope you’ve enjoyed learning about this delightful Renee Paj recipe! It’s a truly special dish because it strikes that perfect balance between being incredibly comforting and surprisingly elegant. The rich, creamy texture combined with the subtle sweetness makes it a crowd-pleaser, perfect for everything from a cozy weeknight dinner to a festive gathering. The beauty of this Renee Paj lies in its adaptability, allowing you to tailor it to your own taste preferences and what you have on hand. I wholeheartedly encourage you to give this recipe a try; you might just discover your new favorite go-to dish! Imagin extracte serving this warm, fragrant Renee Paj alongside a crisp green salad or some crusty bread – pure bliss!
Frequently Asked Questions about Renee Paj:
Can I make this Renee Paj ahead of time?
Yes, absolutely! This Renee Paj is fantastic for making ahead. You can prepare it up to a day in advance and then gently reheat it on the stovetop over low heat or in the oven at a low temperature. This makes it an ideal option for busy hosts or for when you want a comforting meal ready to go after a long day.
Are there any vegetarian variations for this Renee Paj?
Certainly! For a vegetarian version of this Renee Paj, simply omit the meat and consider adding hearty vegetables like mushrooms, bell peppers, or spinach. You could also incorporate plant-based protein options like chickpeas or lentils. The creamy base of the Renee Paj lends itself wonderfully to these additions, creating a satisfying and delicious meat-free meal.
What are some other serving suggestions for this Renee Paj?
Beyond a simple side salad or bread, this Renee Paj is wonderful served over fluffy rice, quinoa, or even pasta. For a more indulgent experience, consider topping it with a dollop of sour cream, a sprinkle of fresh herbs like parsley or chives, or a scattering of toasted nuts for added texture.
Renee Paj
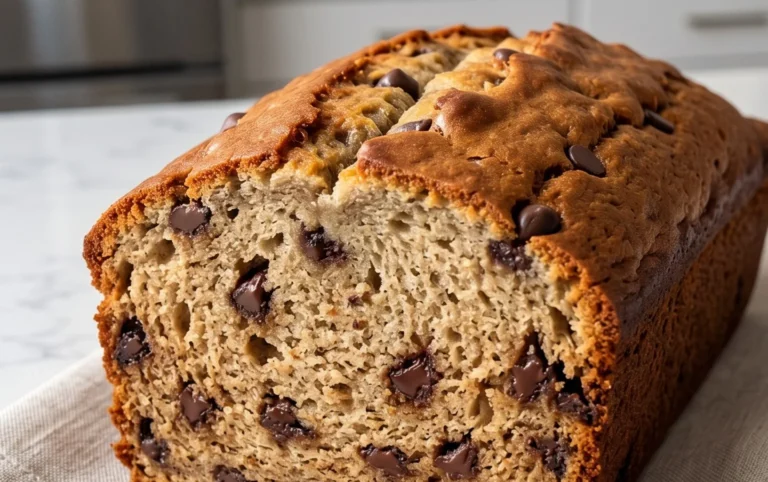
A delicious and easy banana oat bread, perfect for breakfast or a snack.
Ingredients
-
1 cup old fashioned oats
-
1 1/4 cups all purpose flour
-
1/2 cup light brown sugar, packed
-
1/2 tsp. kosher salt
-
1/2 tsp. baking soda
-
1/4 tsp. baking powder
-
1/2 tsp. ground cinnamon
-
3 large, ripe bananas, cut into chunks
-
2 large eggs
-
1 tsp. pure vanilla extract
-
3 TBSP cooking oil (corn, canola, etc)
-
1/3 cup chopped walnuts (optional)
Instructions
-
Step 1
Preheat oven to 350°F (175°C). Grease and flour a 9×5 inch loaf pan. -
Step 2
In a large bowl, whisk together the all-purpose flour, oats, light brown sugar, kosher salt, baking soda, baking powder, and ground cinnamon. -
Step 3
In a separate bowl, mash the ripe bananas. Add the eggs, pure vanilla extract, and cooking oil. Whisk until well combined. -
Step 4
Pour the wet ingredients into the dry ingredients and stir until just combined. Do not overmix. Fold in the chopped walnuts if using. -
Step 5
Pour the batter into the prepared loaf pan and spread evenly. -
Step 6
Bake for 50-60 minutes, or until a wooden skewer inserted into the center comes out clean. -
Step 7
Let the loaf cool in the pan for 10 minutes before inverting it onto a wire rack to cool completely.
Important Information
Nutrition Facts (Per Serving)
It is important to consider this information as approximate and not to use it as definitive health advice.
Allergy Information
Please check ingredients for potential allergens and consult a health professional if in doubt.