Strawberry Swirl Cheesecake Cookie Cups-Easy Recipe
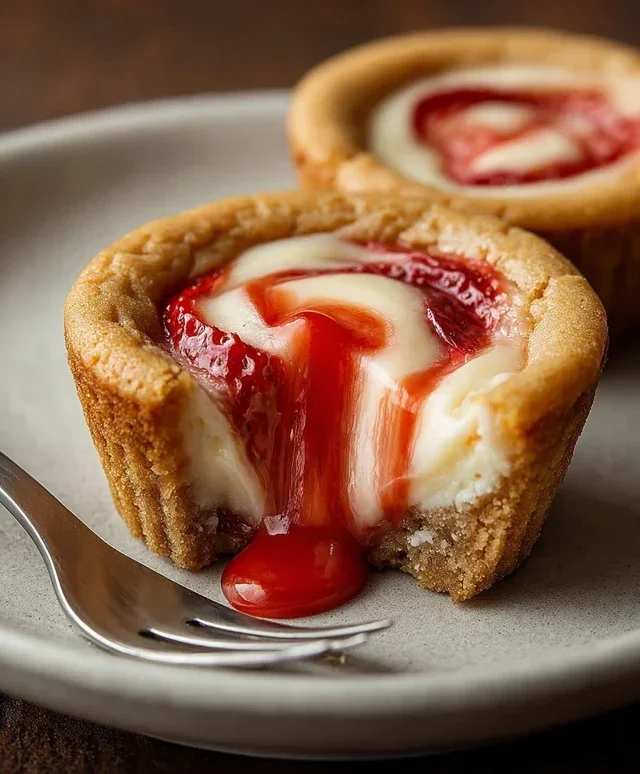
Strawberry Swirl Cheesecake Cookie Cups are the ultimate treat you didn’t know you needed. Imagin extracte the comforting chegrape juicess of a perfectly baked sugar cookie, cradling a luscious, creamy cheesecake filling, all swirled with vibrant, sweet strawberry goodness. It’s a combination that speaks directly to my sweet tooth, and I’m willing to bet it speaks to yours too! Why do we adore this delightful dessert? Because it perfectly captures the best of two worlds: the irresistible simplicity of a cookie and the elegant indulgence of cheesecake. What truly sets these Strawberry Swirl Cheesecake Cookie Cups apart is their delightful miniature format, making them incredibly easy to serve and even easier to devour. They’re perfect for parties, a special weekend treat, or simply when you crave something truly special. Get ready to fall in love with these little cups of happiness!
Strawberry Swirl Cheesecake Cookie Cups
Get ready to treat yourself to something truly delightful! These Strawberry Swirl Cheesecake Cookie Cups are a playful and incredibly delicious twist on two beloved desserts. Imagin extracte the sweet, buttery goodness of a classic sugar cookie, forming a perfect little cup, filled with a tangy, creamy cheesecake filling, and finished with a beautiful, vibrant swirl of strawberry jam. They’re individually portioned, making them ideal for parties, bake snon-alcoholic ales, or simply when you want a decadent dessert all to yourself. The beauty of these is their simplicity; you can whip them up with minimal fuss, and the results are always show-stopping. Let’s dive into creating these little bites of heaven!
Ingredients:
Cookie Cup Creation
The foundation of our delightful dessert is a perfectly baked sugar cookie cup. We’re going to leverage the convenience of refrigerated cookie dough, but if you’re a baker who loves to make everything from scratch, your favorite sugar cookie recipe will work beautifully here. The key is to get the dough to conform to the shape of your muffin tin, creating those lovely little wells that will hold our cheesecake filling.
Step 1: Prepare Your Muffin Tin and Cookie Dough
First things first, let’s get our muffin tin ready. You can either lightly grease it with cooking spray or line it with paper liners. I find that for these cookie cups, a lightly greased tin works best as it helps the cookie dough adhere and bake into a crispier edge. If you choose liners, make sure they are sturdy. Next, we need to prepare our sugar cookie dough. If you’re using refrigerated dough, let it sit at room temperature for about 10-15 minutes to make it easier to handle. If you’re using homemade dough, ensure it’s chilled according to your recipe. We’re going to be forming little cookie cups, so we want the dough to be pliable but not so soft that it loses its shape entirely.
Step 2: Form the Cookie Cups
Now for the fun part – forming the cups! You’ll want to divide your sugar cookie dough into about 12 equal portions. A cookie scoop is perfect for this, ensuring each portion is roughly the same size. Roll each portion into a ball and then place it into each cavity of your prepared muffin tin. Using your fingers, or the bottom of a small glass or measuring cup, gently press the dough ball down and then up the sides of the muffin tin, creating a small cup shape. Aim for the dough to be about ¼ inch thick along the bottom and sides. This will create the structure for our cheesecake filling. Don’t worry if they aren’t perfectly uniform; rustic charm is part of the appeal!
Step 3: Bake the Cookie Cups
Preheat your oven to the temperature recommended on your sugar cookie dough package, usually around 350°F (175°C). Bake the cookie cups for about 10-12 minutes, or until the edges are lightly golden brown and the centers are set but not over-baked. You want them to be cooked through but still slightly soft in the center so they don’t become too hard once cooled. Keep a close eye on them, as oven temperatures can vary. Once they are baked to perfection, remove the muffin tin from the oven and let the cookie cups cool in the tin for about 5-10 minutes. This allows them to firm up a bit before you attempt to remove them.
Cheesecake Filling Magic
While our cookie cups are cooling, let’s whip up the luscious cheesecake filling. This is a simple yet essential component that brings that signature creamy tang we all adore in cheesecake.
Step 4: Prepare the Cream Cheese Filling
In a medium bowl, beat the softened cream cheese with the ¼ cup of granulated sugar until it’s smooth and creamy. It’s crucial that the cream cheese is properly softened to avoid any lumps. You can achieve this by leaving it out on the counter for about an hour, or by gently microwaving it in short bursts (10-15 seconds at a time), being careful not to melt it. Once the cream cheese and sugar are well combined and smooth, stir in the 1 teaspoon of vanilla extract. This simple mixture is the heart of our cheesecake filling, providing that irresistible flavor and texture.
Assembly and Swirls
Now it’s time to bring it all together and add that beautiful strawberry swirl! This is where the visual appeal truly shines.
Step 5: Fill and Swirl
Carefully remove the slightly cooled cookie cups from the muffin tin and place them on a wire rack to cool completely. Once they are fully cooled, it’s time to fill them. Spoon about 1-2 tablespoons of the cream cheese filling into each cookie cup, spreading it evenly to fill the cavity. Now for the artistic part! Take your warmed strawberry jam. A quick zap in the microwave for about 10-15 seconds should do the trick to make it pourable. Drizzle about a teaspoon of the warmed jam over the top of the cream cheese filling in each cookie cup. Then, using a toothpick or the tip of a knife, gently swirl the jam into the cream cheese. Create elegant patterns or just a random, beautiful swirl. The warmth of the jam will allow it to meld beautifully with the cream cheese.
Step 6: Chill and Garnish
Once you’ve finished swirling, it’s time to let these beauties chill. Place the filled cookie cups in the refrigerator for at least 30 minutes, or until the cheesecake filling is set. This chilling time is essential to allow the flavors to meld and the filling to firm up properly. Before serving, you can add an optional garnish. A small fresh strawberry on top adds a pop of color and freshness, or a sprinkle of chocolate shavings offers a touch of elegance and extra indulgence. These Strawberry Swirl Cheesecake Cookie Cups are best enjoyed chilled and are sure to be a hit!
Conclusion:
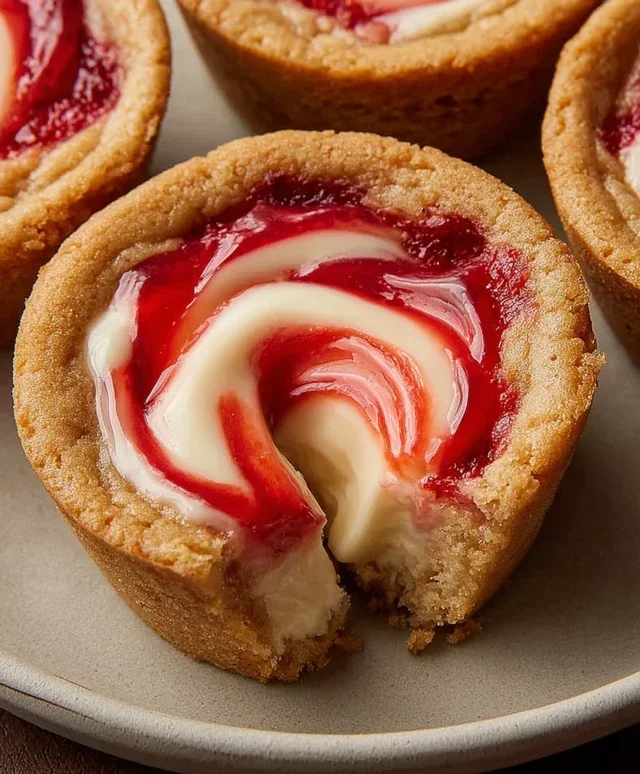
There you have it – the delightful and incredibly achievable Strawberry Swirl Cheesecake Cookie Cups! This recipe truly is a winner because it perfectly combines the comforting chegrape juicess of a classic cookie with the luxurious tang of cheesecake, all infused with the vibrant sweetness of fresh strawberries. They’re a fantastic no-fuss dessert that looks impressive but is surprisingly simple to whip up, making them ideal for any occasion, from casual get-togethers to more special celebrations. The beautiful pink swirls are not only visually appealing but also promise a burst of fruity flavor in every bite. I genuinely encourage you to give these Strawberry Swirl Cheesecake Cookie Cups a try; I’m confident you’ll fall in love with them just as much as I have!
These cookie cups are wonderfully versatile. Serve them chilled for a delightful afternoon treat, or warm them slightly for an extra gooey center. They are absolutely divine on their own, but you could also elevate them with a dollop of whipped cream or a scattering of fresh strawberry slices. For a fun twist, consider adding a touch of lemon zest to the cookie dough for an extra zing, or swap out the strawberries for raspberries or blueberries for a different fruity flavor profile. The possibilities are endless, and each variation promises a unique and delicious experience.
Frequently Asked Questions:
Can I make these ahead of time?
Yes, you absolutely can! The cookie cups can be baked and stored in an airtight container at room temperature for up to 3 days. For the cheesecake swirl, it’s best to add that just before serving for the freshest flavor and texture. If you need to make them further in advance, you can bake the cookie cups and freeze them. Thaw them overnight in the refrigerator before adding the cheesecake swirl and fresh strawberries.
What if I don’t have fresh strawberries?
No problem at all! You can use about 1/2 cup of good quality strawberry jam or preserves. Simply swirl it into the cheesecake mixture as you would the fresh strawberry puree. The flavor will still be delicious, though a touch sweeter and less vibrant in color. Just be sure to use a jam with real fruit pieces for the best texture.
How do I get the swirl effect?
The key to a beautiful swirl is to dollop the strawberry mixture onto the cheesecake filling before baking. Then, use a toothpick or the tip of a knife to gently swirl the two together. Don’t overmix, or you’ll lose the distinct swirls! A few gentle passes will create that lovely marbled effect.
Strawberry Swirl Cheesecake Cookie Cups
Delightful cookie cups with a creamy cheesecake filling and a sweet strawberry swirl.
Ingredients
-
1 roll (16.5 oz) refrigerated sugar cookie dough or homemade equivalent
-
8 oz cream cheese, softened
-
1/4 cup granulated sugar
-
1 tsp vanilla extract
-
1/3 cup strawberry jam, warmed slightly
-
Fresh strawberries (optional)
-
Chocolate shavings (optional)
Instructions
-
Step 1
Preheat oven to 350°F (175°C). Grease and flour a mini muffin tin. -
Step 2
Press about 1 tablespoon of sugar cookie dough into the bottom and up the sides of each mini muffin cup. -
Step 3
In a medium bowl, beat together the softened cream cheese and granulated sugar until smooth. Stir in the vanilla extract. -
Step 4
Spoon about 1 teaspoon of the cream cheese mixture into each cookie cup. -
Step 5
Drizzle about 1/2 teaspoon of warmed strawberry jam over the cream cheese filling in each cup. Use a toothpick to gently swirl the jam into the cream cheese. -
Step 6
Bake for 12-15 minutes, or until the cookie edges are golden brown and the cream cheese is set. -
Step 7
Let cool in the muffin tin for a few minutes before transferring to a wire rack to cool completely. -
Step 8
Garnish with fresh strawberries or chocolate shavings, if desired.
Important Information
Nutrition Facts (Per Serving)
It is important to consider this information as approximate and not to use it as definitive health advice.
Allergy Information
Please check ingredients for potential allergens and consult a health professional if in doubt.