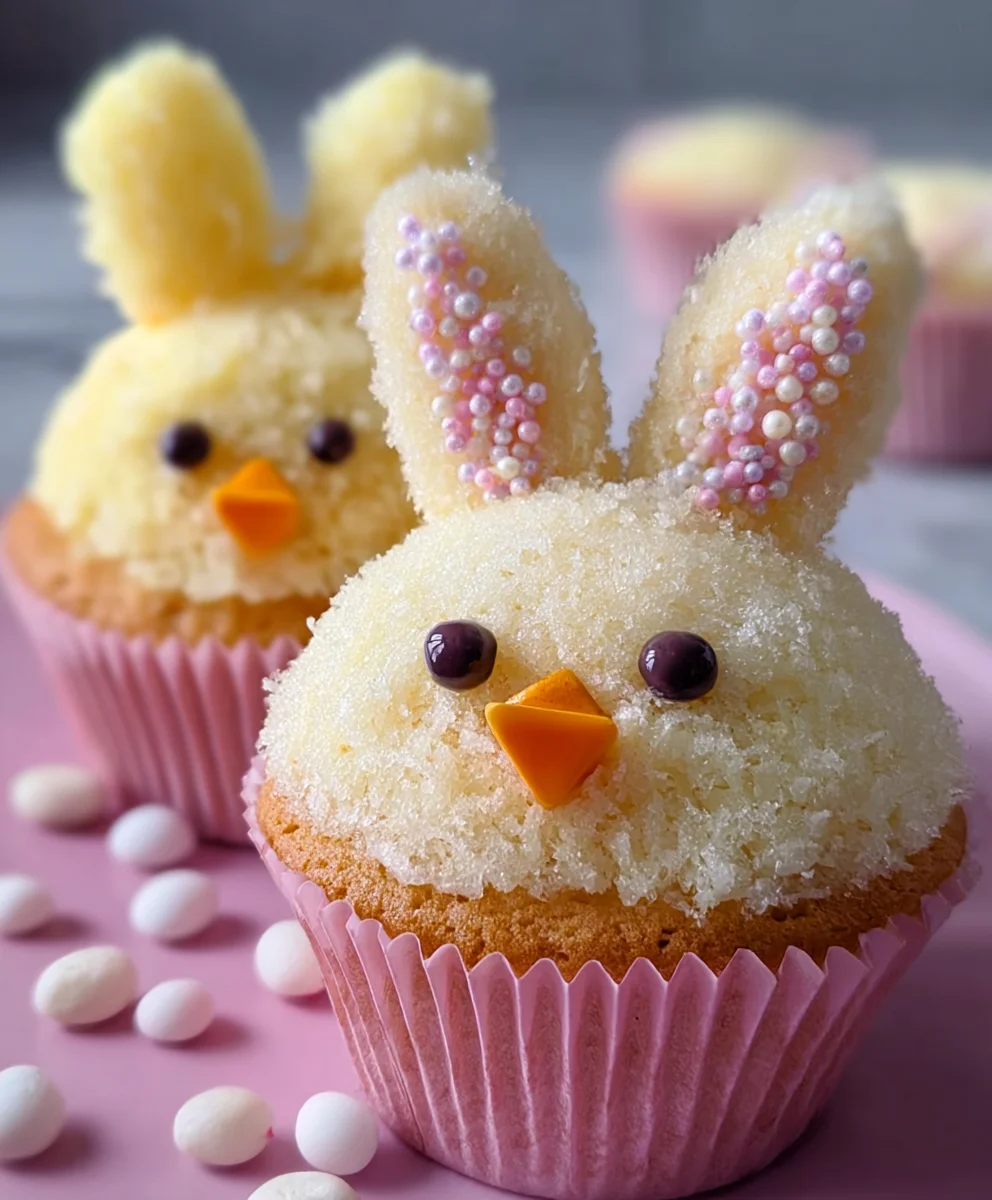
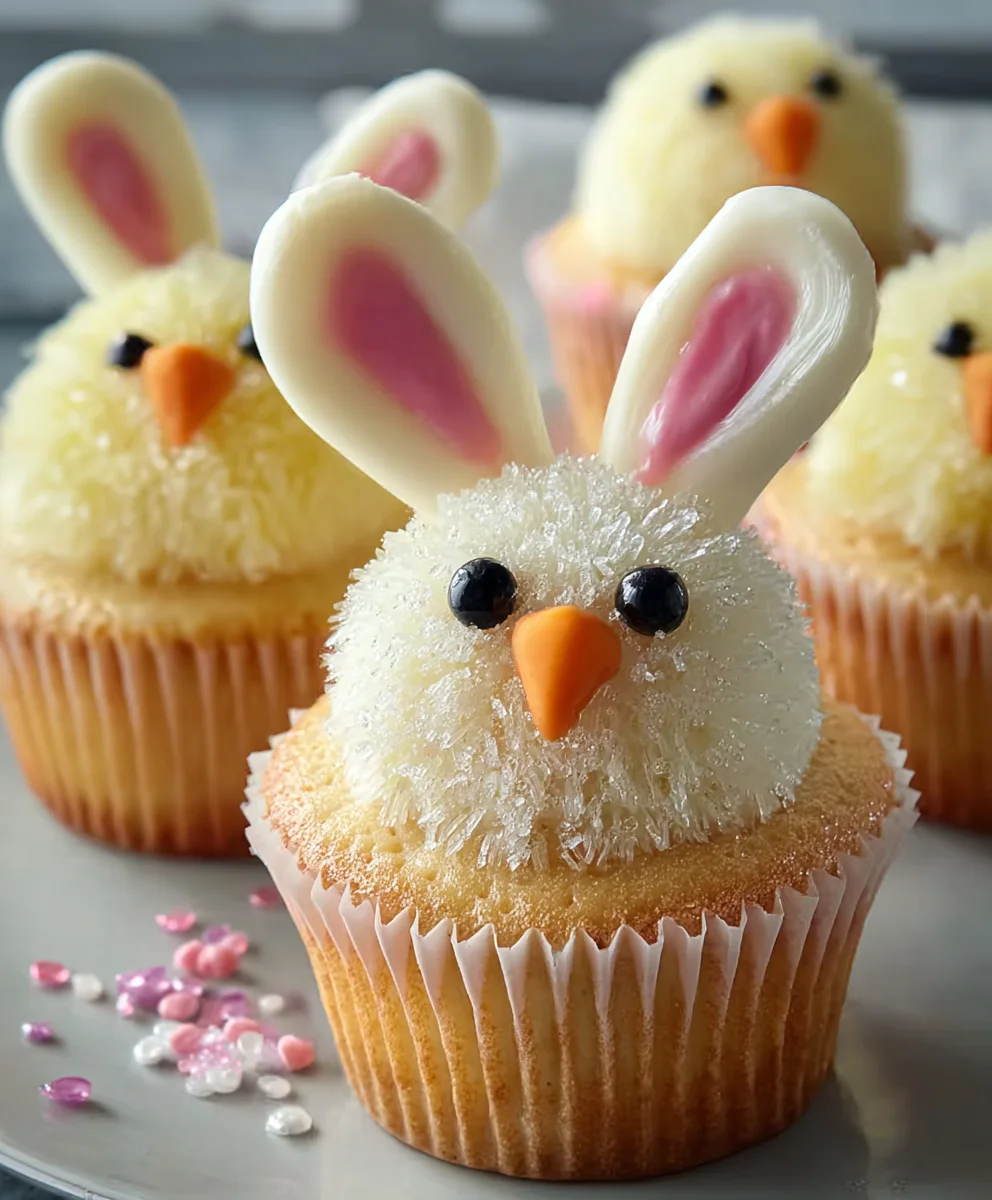
Easter Bunny Chick Cupcakes – Cute & Easy Recipe
Easter Bunny and Chick Cupcakes are more than just a sweet treat; they’re a celebration in miniature form! As spring unfurls its vibrant colors and the spirit of renewal fills the air, there’s no better way to capture the joy of the season than with these adorable edible creations. Imagin extracte the delight on your little one’s face, or even your own, as you unveil a batch of these charming cupcakes. They’re the quintessential centerpiece for any Easter brunch or gathering, guaranteed to bring smiles and gasps of delight. What truly sets these Easter Bunny and Chick Cupcakes apart is their irresistible blend of fun and flavor. We’re not just talking about frosting; we’re talking about pure, unadulterated Easter magic, whipped into a fluffy cloud of deliciousness. Get ready to bake up some unforgettable memories with this delightful recipe!
Ingredients:
- 1 recipe Vanilla Cupcakes (or your favorite cake mix)
- 1 recipe Fluffy Vanilla Frosting (or store-bought frosting)
- Yellow and white sprinkles
- Large and mini marshmallows
- Pink colored sanding sugar
- Black decorator icing
- Jelly beans (pink for bunny noses)
- Orange colored gum or M&Ms (for chick beaks)
- Yellow food coloring (for chick frosting)
Baking the Cupcakes
Preparation is Key
The first step to creating these adorable Easter Bunny and Chick Cupcakes is to prepare your cupcakes. If you’re using a cake mix, follow the package instructions precisely. For those baking from scratch, ensure you have your favorite vanilla cupcake recipe ready to go. It’s crucial to measure your ingredients accurately for the best texture and flavor. Don’t overmix the batter, as this can lead to tough cupcakes. Remember to line your muffin tins with paper liners before filling them about two-thirds full with batter. This prevents overflow and makes for easier cleanup.
Baking and Cooling
Once your batter is prepared and portioned, it’s time to bake. Preheat your oven according to your recipe or cake mix directions. Baking times can vary, so start checking for doneness around the minimum recommended time. A toothpick inserted into the center of a cupcake should come out clean when they are ready. Avoid the temptation to open the oven door too frequently during baking, as this can cause cupcakes to sink. After baking, let the cupcakes cool in their tins for about 5-10 minutes before transferring them to a wire rack to cool completely. It’s essential that they are thoroughly cooled before frosting; warm cupcakes will melt your frosting into a sticky mess.
Frosting and Decorating the Easter Bunny Cupcakes
Preparing the Bunny Frosting Base
While your cupcakes are cooling, let’s get the frosting ready. If you’re making your own fluffy vanilla frosting, ensure it’s light and airy. If you’re using store-bought, you might want to whip it for a minute or two to make it smoother and easier to spread. For the bunny cupcakes, we’ll be using plain white frosting as the base. You’ll want a generous amount of frosting for each cupcake.
Creating the Bunny Details
Now for the fun part! To create the bunny ears, take two large marshmallows. Using a sharp knife, carefully slice each marshmallow in half lengthwise. Then, insert the cut side of each marshmallow half into the top of a frosted cupcake, angling them slightly outwards to resemble bunny ears. For the bunny nose, place a pink jelly bean in the center between the marshmallow ears. To add the bunny’s eyes, use the black decorator icing. Apply two small dots of icing just above the jelly bean nose. You can also add a tiny upside-down V shape with the black icing just below the nose for a subtle mouth detail if you like. For an extra touch of whimsy, you can lightly dust the bunny ears with a tiny bit of pink sanding sugar for a subtle blush.
Frosting and Decorating the Chick Cupcakes
Coloring the Chick Frosting
For our cheerful chick cupcakes, we need yellow frosting. If you’re using homemade frosting, add yellow food coloring gradually until you achieve a vibrant, chick-like hue. Start with just a few drops and mix thoroughly, adding more as needed to get the desired shade. If you’re using store-bought frosting, you can stir in yellow food coloring until the color is right. Remember, it’s easier to add more color than to take it away, so be patient.
Assembling the Chick Faces
Once your frosting is a lovely shade of yellow, frost the remaining cupcakes. You can use a spatula to create a smooth dome or a piping bag for a more textured look. For the chick’s beak, take an orange piece of gum or an orange M&M and gently press it into the center of the frosted cupcake, just below where the eyes will go. For the eyes, use the black decorator icing to create two small dots above the beak. You can also add a tiny dab of white frosting or a mini marshmallow piece above the black eyes to create highlights, giving the chicks a more animated look. To complete the chick’s look, sprinkle a few yellow and white sprinkles around the base of the cupcake or lightly over the top for a feathery effect. Make sure the sprinkles are applied while the frosting is still soft so they adhere properly.
Conclusion:
There you have it! You’ve now mastered the art of creating adorable and delicious Easter Bunny and Chick Cupcakes. These delightful treats are guaranteed to be a showstopper at any Easter celebration, bringin extractg smiles to both kids and adults alike. The combination of fluffy cake and sweet frosting, transformed into charming Easter characters, makes these cupcakes a truly memorable dessert.
For serving suggestions, these Easter Bunny and Chick Cupcakes are perfect as a standalone dessert, a delightful addition to an Easter brunch table, or as a fun activity for a family baking day. You can also package them individually as sweet party favors for your guests.
Looking for variations? Feel free to experiment with different cake flavors like lemon or carrot cake to complement the spring theme. You can also get creative with the frosting colors or add edible glitter for an extra touch of sparkle. Don’t be afraid to let gin extractr imagination run wild and personalize your Easter Bunny and Chick Cupcakes!
We encourage you to give this recipe a try. It’s a rewarding and joyful baking experience that will undoubtedly make your Easter festivities even more special. Happy baking and a very Happy Easter!
Frequently Asked Questions:
Can I make the cupcakes and frosting ahead of time?
Yes, absolutely! The cupcakes can be baked a day in advance and stored in an airtight container at room temperature. The frosting can also be made a day ahead and refrigerated. Bring the frosting to room temperature and give it a good whisk before decorating.
What if I don’t have piping bags and tips?
No problem! You can still decorate your Easter Bunny and Chick Cupcakes without specialized tools. For the bunny ears, you can use a small spoon to create petal-like shapes in the frosting. For the chick’s beak and eyes, you can use a toothpick dipped in yellow and black food coloring, or even small candy pieces.
Easter Bunny Chick Cupcakes – Cute & Easy Recipe
Adorable and simple Easter cupcakes decorated to look like bunnies and chicks.
Ingredients
-
1 recipe Vanilla Cupcakes (or your favorite cake mix)
-
1 recipe Fluffy Vanilla Frosting (or store-bought frosting)
-
Yellow and white sprinkles
-
Large and mini marshmallows
-
Pink colored sanding sugar
-
Black decorator icing
-
Jelly beans (pink for bunny noses)
-
Orange colored gum or M&Ms (for chick beaks)
-
Yellow food coloring (for chick frosting)
Instructions
-
Step 1
Prepare your cupcakes according to your favorite vanilla recipe or cake mix instructions. Ensure accurate measurements and do not overmix the batter. Line muffin tins and fill about two-thirds full. -
Step 2
Bake cupcakes following recipe directions, checking for doneness with a toothpick. Cool in tins for 5-10 minutes before transferring to a wire rack to cool completely. Ensure they are fully cooled before frosting. -
Step 3
For bunny cupcakes, frost with plain white frosting. Slice large marshmallows in half lengthwise for ears and insert into the top of frosted cupcakes. Place a pink jelly bean for the nose and use black decorator icing for eyes and mouth details. -
Step 4
For chick cupcakes, color frosting yellow with yellow food coloring. Frost the cupcakes. Gently press an orange gum or M&M into the center for the beak and use black decorator icing for the eyes. -
Step 5
Add finishing touches: dust bunny ears lightly with pink sanding sugar. Sprinkle yellow and white sprinkles around chick cupcakes for a feathery effect while frosting is still soft.
Important Information
Nutrition Facts (Per Serving)
It is important to consider this information as approximate and not to use it as definitive health advice.
Allergy Information
Please check ingredients for potential allergens and consult a health professional if in doubt.