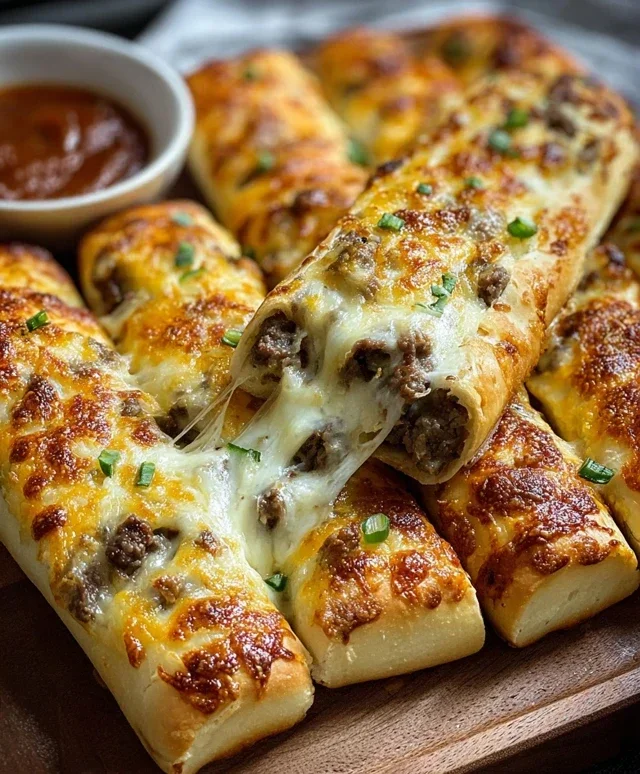
Easy Cheesy Garlic Crescent Rolls Recipe
Easy Cheesy Garlic Crescent Rolls are more than just a side dish; they’re a warm hug in roll form, a symphony of savory flavors that dances on your palate with every delightful bite. Imagin extracte the aroma of freshly baked dough, infused with the pungent allure of garlic and blanketed in a generous layer of melted, golden cheese – that’s the magic we’re conjuring today. What is it about these simple creations that captures hearts and stomachs so completely? It’s their undeniable comfort, their ability to elevate any meal from ordinary to extraordinary, and their sheer, unadulterated deliciousness. We love them because they deliver maximum flavor with minimum fuss, making them a weeknight savior and a weekend showstopper alike. Get ready to experience the absolute joy of crafting these incredibly Easy Cheesy Garlic Crescent Rolls that will disappear from your table faster than you can say “more, please!”

Ingredients:
- 1 can (8 oz) refrigerated crescent roll dough
- 4 tablespoons unsalted butter, melted
- 2 cloves garlic, minced
- ¼ teaspoon garlic powder
- ¼ teaspoon onion powder
- ¼ teaspoon dried parsley
- ¼ cup shredded mozzarella cheese
- ¼ cup shredded cheddar cheese
- Salt to taste
- Black pepper to taste
Preparation
Let’s get started on these incredibly Easy Cheesy Garlic Crescent Rolls. They’re the perfect accompaniment to almost any meal, from a hearty stew to a simple pasta dish, and are surprisingly simple to make. The beauty of using refrigerated crescent roll dough is that it cuts down on prep time significantly, allowing you to enjoy these warm, cheesy delights even faster. First things first, preheat your oven. For this recipe, we’re aiming for a cozy 375°F (190°C). While the oven is warming up, take out a baking sheet and line it with parchment paper. This isn’t strictly necessary, but it makes cleanup a breeze, and nobody likes scrubbing burnt cheese off a pan. You’ll be so glad you did this step later!
Next, we need to prepare our flavorful garlic butter. In a small bowl, combine the melted unsalted butter. To this buttery base, we’ll add the aromatics. Add your minced garlic cloves. Make sure they are finely minced so they distribute evenly throughout the butter and infuse that wonderful garlic flavor. Now, let’s amp up the garlic flavor even more with a touch of garlic powder and a hint of onion powder. These two powders add a depth of flavor that fresh garlic alone might not achieve. Finally, sprinkle in the dried parsley for a touch of color and herbaceousness. Give this mixture a good stir with a fork or a small whisk until everything is well combined. This potent concoction is going to be the flavor powerhouse for our crescent rolls.
Assembling the Rolls
Now for the fun part – assembling our Easy Cheesy Garlic Crescent Rolls! Open the can of refrigerated crescent roll dough. You’ll notice the dough is perforated into triangles. Carefully separate these triangles. It’s important to handle the dough gently to avoid tearing it, which can make it harder to roll up later. Lay out each triangle on your prepared baking sheet, leaving a little space between them as they will expand slightly as they bake. Now, take your delicious garlic butter mixture. Using a pastry brush, generously brush the garlic butter over the surface of each crescent roll triangle. Make sure to get all the way to the edges. Don’t be shy with this mixture; it’s what makes these rolls so incredibly flavorful and moist. The melted butter will soak into the dough, carrying all those wonderful garlic and herb flavors with it.
With our garlic butter generously applied, it’s time to add that irresistible cheesy goodness. Take your shredded mozzarella cheese and shredded cheddar cheese. You can either pre-mix them in a separate bowl or sprinkle them directly over the garlic butter on each crescent roll. We’re aiming for an even distribution of cheese, so sprinkle a good amount on each triangle, making sure some of the cheese reaches the wider end of the triangle, which will form the base when rolled. The combination of mozzarella and cheddar provides a fantastic melty texture and a classic, comforting cheesy flavor that pairs perfectly with the garlic. If you like, you can add a tiny pinch of salt and a grind of black pepper over the cheese at this stage, but remember that the butter mixture already contains salt, so be judicious with your seasoning.
Rolling and Baking
The final assembly step is to roll up those cheesy triangles! Starting from the wide end of each crescent roll triangle, carefully and snugly roll the dough towards the pointed tip. Try to keep the roll as consistent as possible. This ensures that the rolls bake evenly and have a nice, uniform shape. As you roll, the cheese might want to escape a little, and that’s perfectly fine. Any cheese that melts and drips onto the parchment paper will create delicious little cheesy bits on the baking sheet that you can even scoop up and enjoy later! Once all the crescent rolls are rolled, place them seam-side down on the baking sheet to help them hold their shape during baking. Give them a little space so they don’t stick together as they puff up.
Now it’s time to bake these beauties to golden perfection. Carefully place the baking sheet into your preheated 375°F (190°C) oven. We’re going to bake them for approximately 12 to 15 minutes. Keep a close eye on them, as oven temperatures can vary. You’re looking for the crescent rolls to be beautifully puffed up, golden brown on top, and with the cheese melted and slightly bubbly. If they seem to be browning too quickly on top before the dough is cooked through, you can loosely tent the baking sheet with aluminum foil. Once they’re done, carefully remove the baking sheet from the oven. For an extra touch of flavor and shine, you can optionally brush them with a little more melted butter or the remaining garlic butter mixture immediately after they come out of the oven. Let them cool for just a few minutes on the baking sheet before transferring them to a wire rack or serving them directly from the pan. They are best enjoyed warm!

Conclusion:
There you have it – a foolproof guide to creating the most delightful Easy Cheesy Garlic Crescent Rolls! We’ve walked through each step, from mixing the dough to achieving that perfect golden-brown finish. These rolls are more than just a side dish; they’re a comforting and flavorful addition to any meal. Imagin extracte them alongside a hearty soup, a savory stew, or even as a delightful appetizer on their own. The simple combination of garlic, cheese, and buttery crescent dough creates a truly irresistible treat that’s sure to become a family favorite.
Feel free to get creative with these Easy Cheesy Garlic Crescent Rolls! For a spicier kick, try adding a pinch of red pepper flakes to the garlic butter mixture. If you prefer a different cheese, mozzarella, Gruyère, or even a sharp cheddar would be delicious alternatives. You could also sprinkle in some fresh chopped parsley or chives after baking for an extra pop of color and freshness. Don’t be afraid to experiment and make them your own!
I truly hope you enjoy making and sharing these wonderful rolls. The aroma alone is enough to make any kitchen feel like home. So, gather your ingredients, embrace the simplicity, and let the deliciousness unfold!
Frequently Asked Questions:
Can I make the dough for Easy Cheesy Garlic Crescent Rolls ahead of time?
Yes, you can prepare the dough and refrigerate it for up to 24 hours. Allow it to come to room temperature for about 30 minutes before proceeding with shaping and baking. This makes them even more convenient for entertaining!
What are the best serving suggestions for Easy Cheesy Garlic Crescent Rolls?
These rolls are incredibly versatile. They pair beautifully with Italian dishes like pasta or lasagna, hearty chilis, roasted chicken or beef, and any type of soup. They also make a fantastic base for mini garlic bread pizzas!
Easy Cheesy Garlic Crescent Rolls Recipe
These incredibly easy cheesy garlic crescent rolls are the perfect accompaniment to almost any meal. They are surprisingly simple to make, with refrigerated crescent roll dough cutting down on prep time significantly.
Ingredients
-
1 can (8 oz) refrigerated crescent roll dough
-
4 tablespoons unsalted butter, melted
-
2 cloves garlic, minced
-
¼ teaspoon garlic powder
-
¼ teaspoon onion powder
-
¼ teaspoon dried parsley
-
¼ cup shredded mozzarella cheese
-
¼ cup shredded cheddar cheese
-
Salt to taste
-
Black pepper to taste
Instructions
-
Step 1
Preheat your oven to 375°F (190°C). Line a baking sheet with parchment paper for easy cleanup. -
Step 2
In a small bowl, combine melted unsalted butter with minced garlic, garlic powder, onion powder, and dried parsley. Stir well to combine. -
Step 3
Open the can of refrigerated crescent roll dough and carefully separate the triangles. Lay them out on the prepared baking sheet. -
Step 4
Generously brush the garlic butter mixture over the surface of each crescent roll triangle using a pastry brush. Sprinkle shredded mozzarella and cheddar cheese evenly over the buttered dough. Season with salt and pepper to taste. -
Step 5
Starting from the wide end, carefully roll up each triangle towards the pointed tip. Place the rolled crescent rolls seam-side down on the baking sheet, leaving some space between them. -
Step 6
Bake for 12 to 15 minutes, or until golden brown and puffed up. If needed, tent with foil to prevent over-browning. Optionally, brush with more melted butter after baking. Let cool slightly before serving warm.
Important Information
Nutrition Facts (Per Serving)
It is important to consider this information as approximate and not to use it as definitive health advice.
Allergy Information
Please check ingredients for potential allergens and consult a health professional if in doubt.